

Okta Single Sign-On (SSO) Setup: A Step-by-Step Guide
Configuring SSO authentication in Okta
After logging into the Okta panel, you will be redirected to the dashboard. From here, we will configure Okta to enable Single Sign-On (SSO) authentication for our application.
Assigning users to group
We need to add groups and add the required users to the appropriate group.
!Note: Only users who are members of this group will be able to sign in to your application.
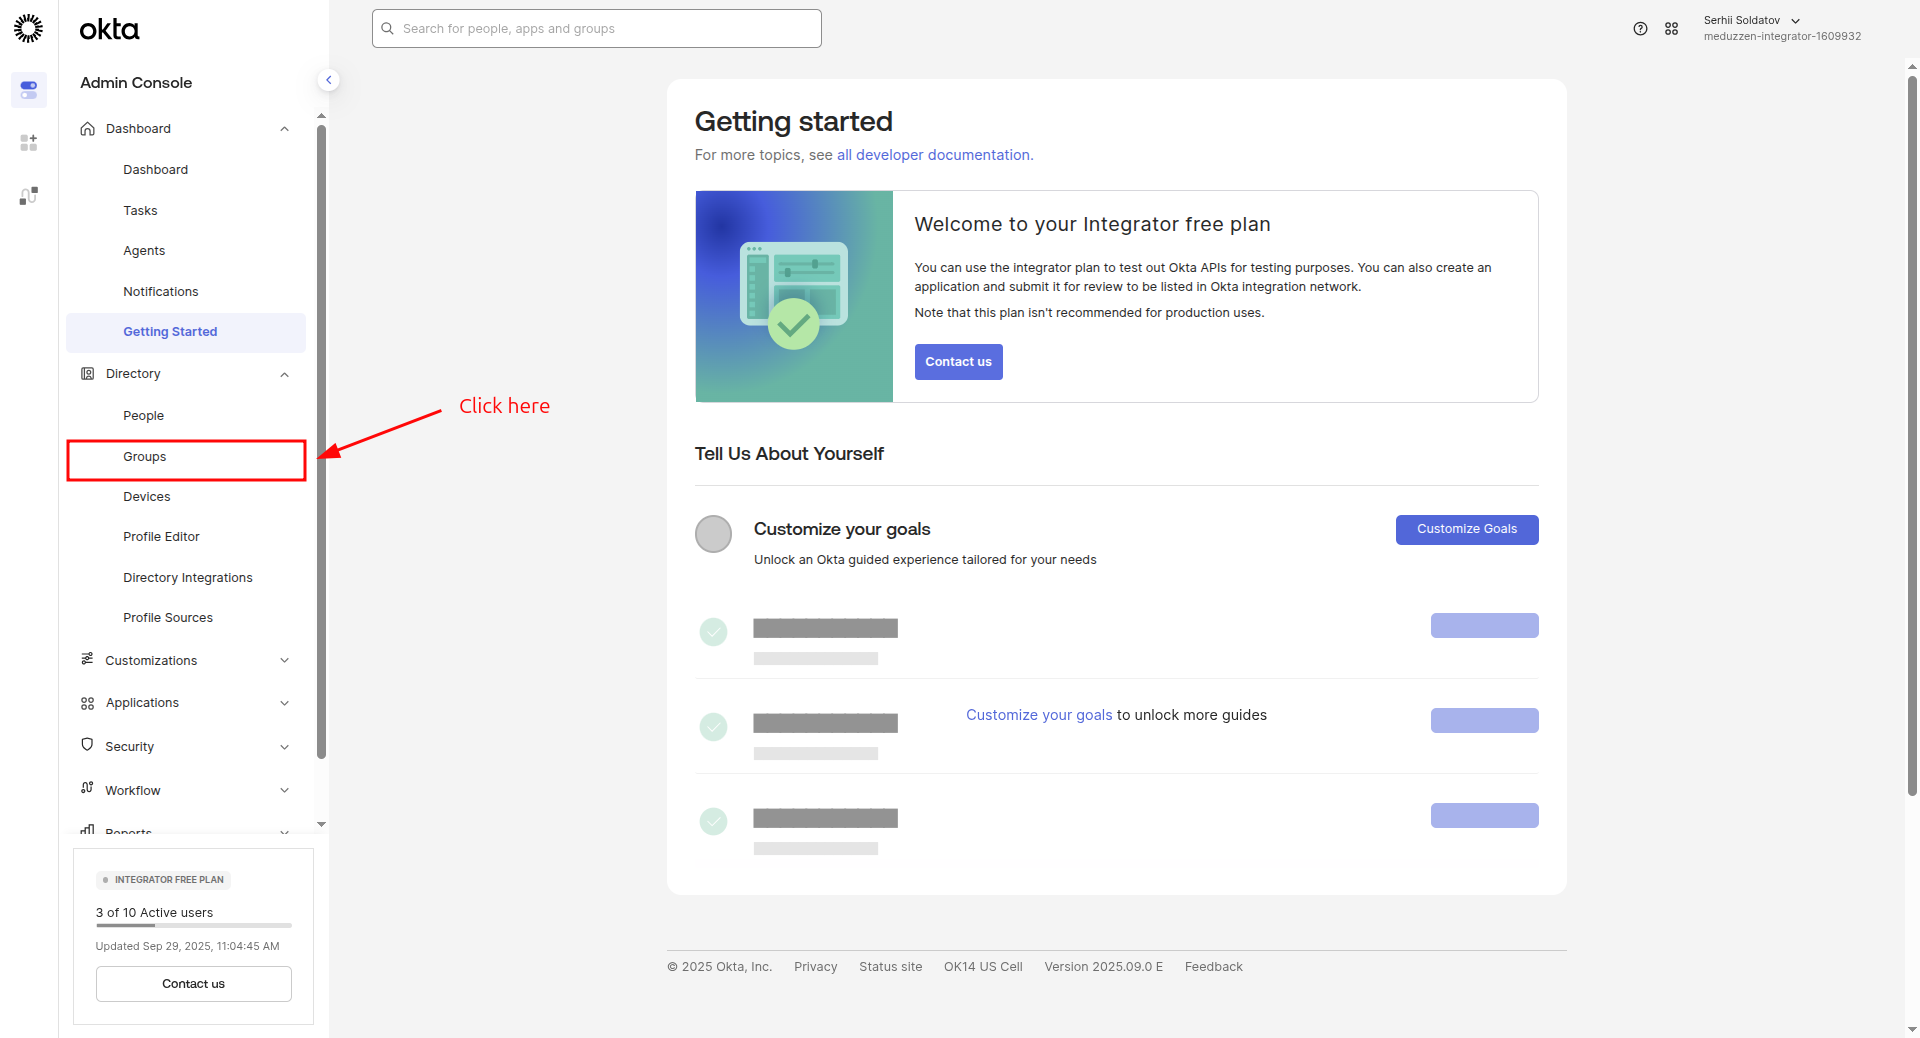
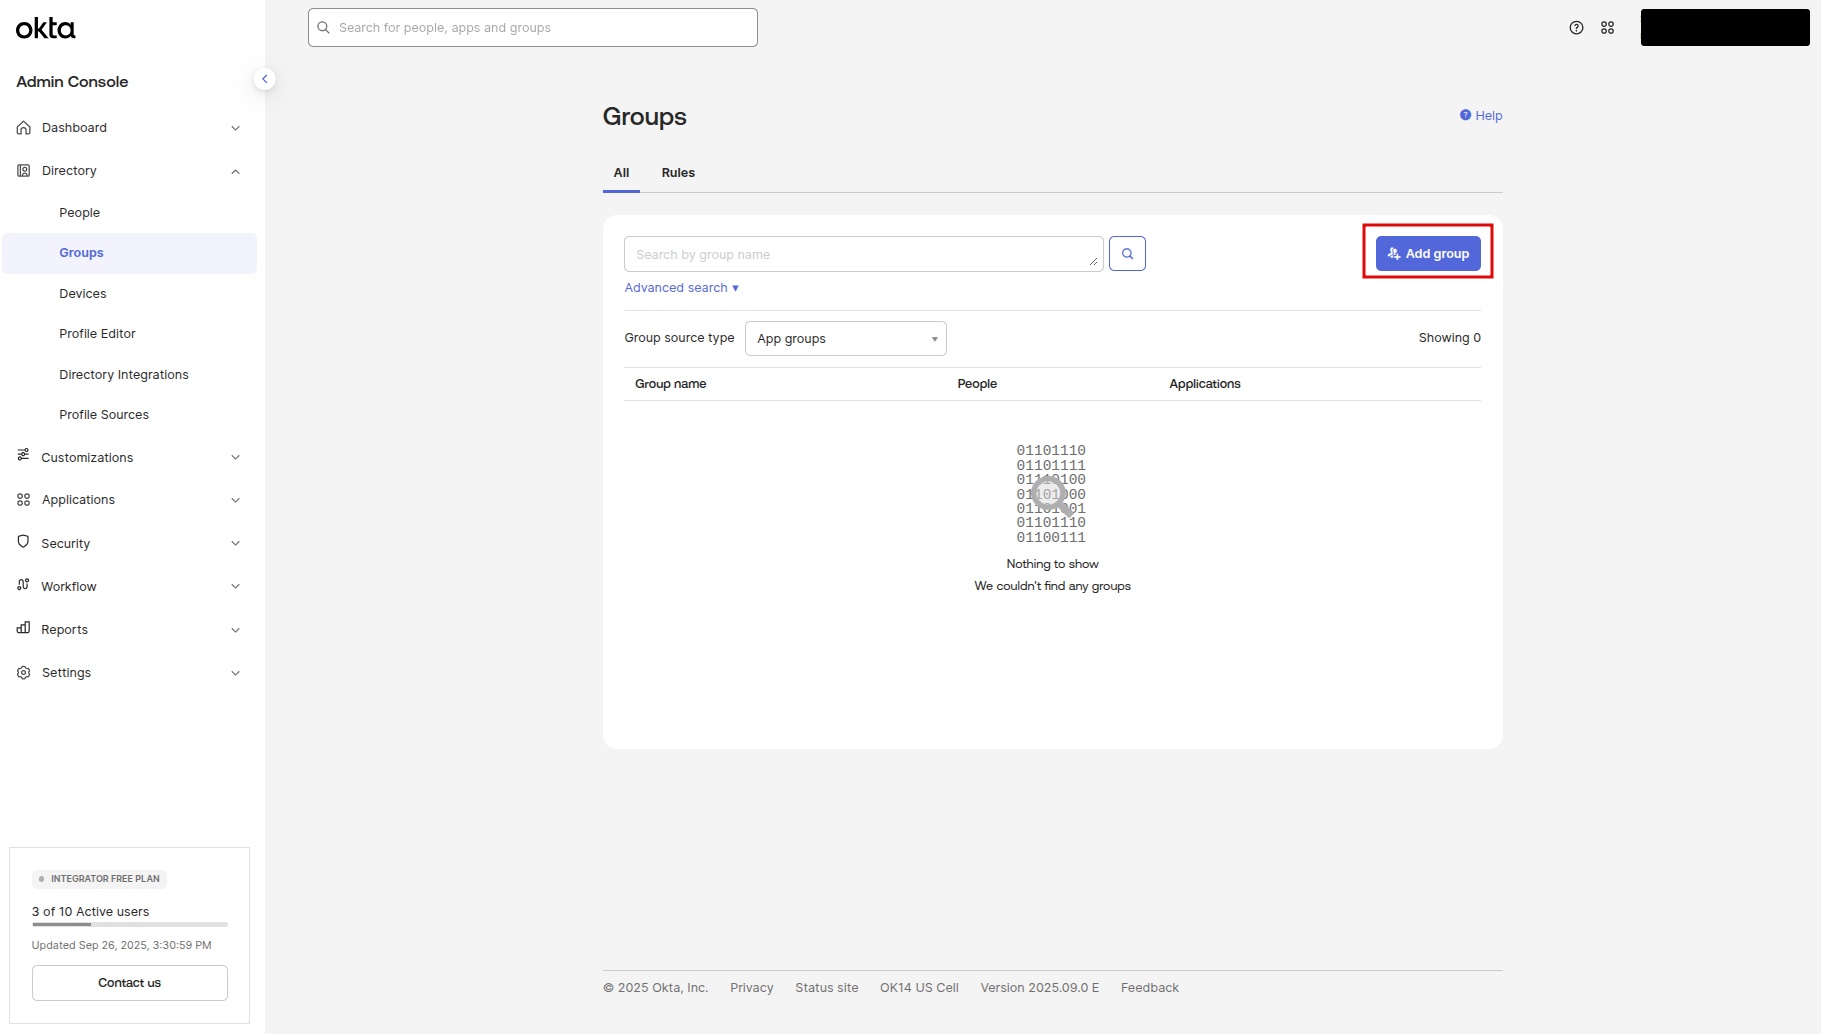
In the side menu, navigate to the Groups page
then click to the Add group button
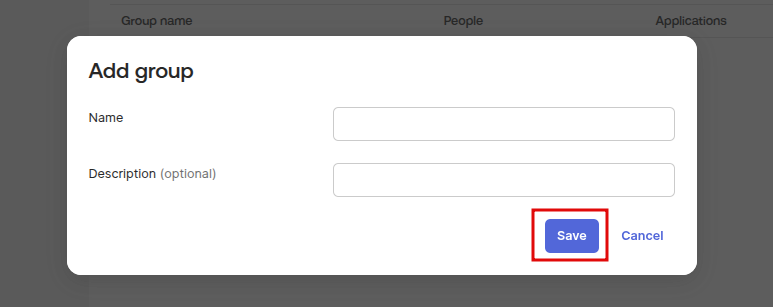
A modal window will appear with the configuration form.
Fill this form with the group name and description, then click the Save button.
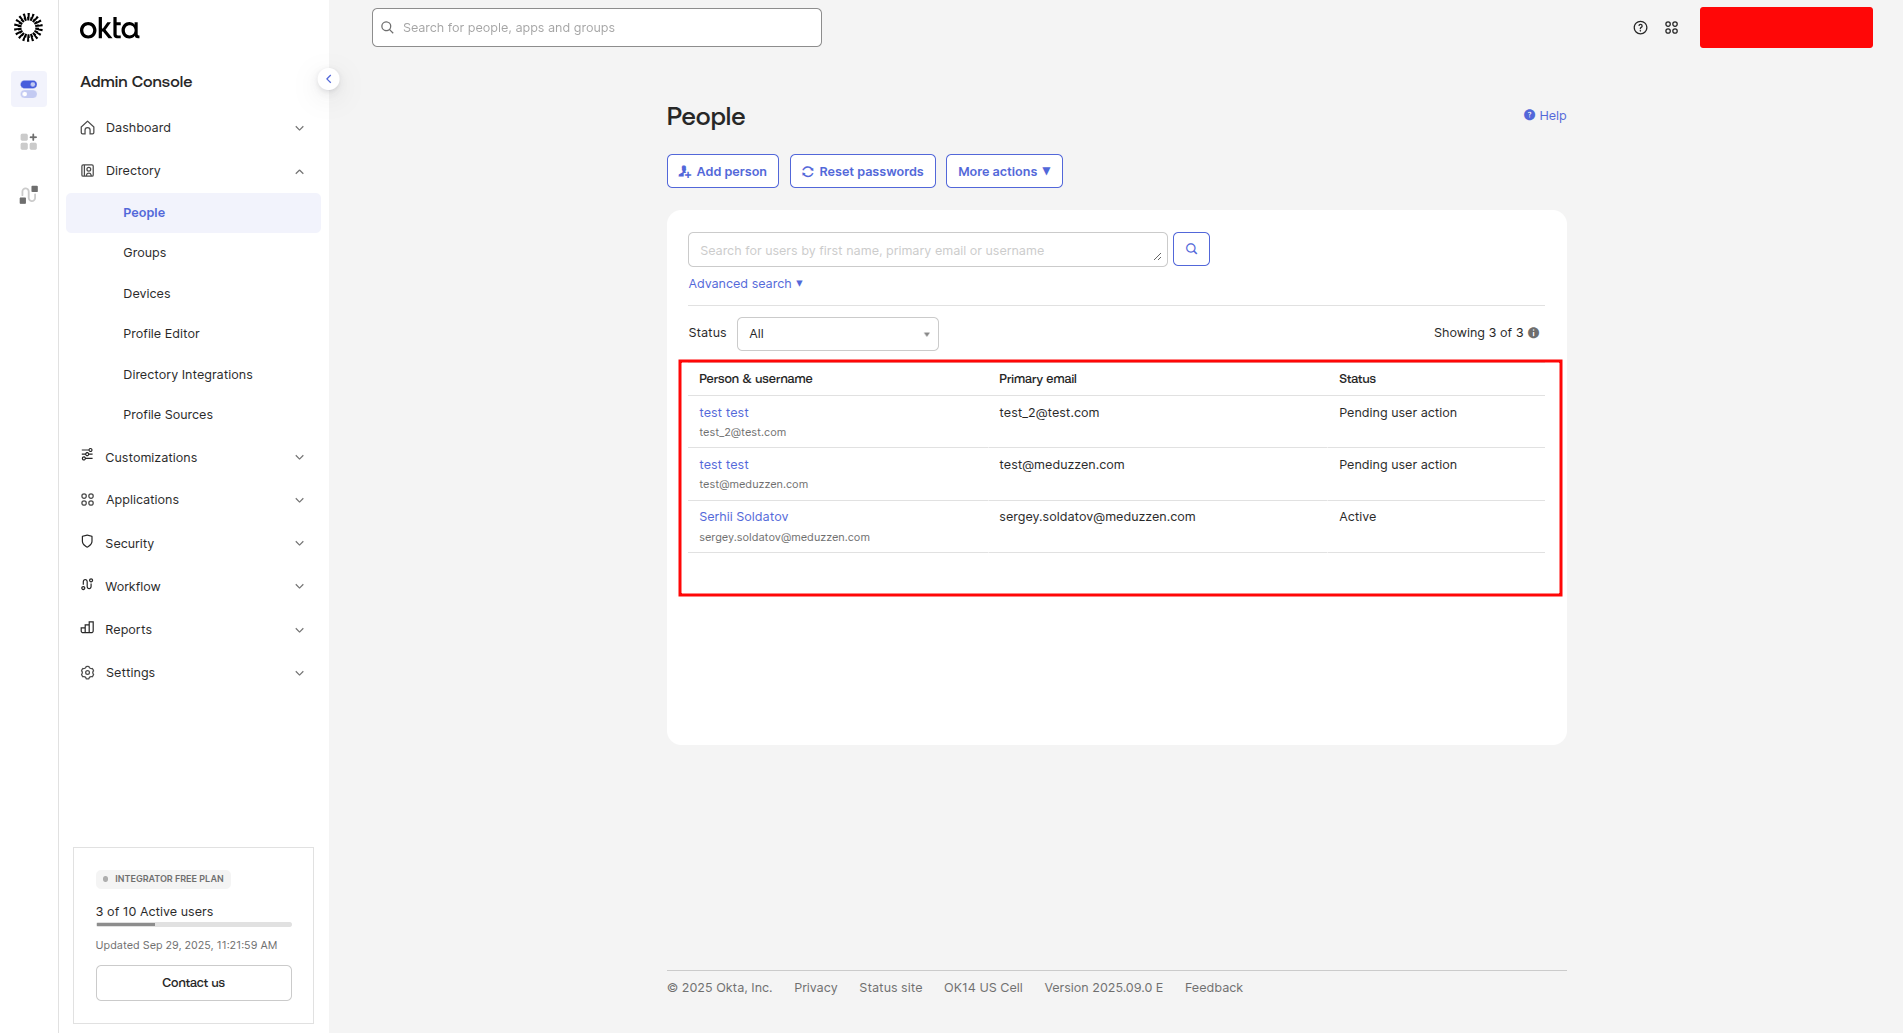
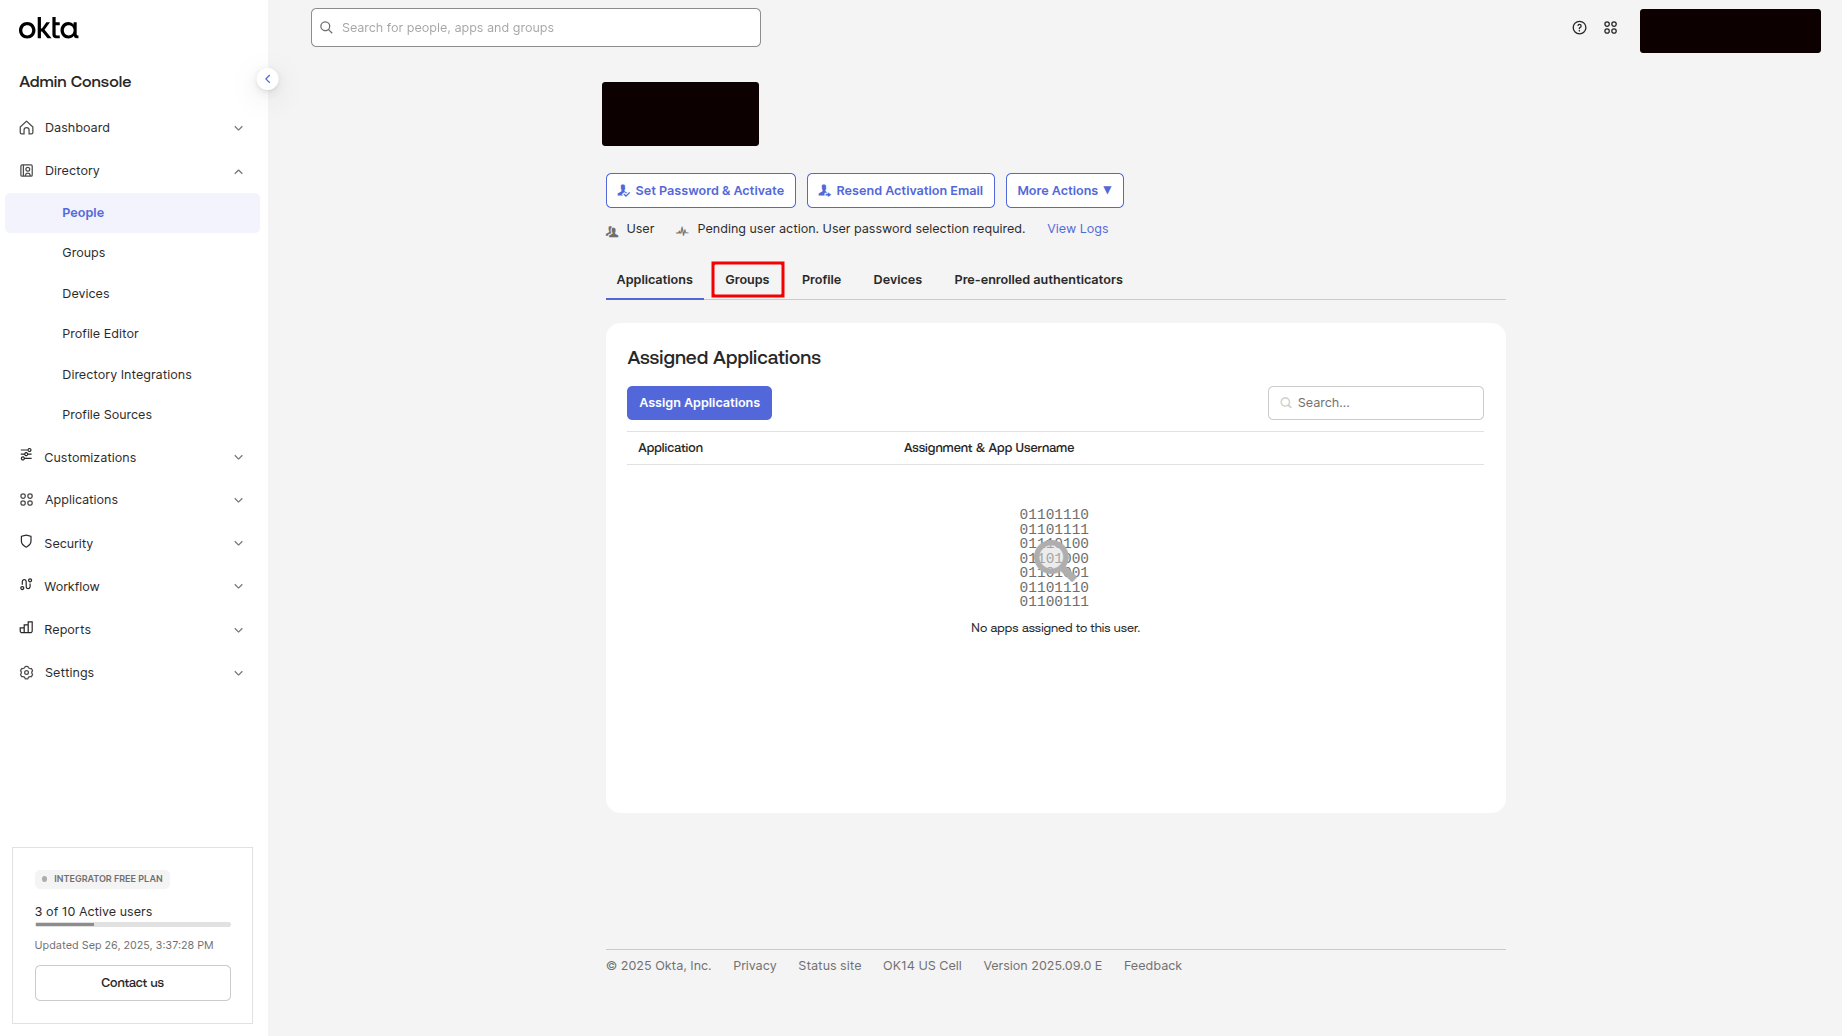
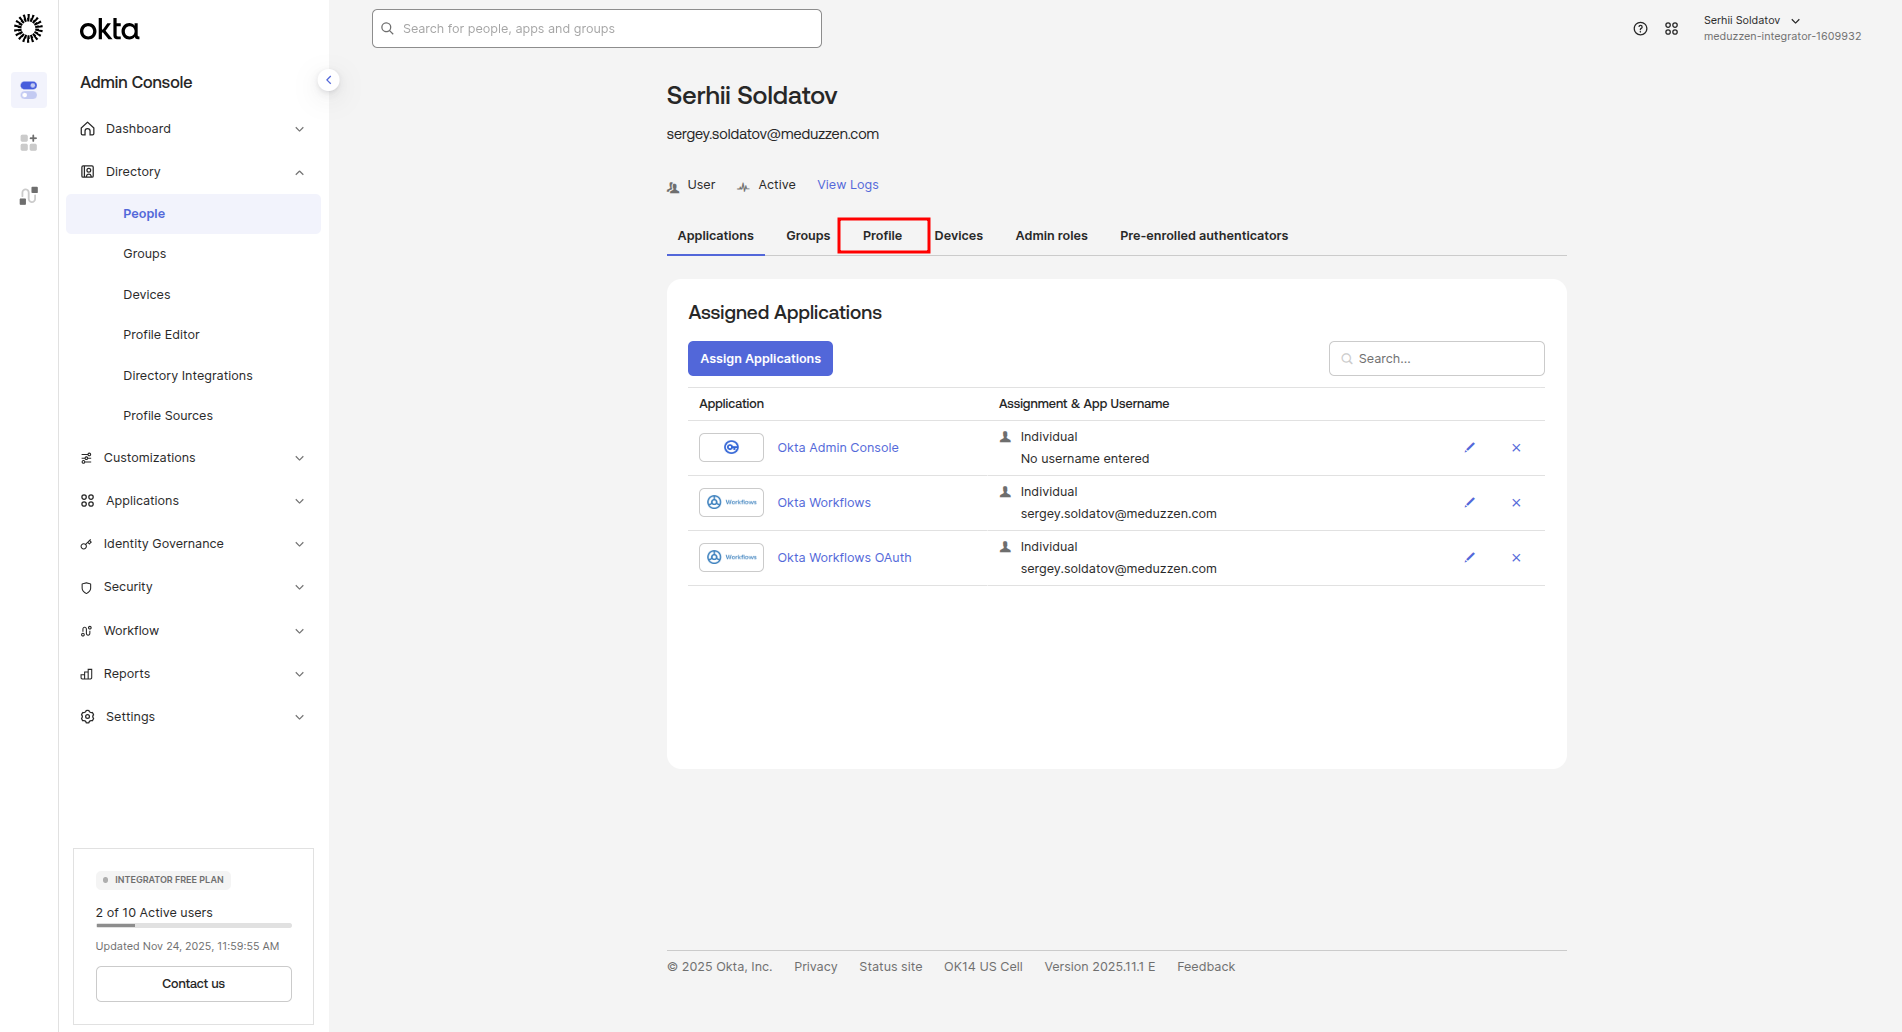
In the side menu, navigate to the People page, then choose a particular person in the list and click to navigate to the Person page
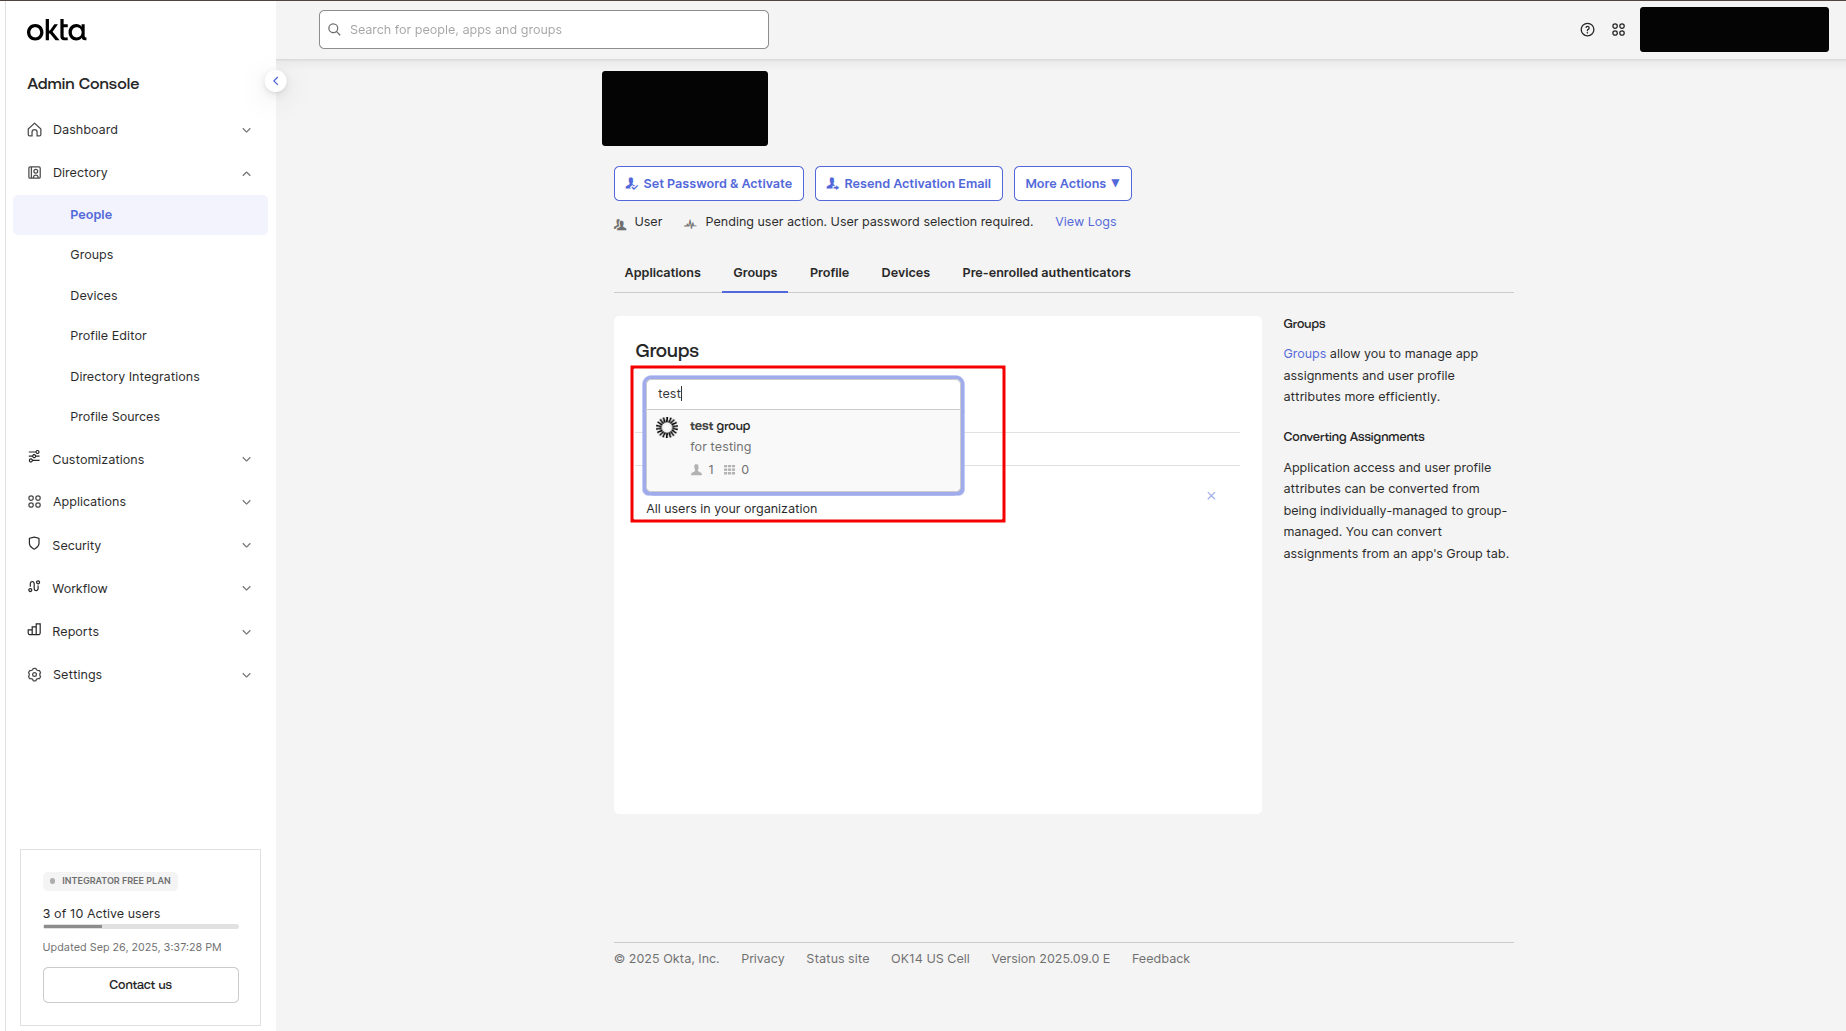
Click on the Groups subtitle to navigate to the profile page
Click on the Search field and enter the group name that you want to assign the user with, then click to the appearing group.
Creating an application
An application refers to a cloud or on-premises service integrated with Okta for single sign-on, enabling users to securely access and authenticate across multiple applications with a single set of credentials.
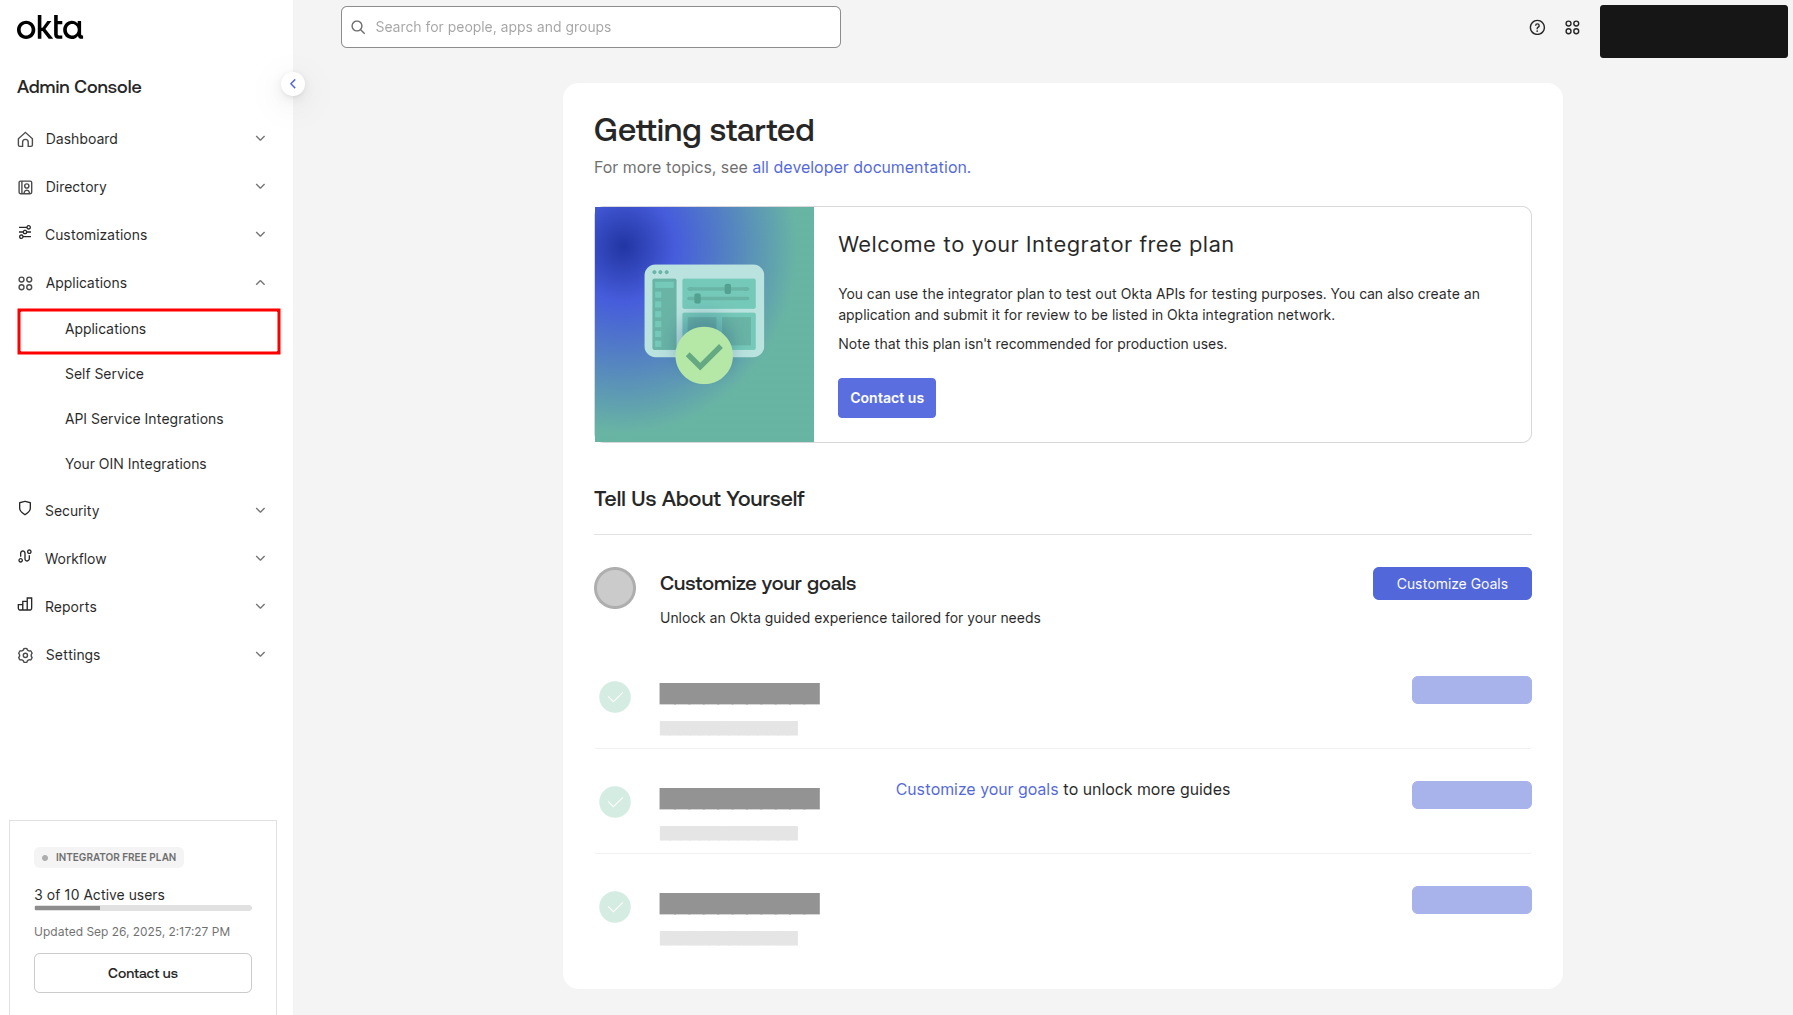
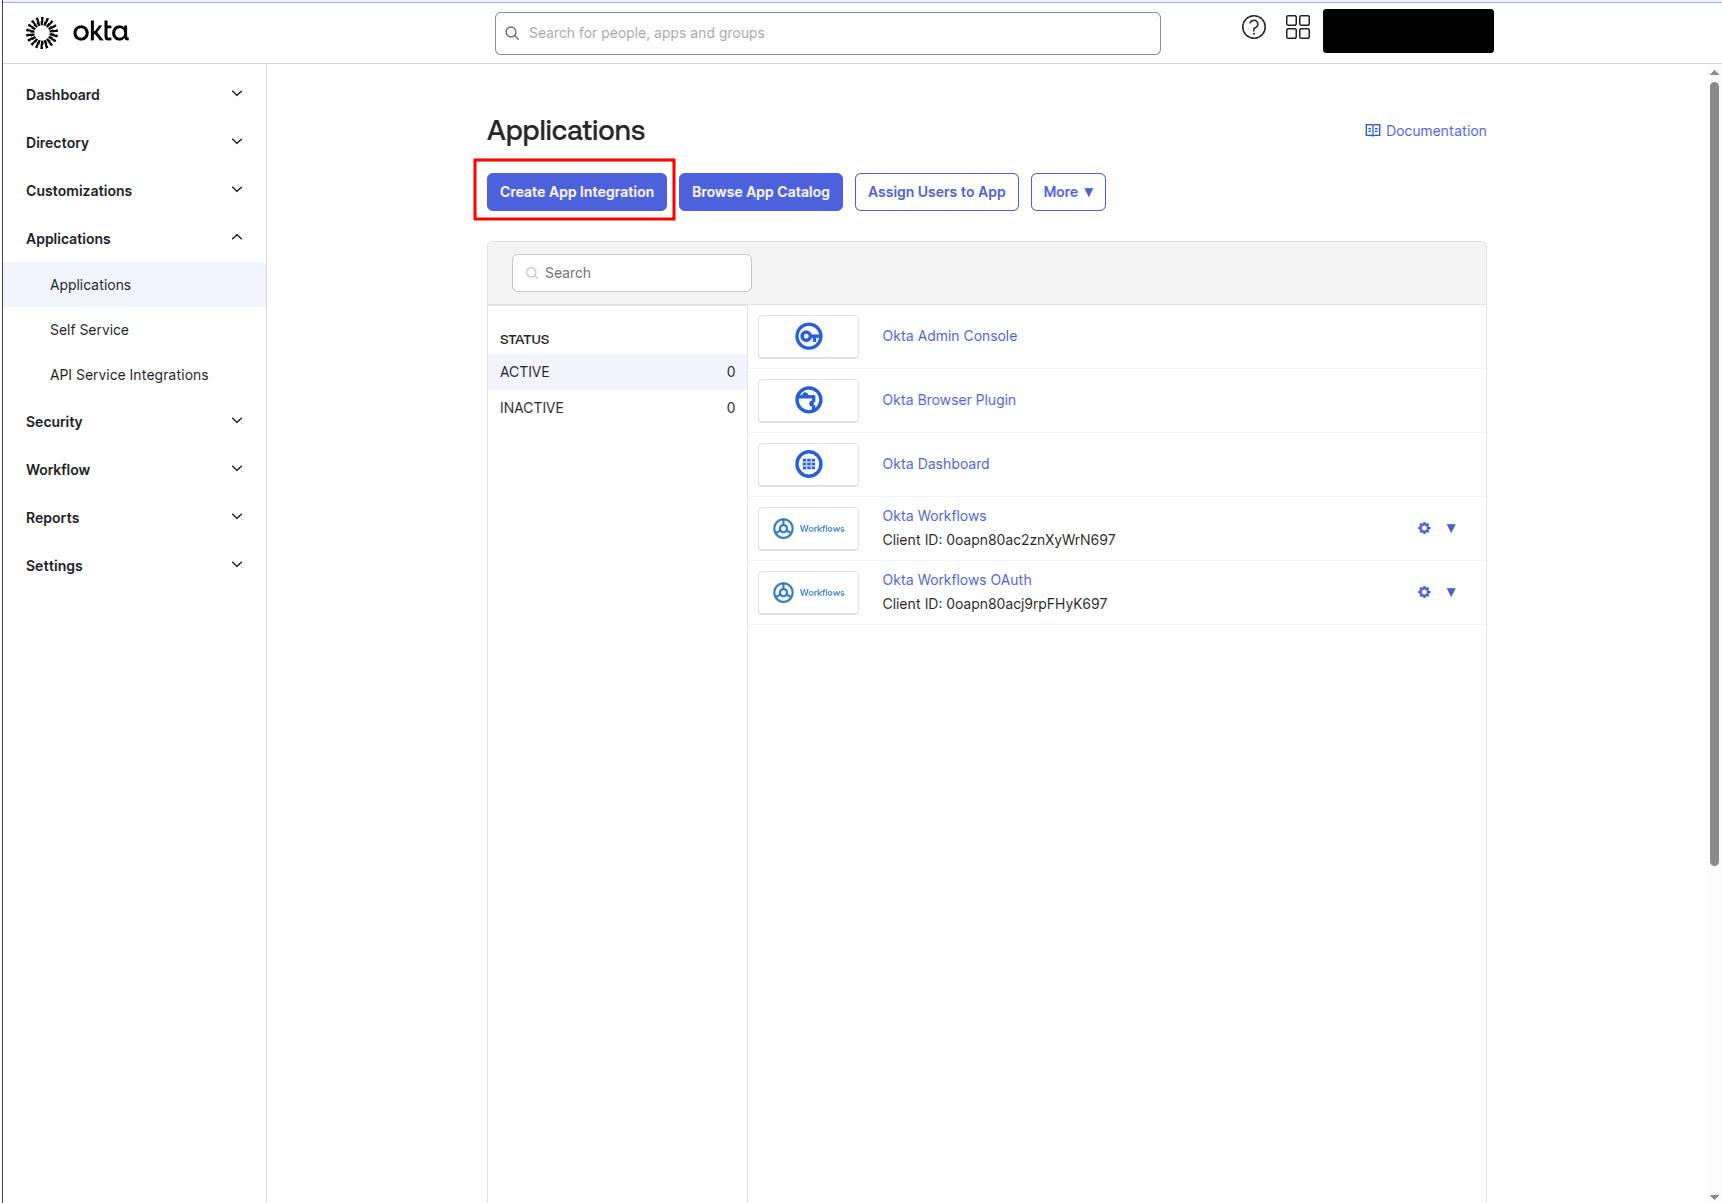
Next, navigate to the Applications page (as shown in the screenshot)
Click on the Create App Integration button
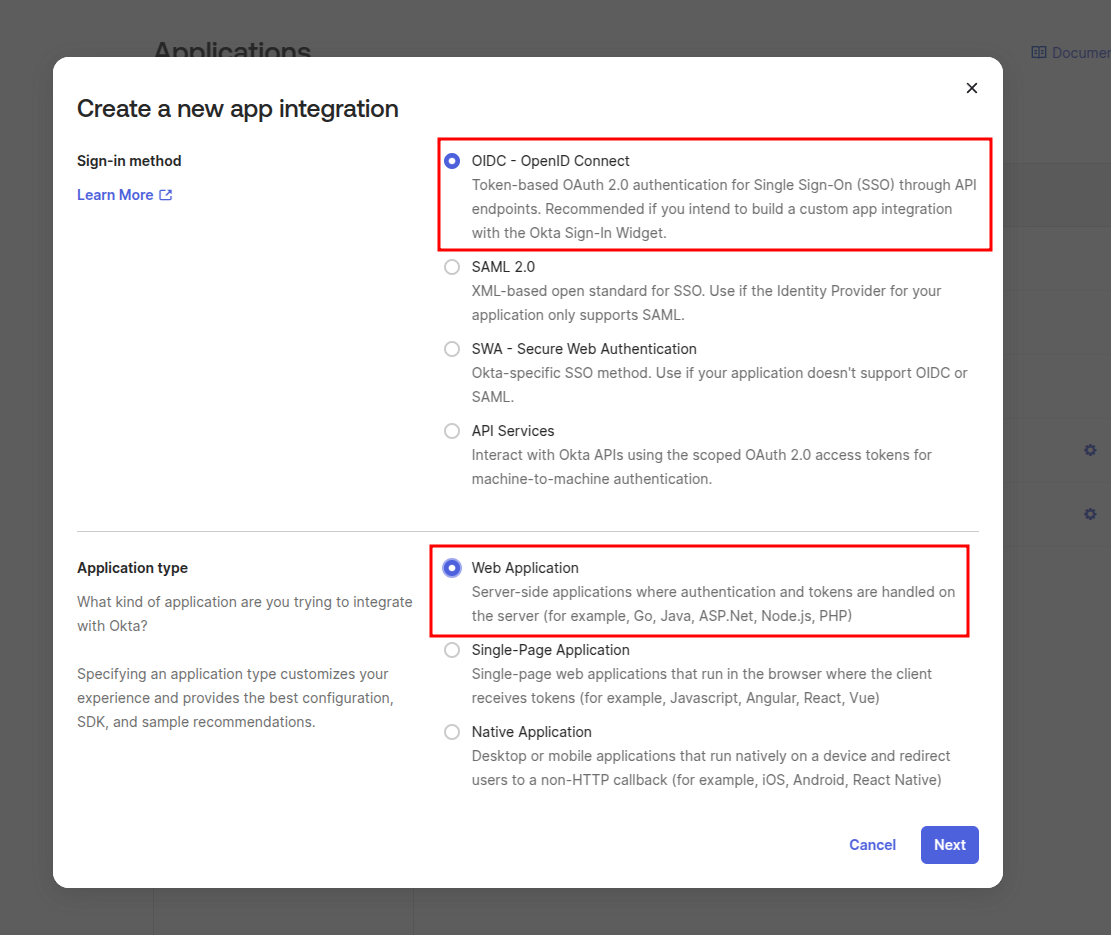
A modal window will appear with configuration options. Select the options as shown in the screenshot, then click the Next button.
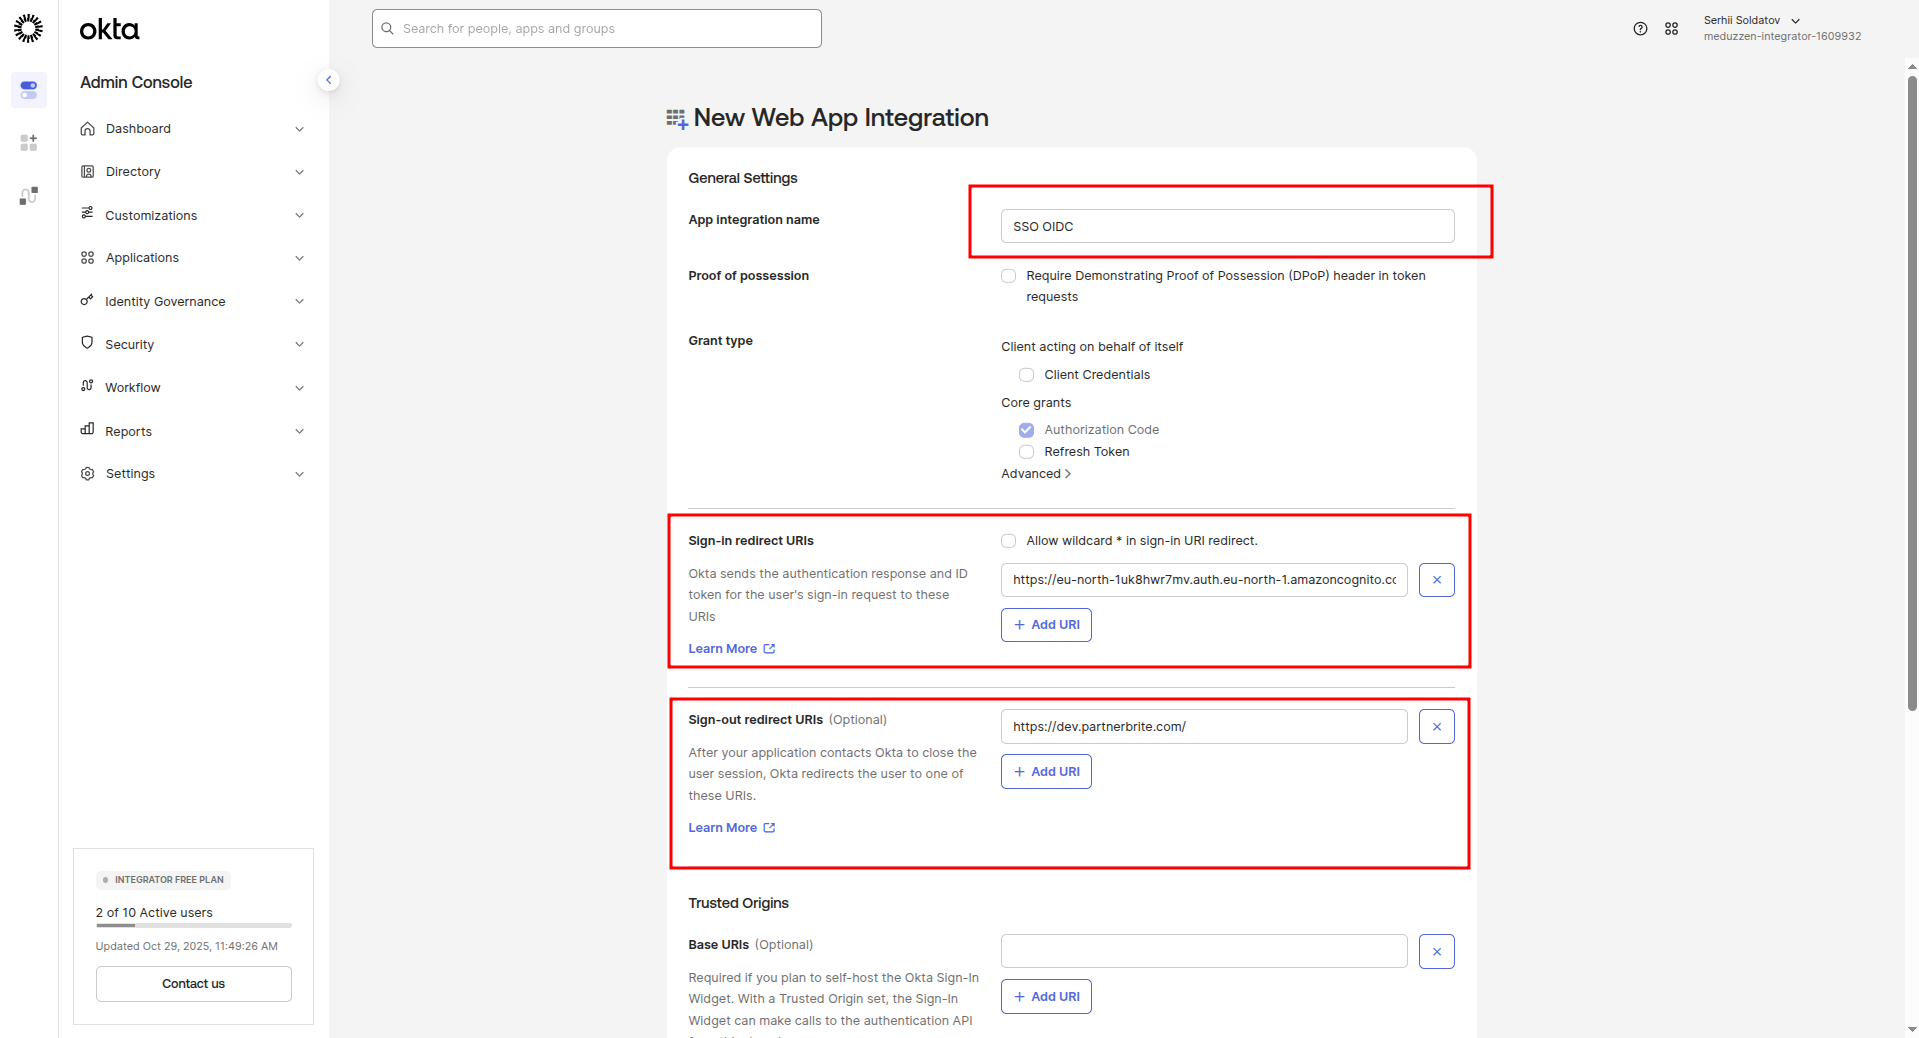
You will be redirected to the configuration page:
Follow the instructions below and configure the settings as marked in the next two screenshots:
I will set my app name to "SSO OIDC", but you can use just "your application".
Sign-in redirect URIs: The format should be:
https://<your-user-pool-domain>/oauth2/idpresponsewhere<your-user-pool-domain>is your Cognito User Pool Domain
(example: https://eu-north-2uasd2wr7mv.auth.eu-north-1.amazoncognito.com/oauth2/idpresponse).
Sign-out redirect URIs: This ensures users are properly signed out when logging out of our application. Input:
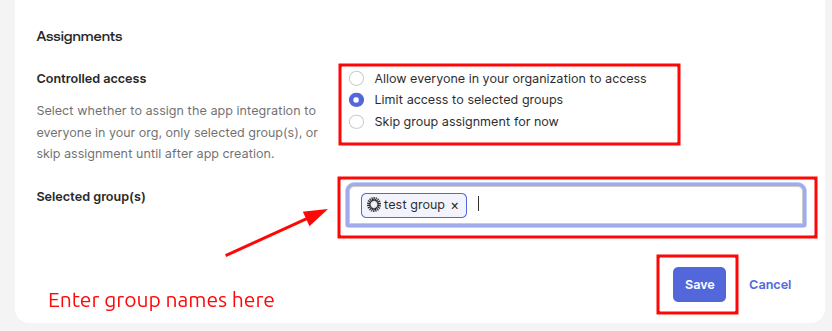
https://yourapp.com/Right holder access: choose the Limit access to selected groups option and enter group names you want to give access to your application application.
Click on the Save button.
You will then be redirected to the newly created application's page.
Configuring a User Okta profile (Add Roles to Profile)
In Okta, we can define roles for users to manage permissions within our application.
These roles determine the level of access a user has, such as admin, manager, etc.
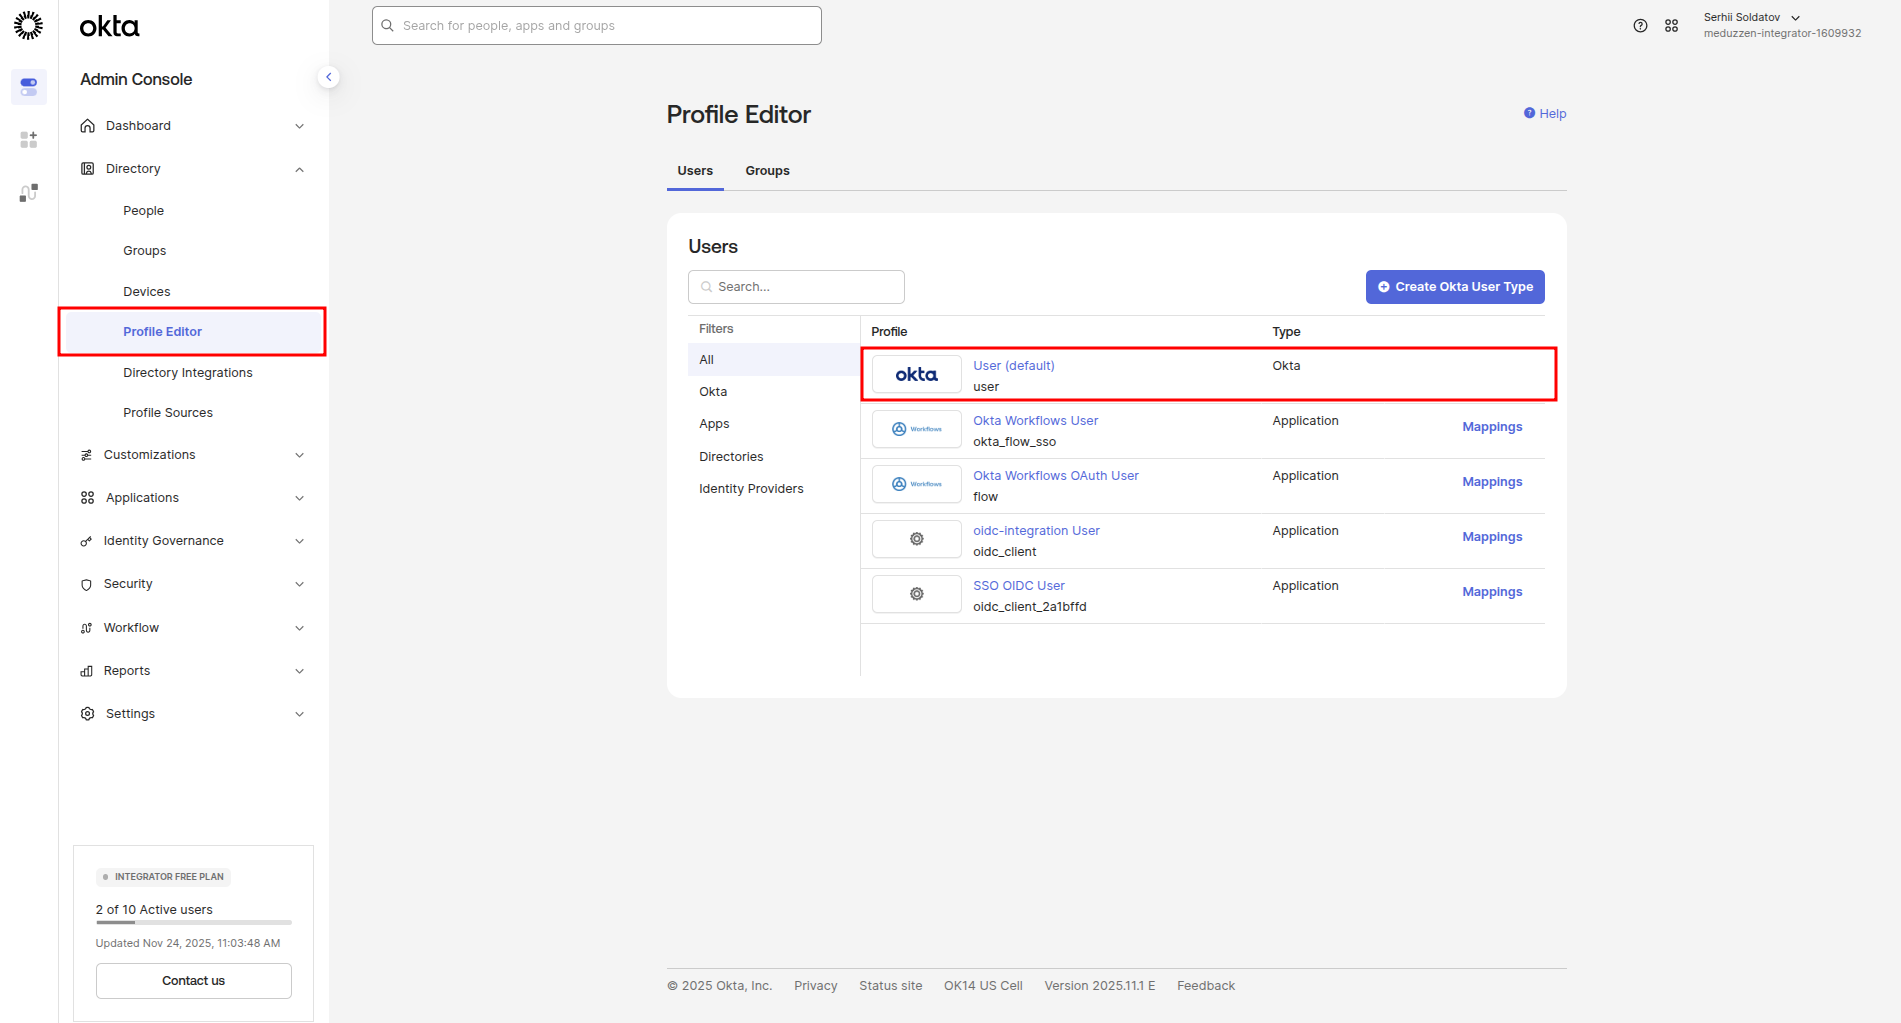
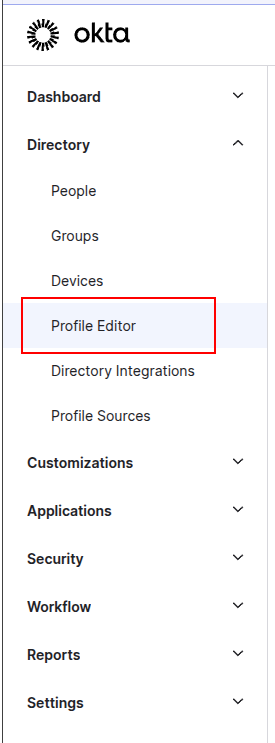
In the side menu, navigate to the Profile Editor page
Click to User (default) link to open User Okta Profile edit page:
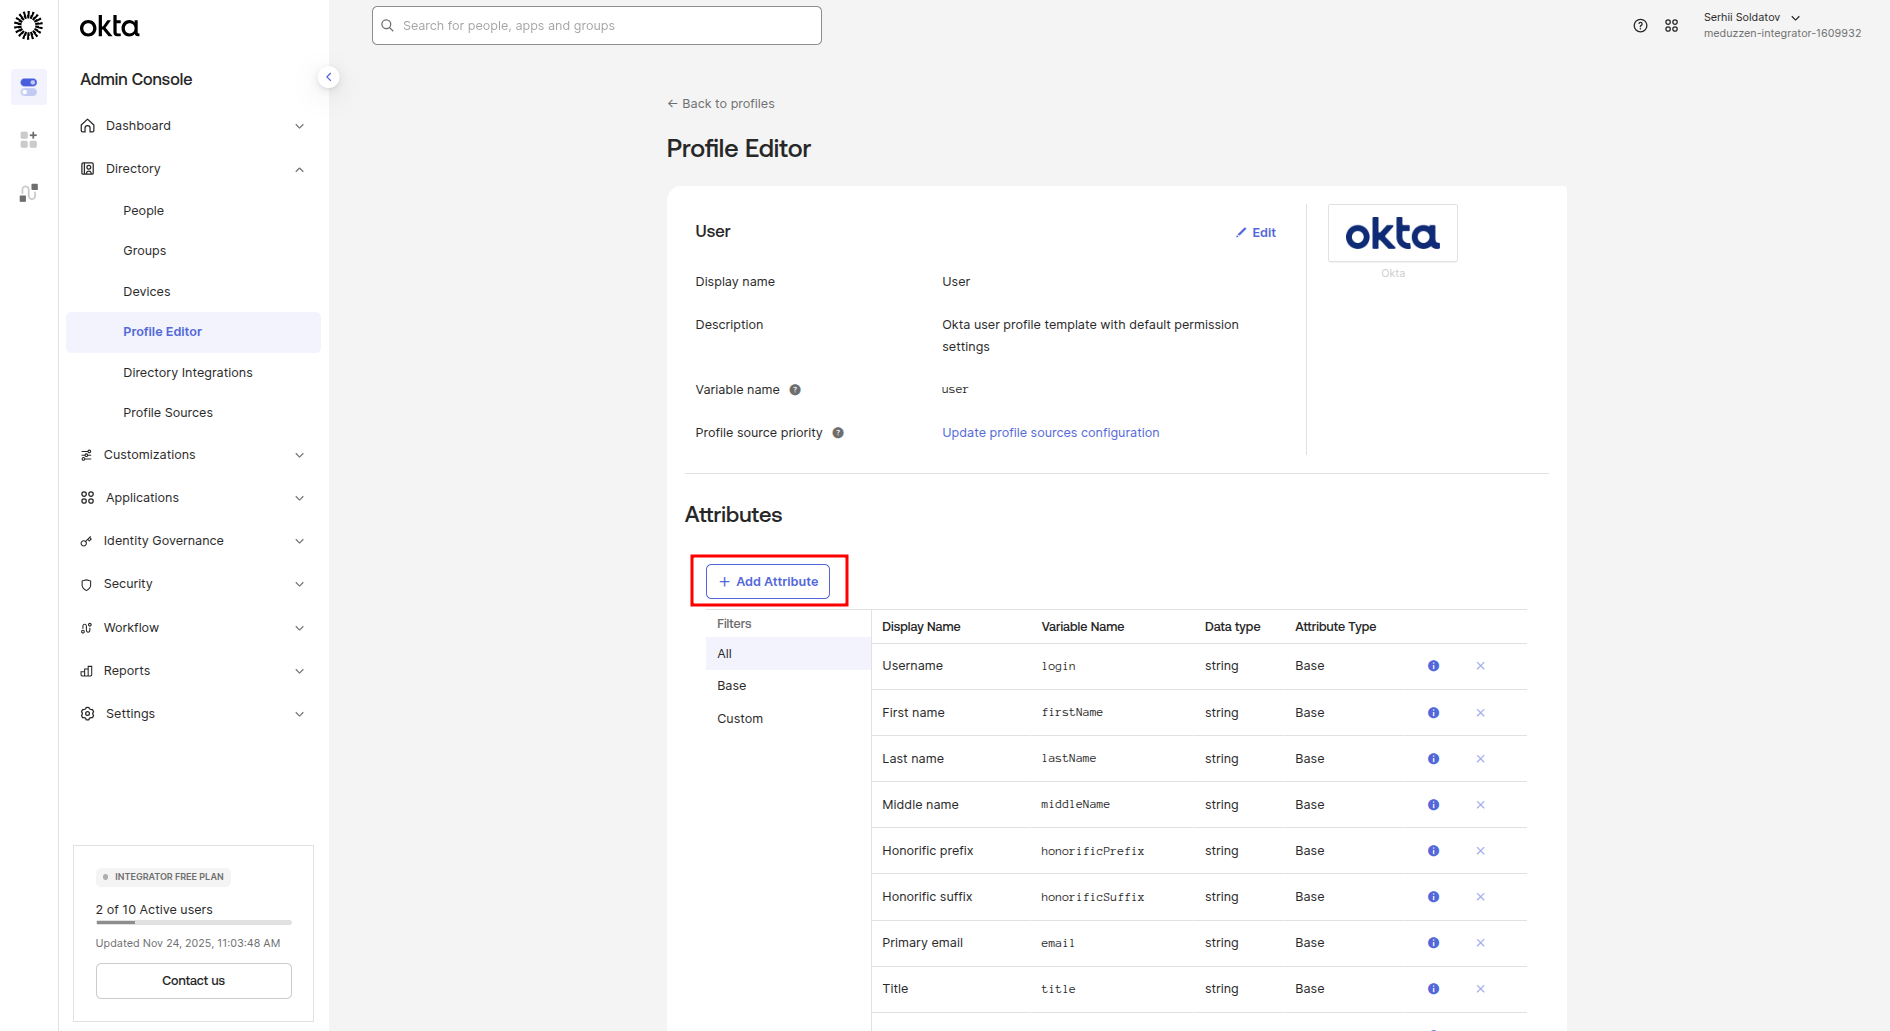
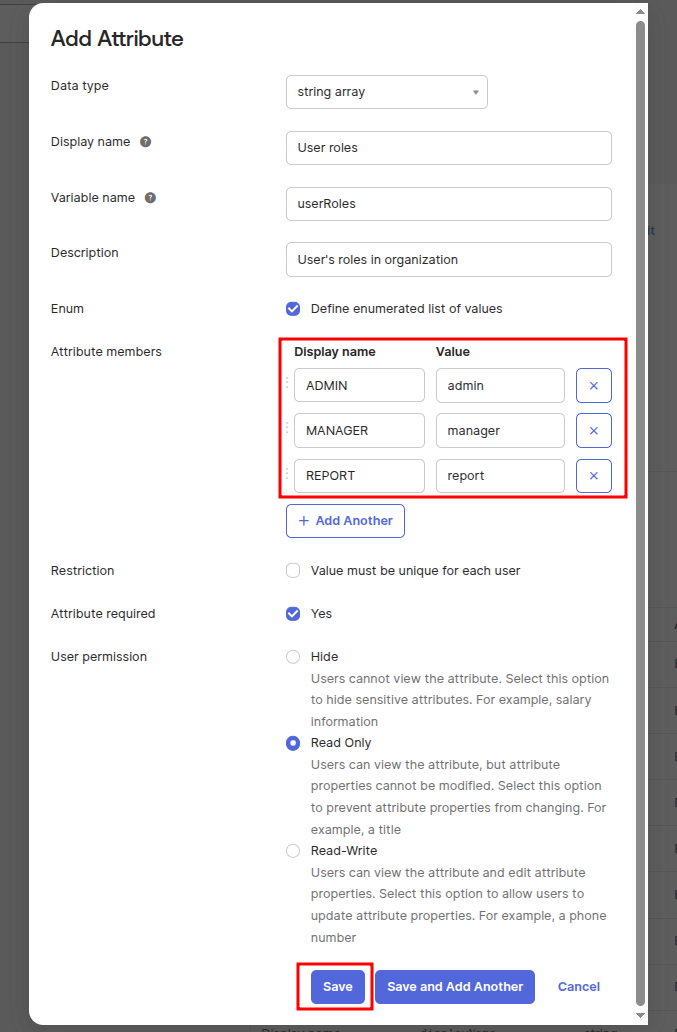
Click on the Add Attribute button to add a new attribute for roles in the Okta User profile:
A modal window will appear with configuration form.
Fill this form as shown in the following screenshot, then click the Save button.
Configuring an OIDC client profile for the app
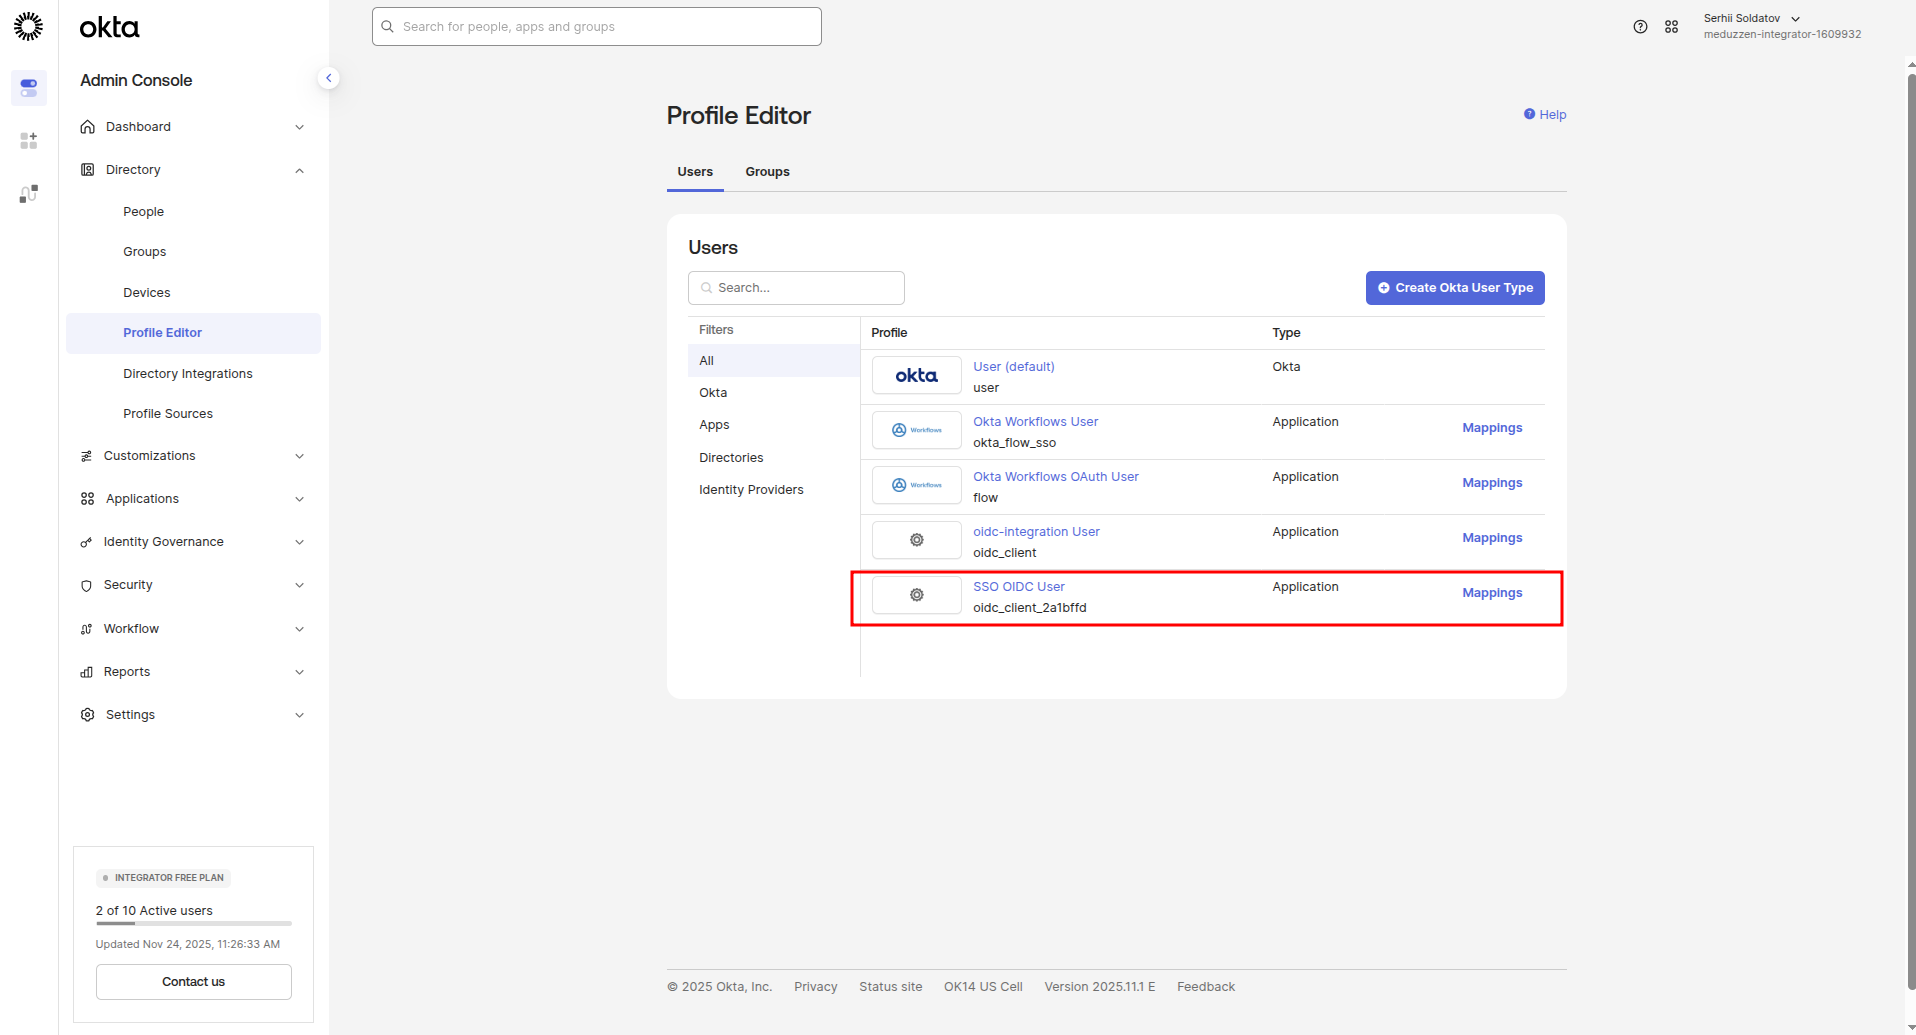
In the side menu, navigate to the Profile Editor page:
Click on the SSO OIDC User (name of our application) link to navigate to the OIDC Client Profile edit page:
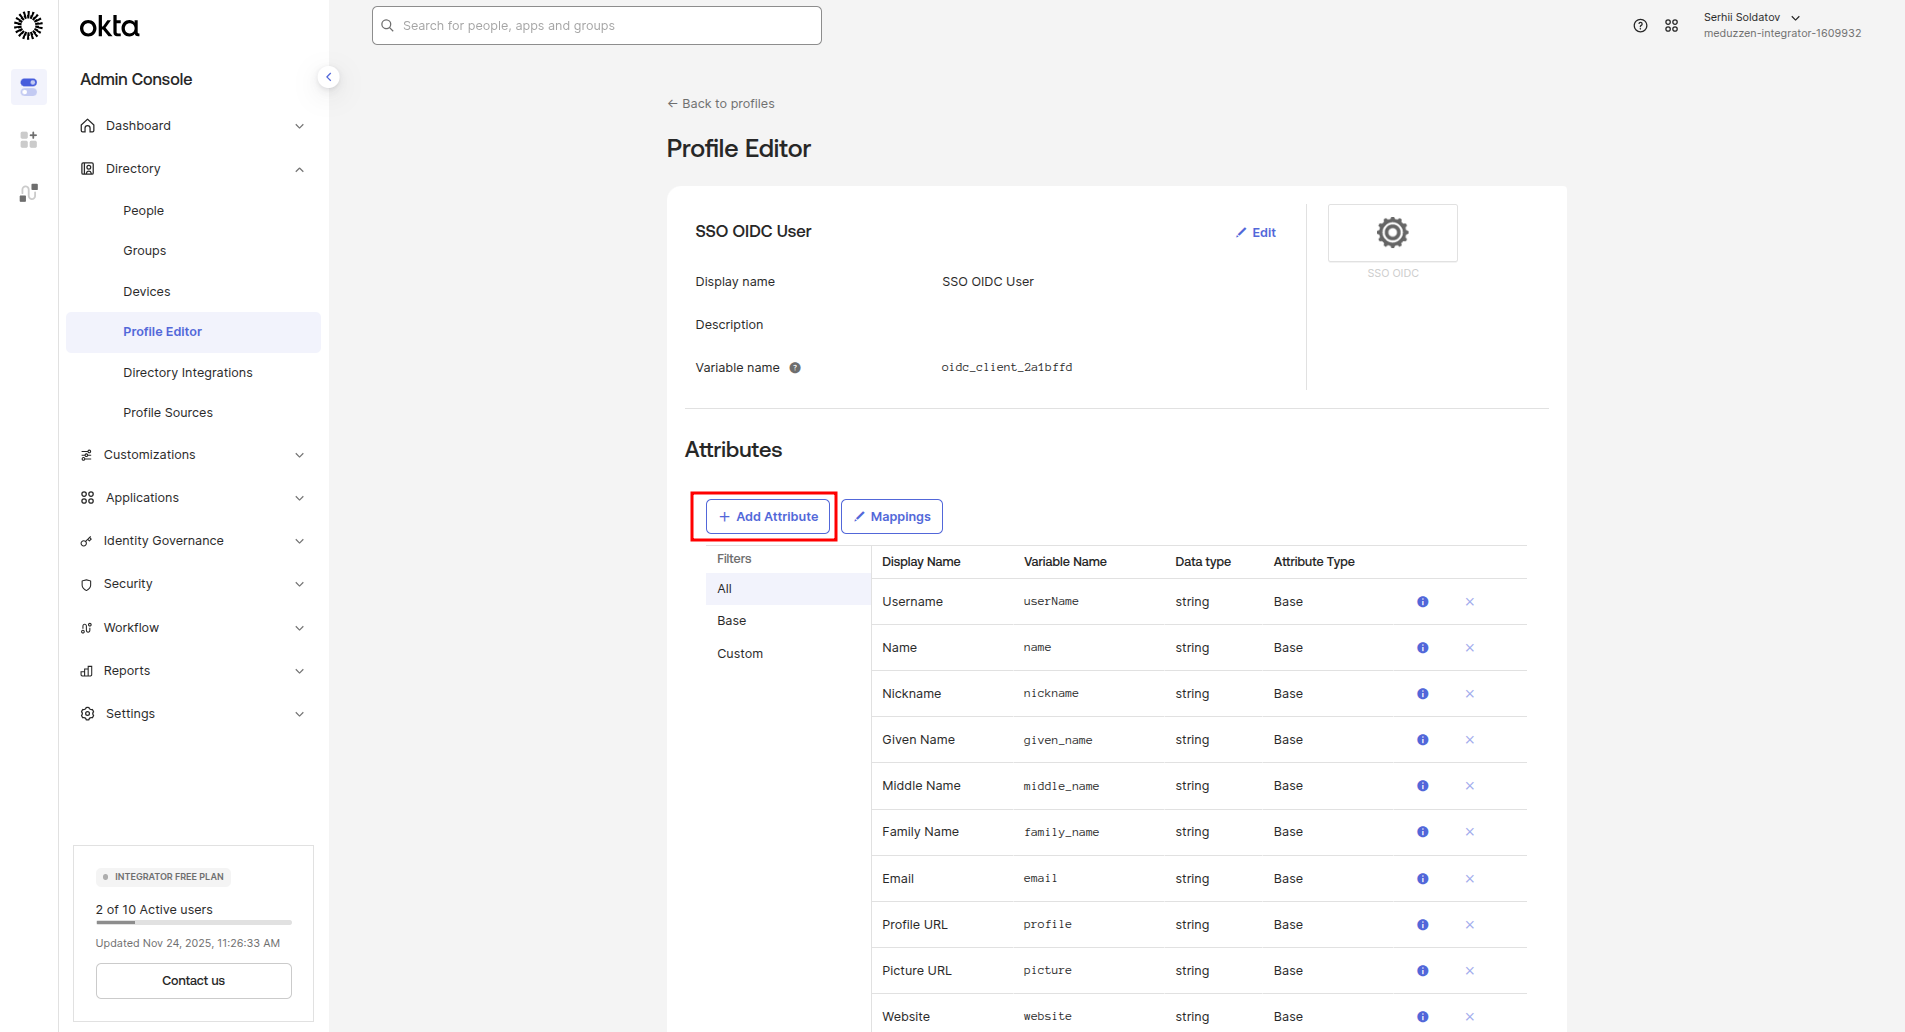
Click on the Add Attribute button to add a new attribute for roles in the OIDC Client Profile.
A modal window will appear with configuration form.
Fill this form as shown in the following screenshot, then click the Save button.

Click on the Mappings button to configure the mapping between the Okta User Profile and the OIDC Client Profile:

A modal window will appear with configuration fields for each relation.
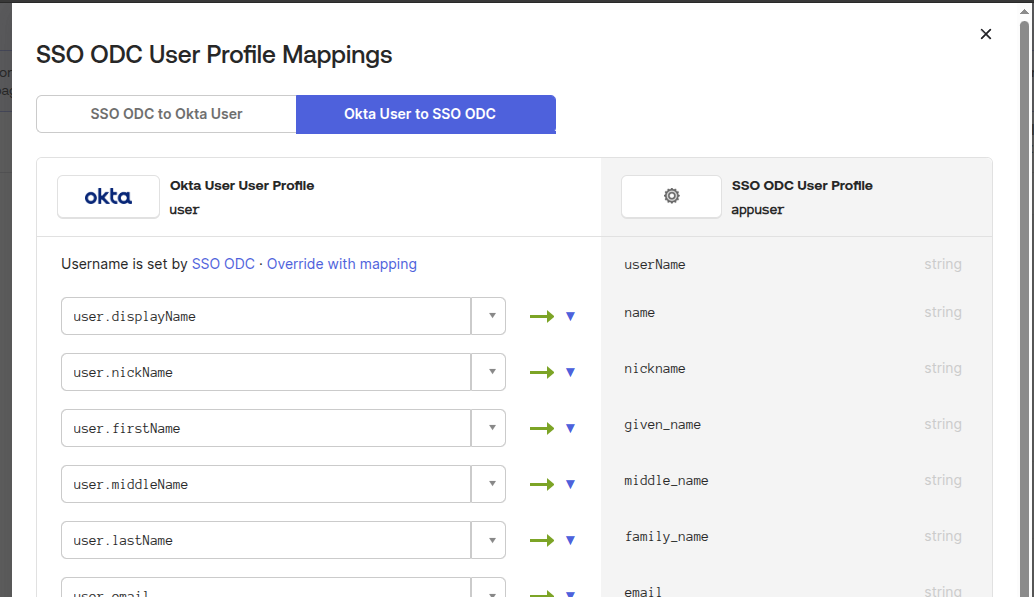
Slide to the last field, type in the field user.userRoles. Click on the relation button which mark on the following screenshot:

Choose an Apply mapping on user create and update option:
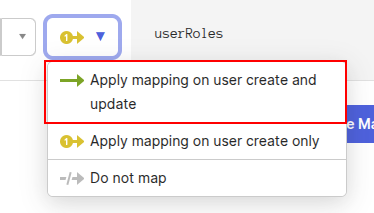
Now, this should look like as shown below. Click on the Save Mappings button.

Configuring an API Authorization
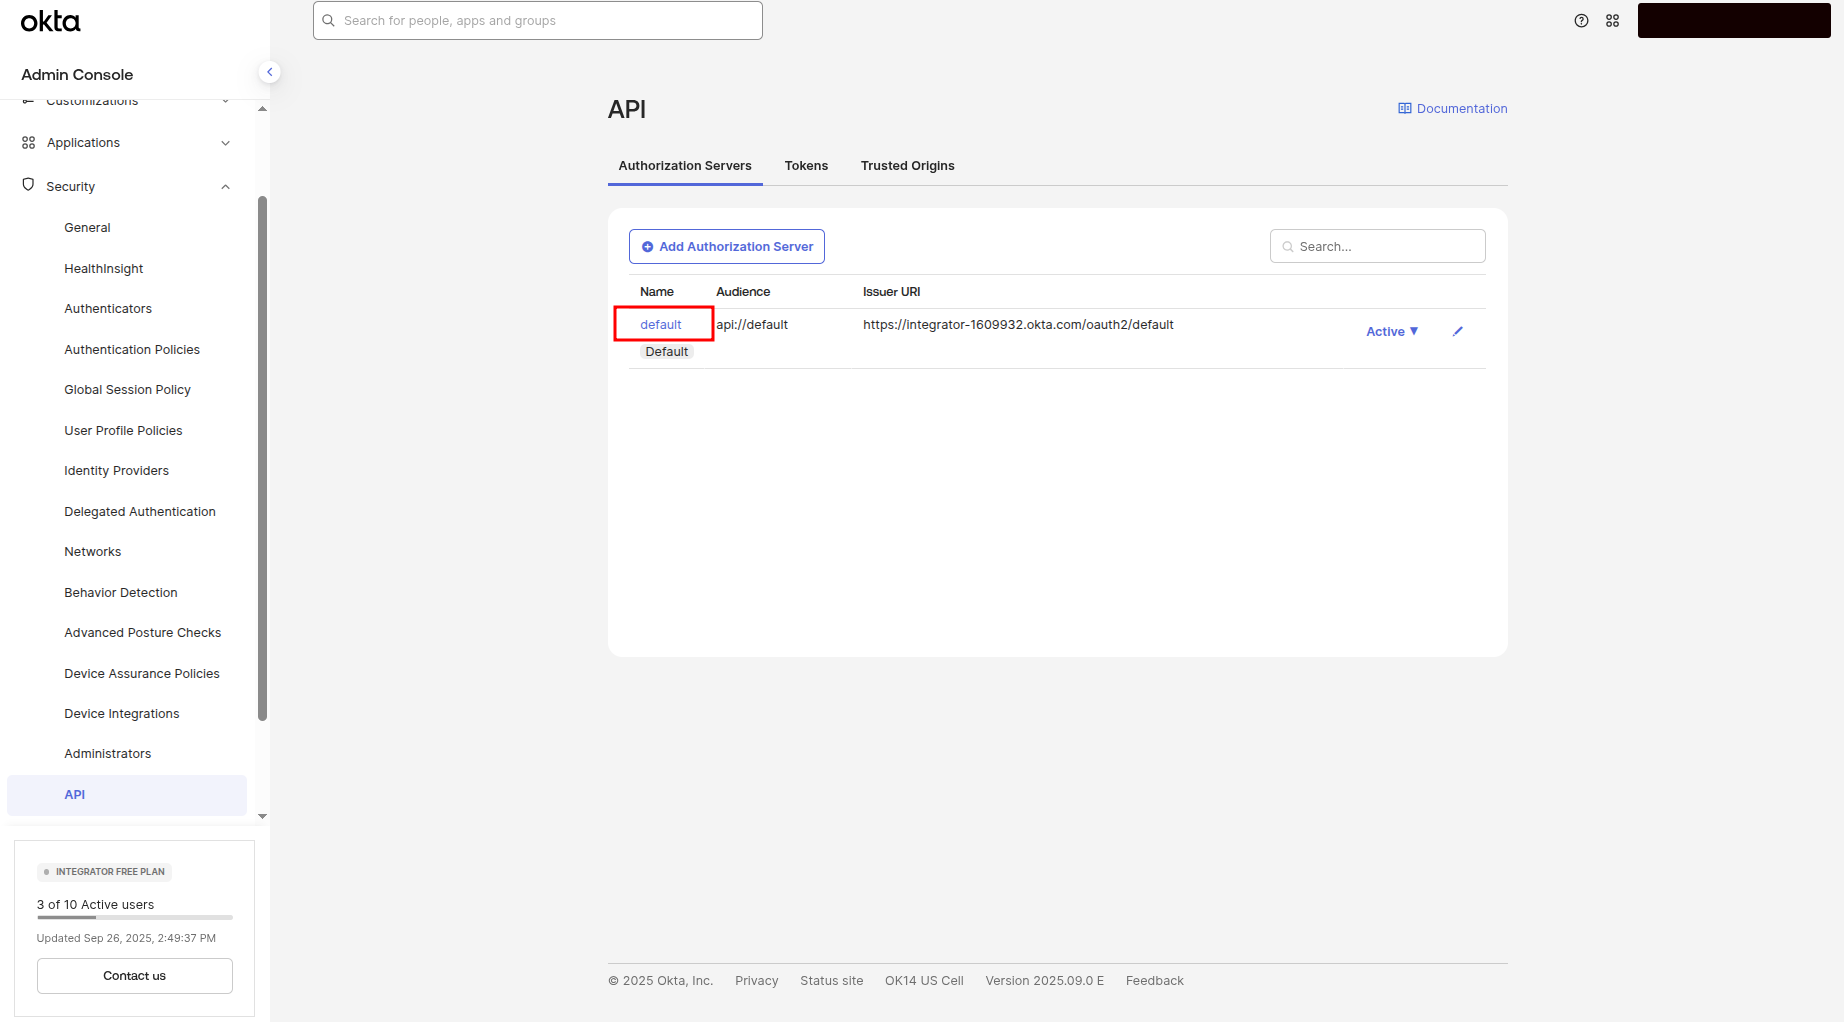
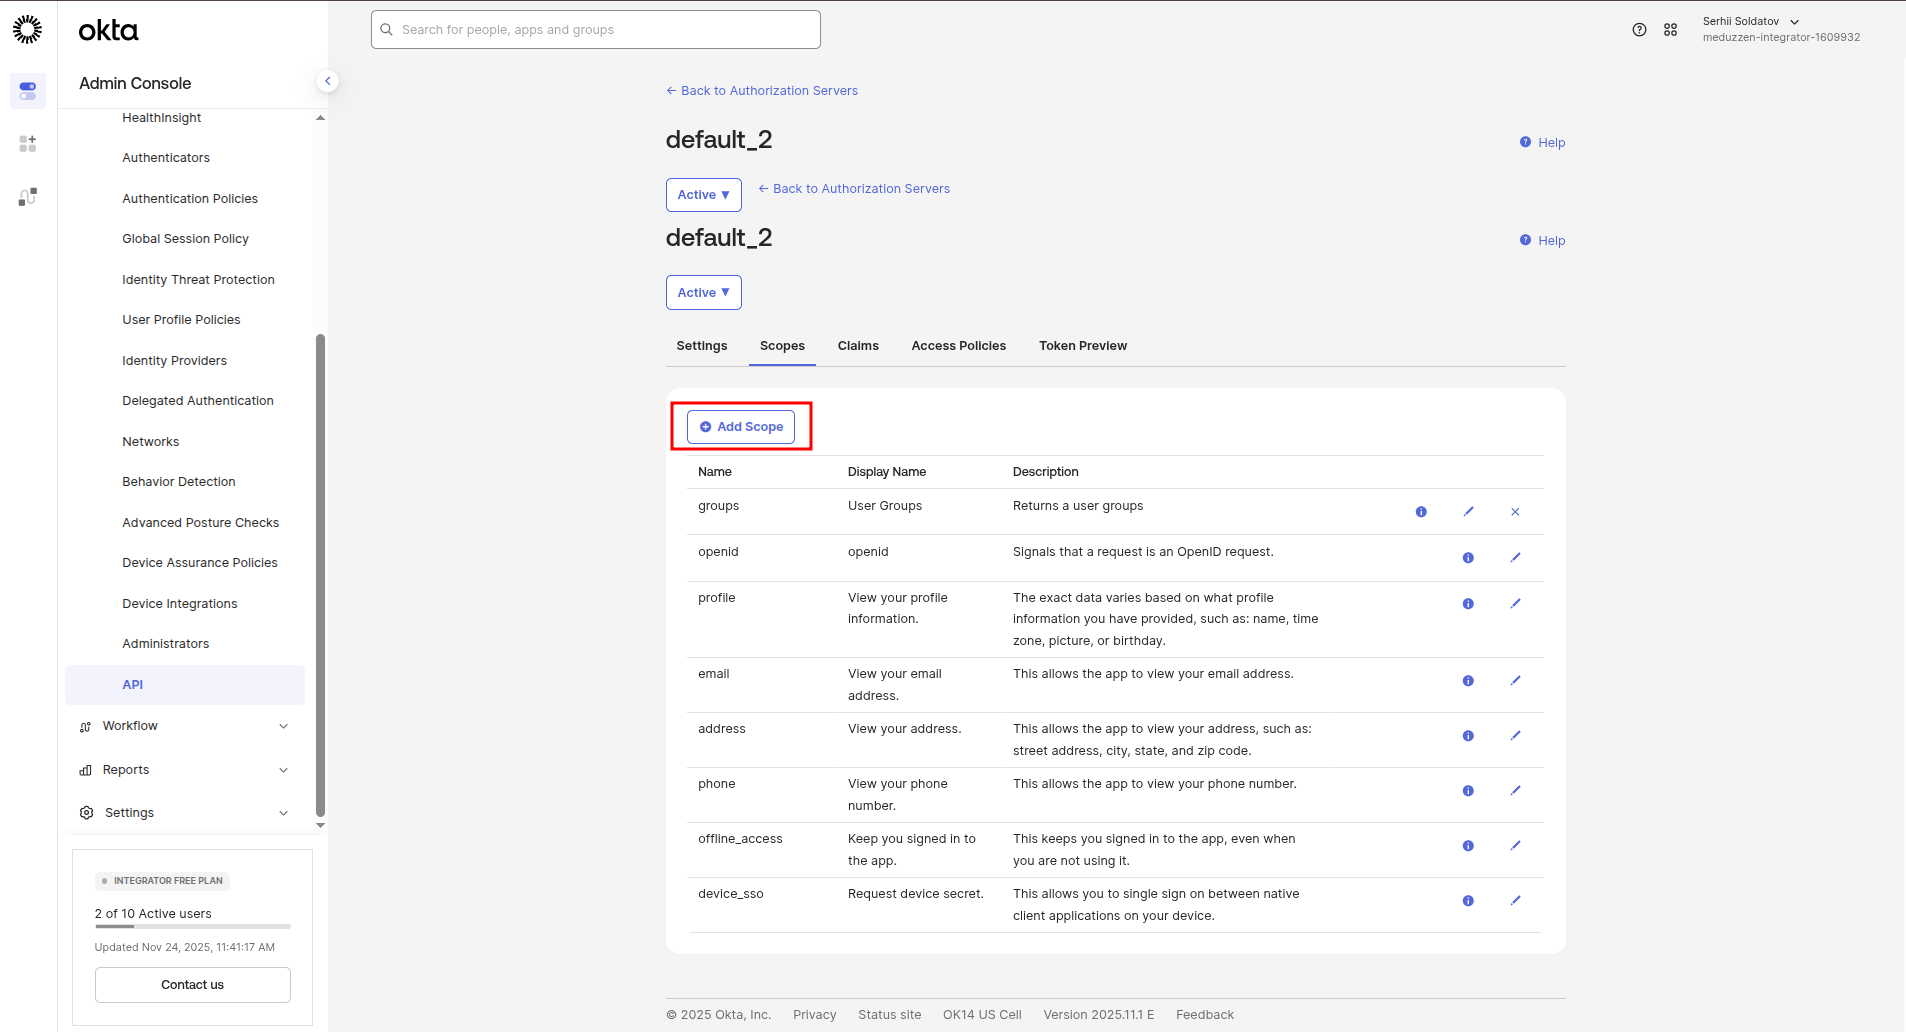
In the side menu, navigate to the API page
Click on the default link (I use default_2, because default in my account already configured), which is marked in the following screenshot:
Configuring a group scope
Now, let's configure scopes to define the permissions our application can request.
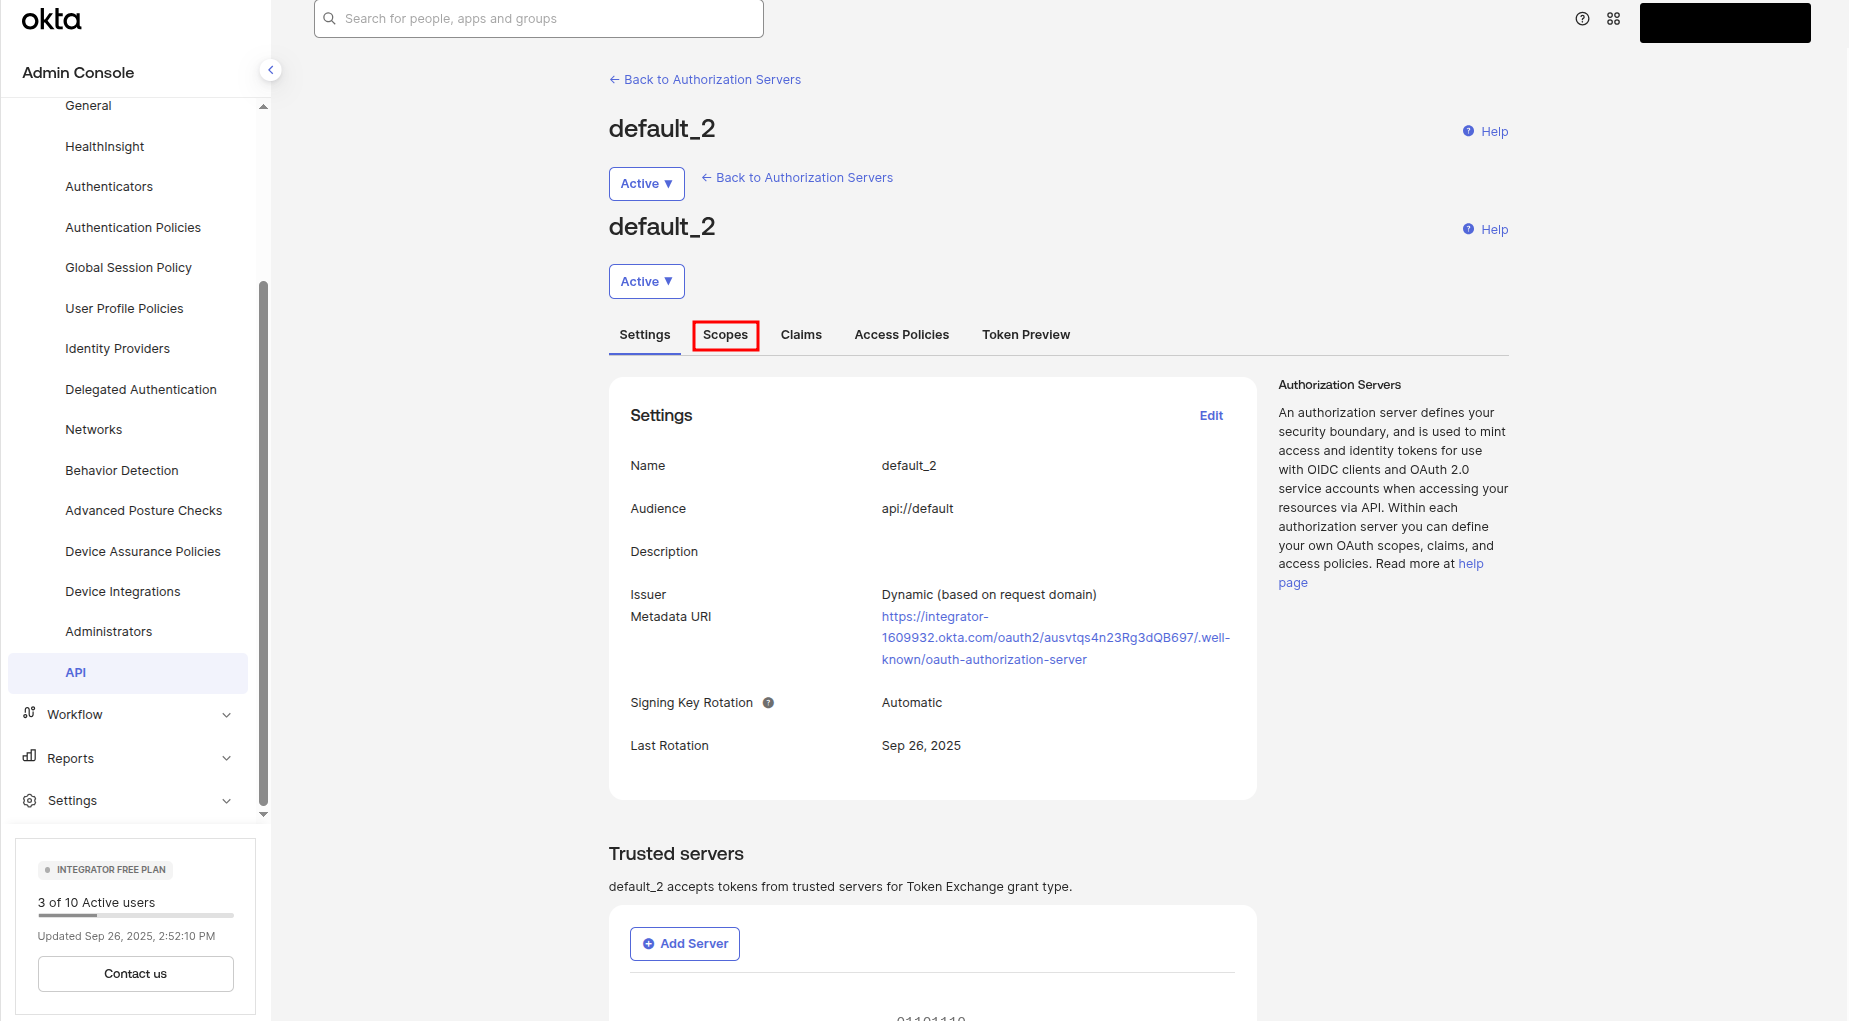
Click on the Scopes subtitle to navigate to the scopes configuration page:
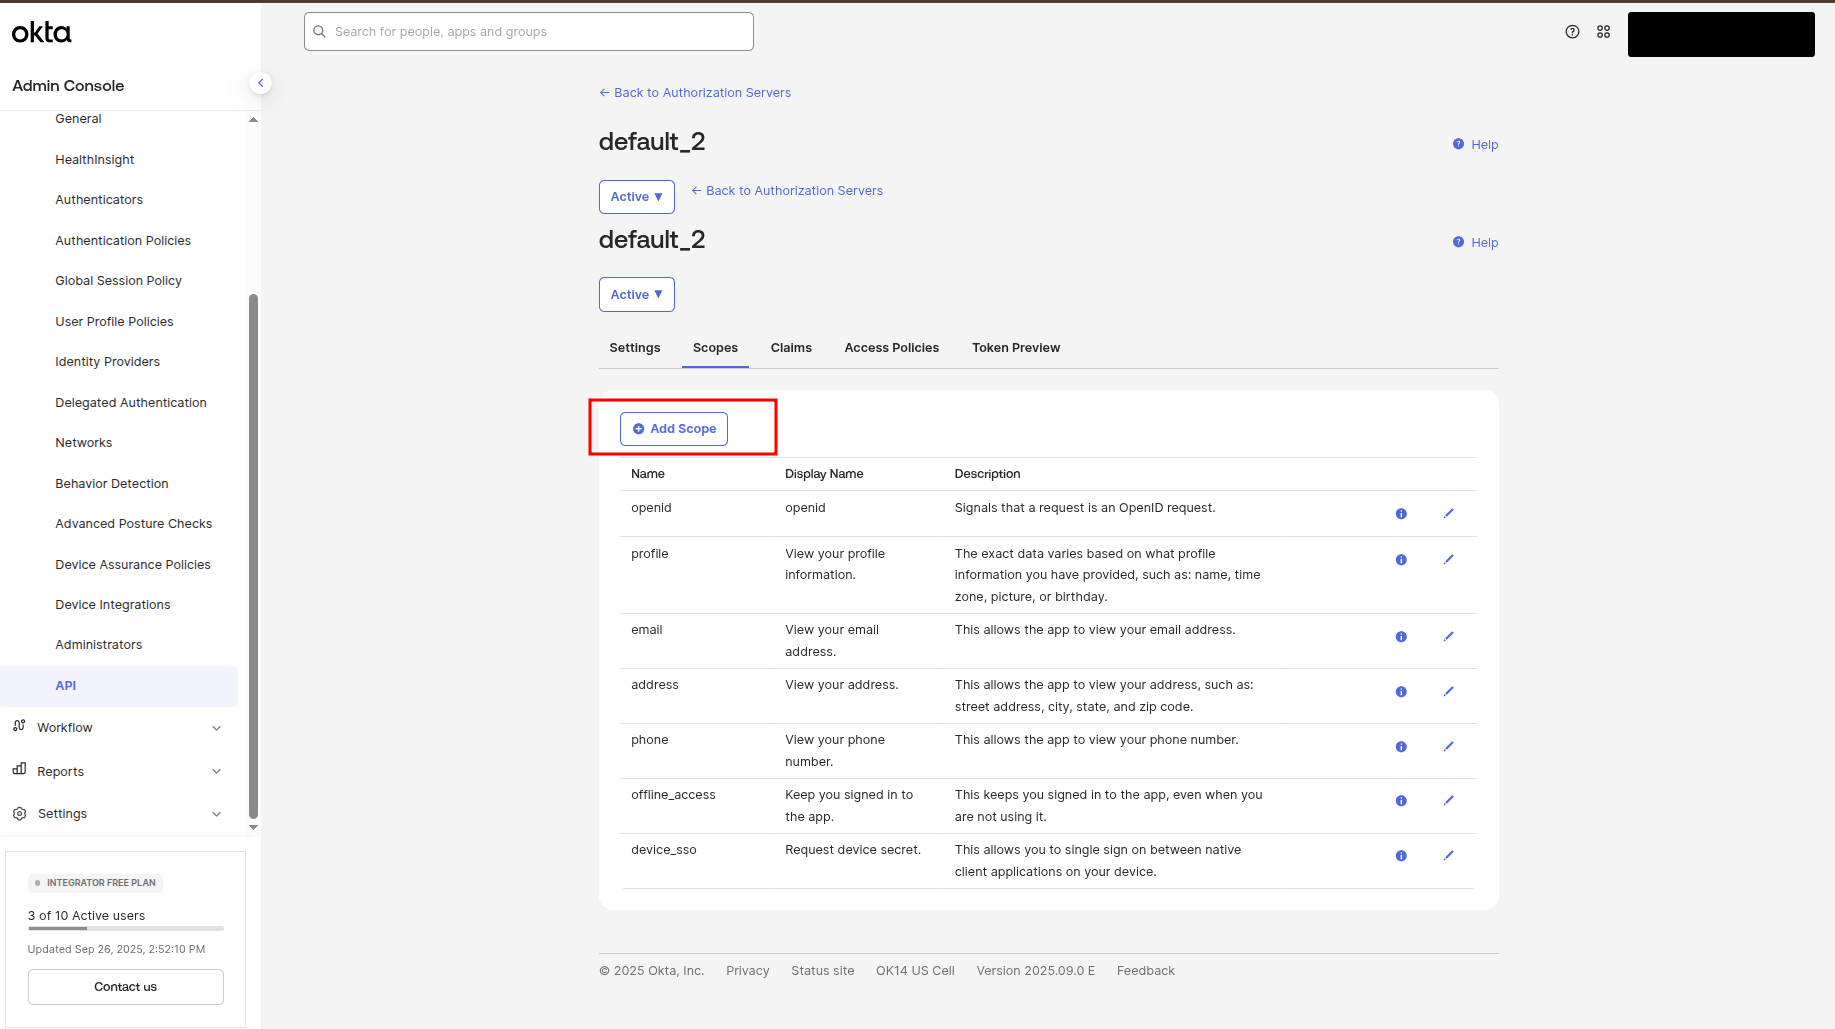
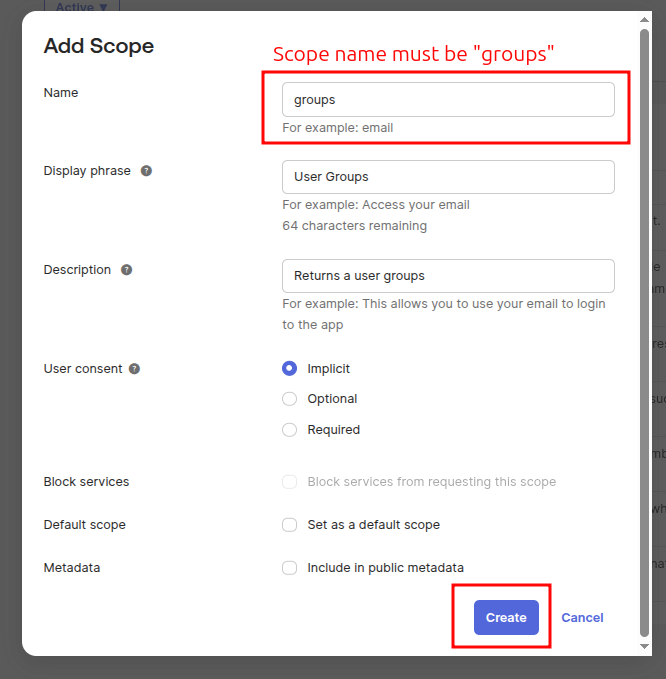
Click on the Add Scope button to add a new scope, which will be used for groups
A modal window will appear with configuration form. Fill this form as shown in the following screenshot, then click the Create button.
!Important: Scope name must be "groups", values in the "Display phrase" and "Description" fields are not that important.
Configuring role scope
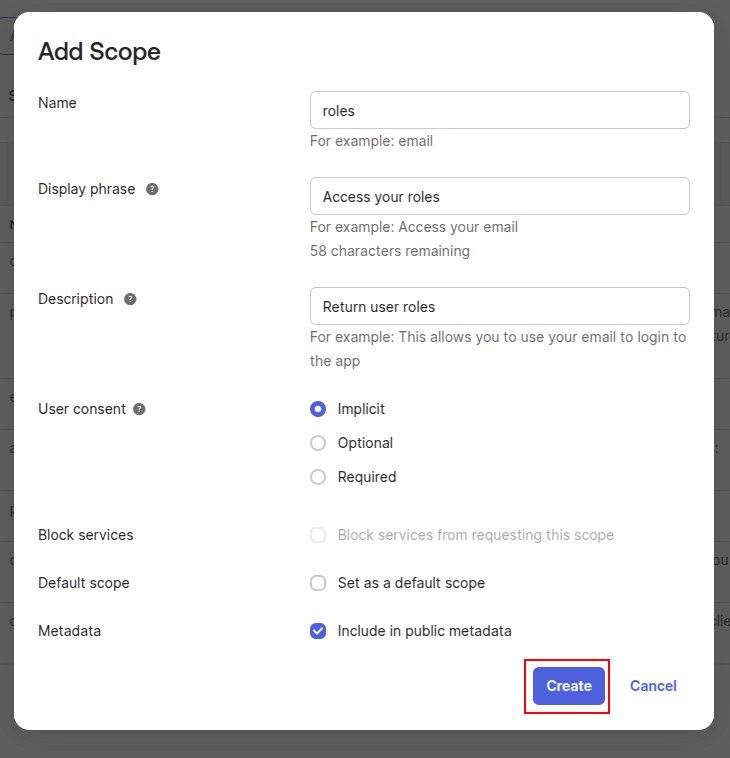
Click on the Add Scope button to add a new scope, which will be used for roles
A modal window will appear with configuration form. Fill this form as shown in the following screenshot, then click the Create button.
Configuring a new groups claim
Configuring a claim after the scope for Okta SSO ensures that the appropriate user attributes are securely included in the authentication token, enabling seamless access control and personalized experiences across integrated applications.
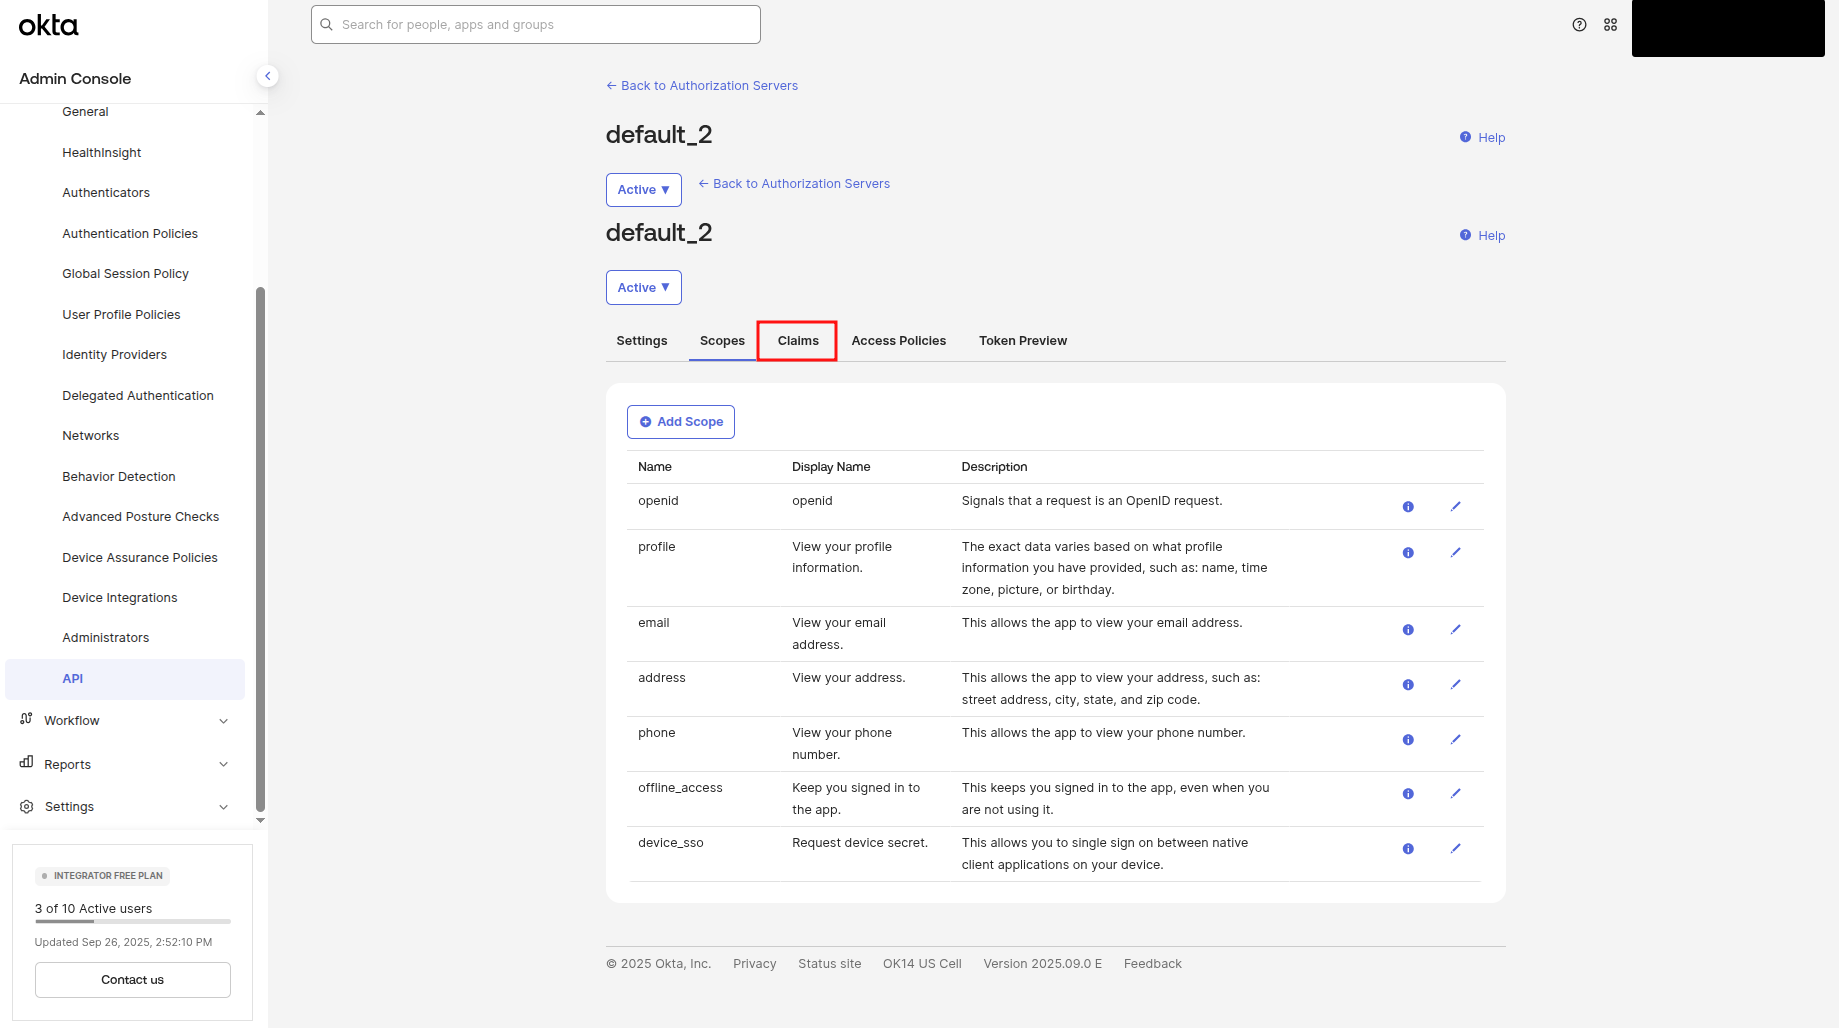
Click on the Claims subtitle to navigate to the claims configuration page:
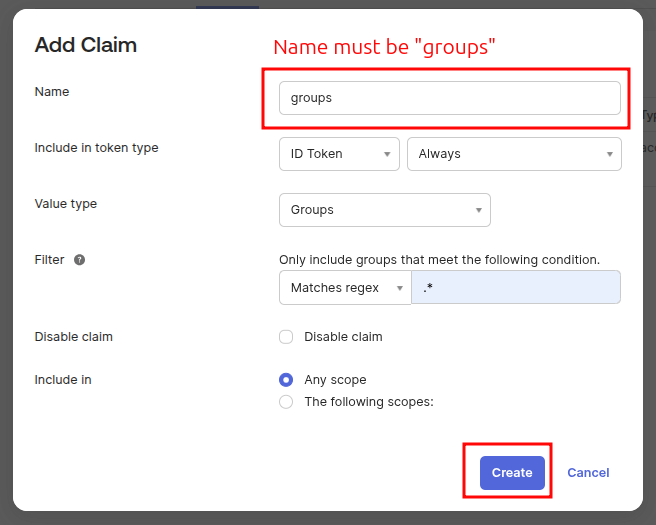
Click on the Add Claim button to add a new claim, which will be used for groups:
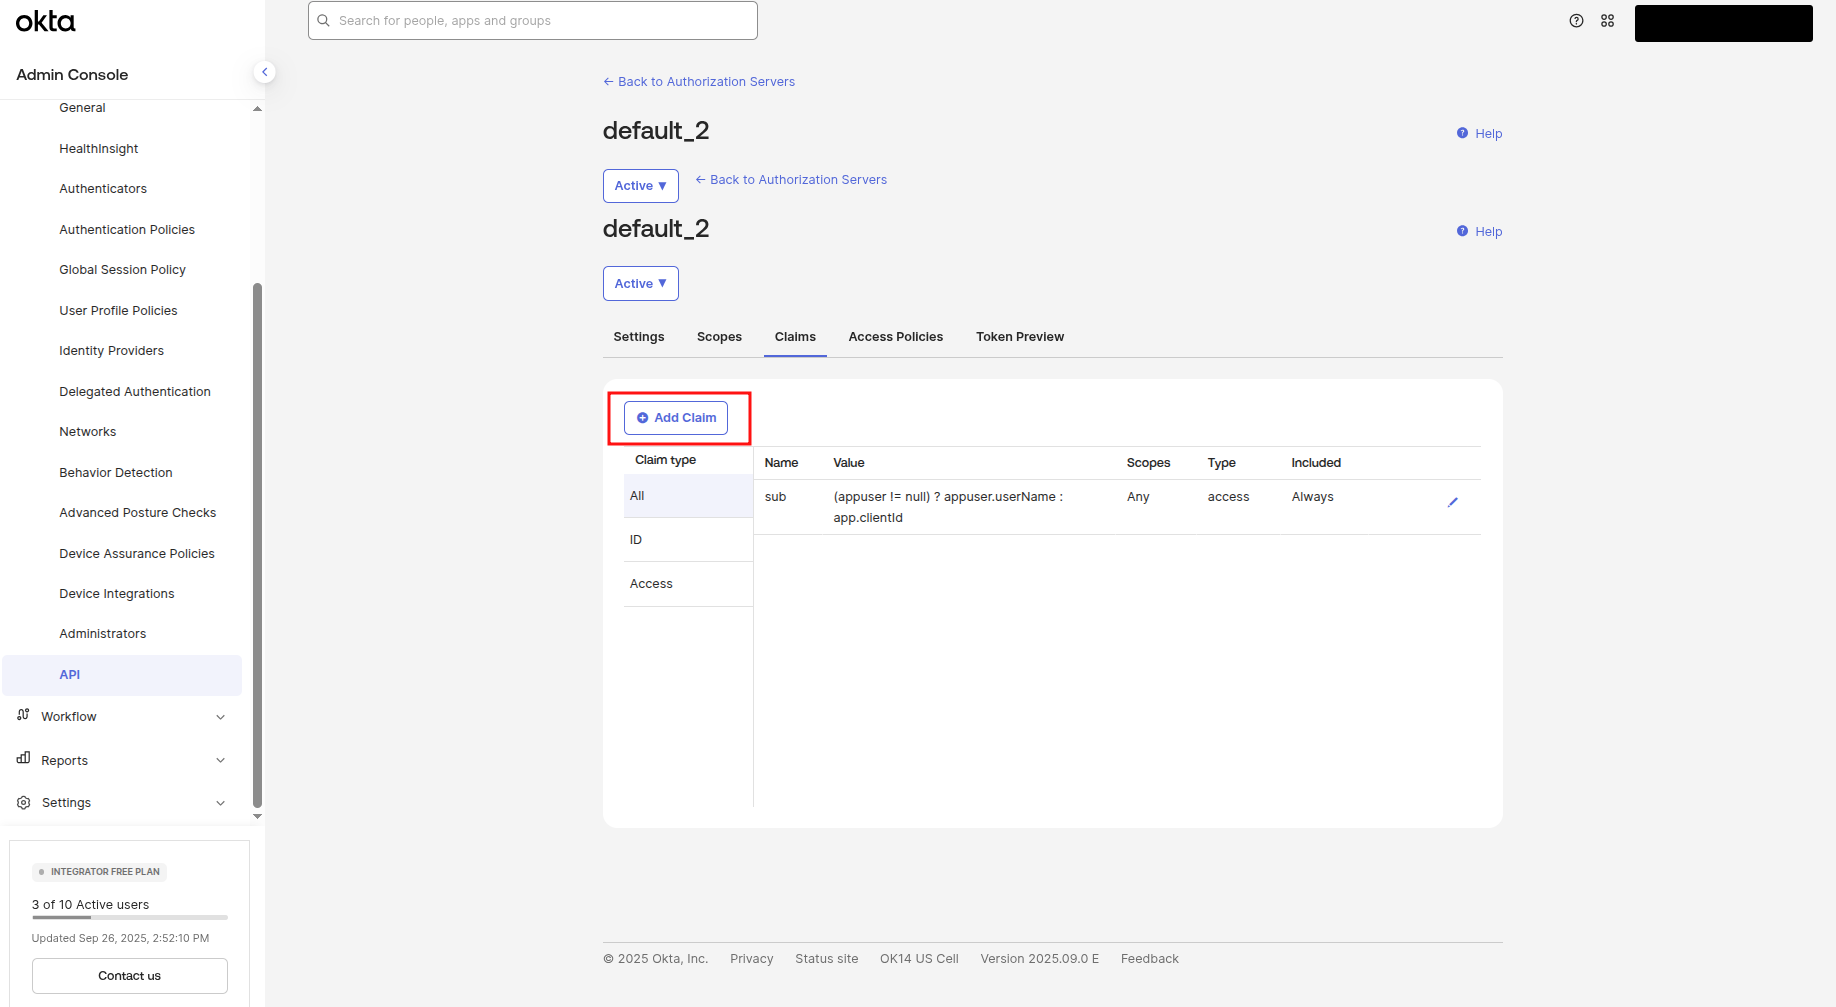
A modal window will appear with configuration form. Fill this form as shown in the following screenshot, then click the Create button.
!Important: Claim name must be "groups" and all other values must be identical as on screenshot!
Configuring a new roles claim
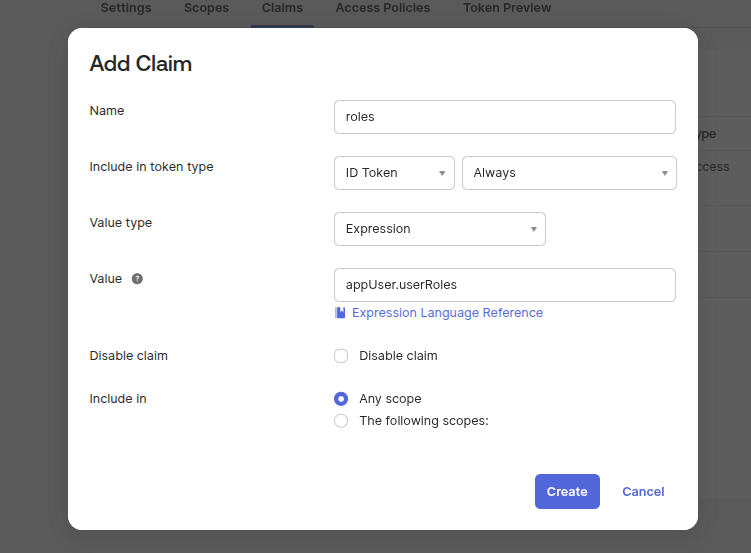
Click on the Add Claim button to add a new claim, which will be used for roles.
A modal window will appear with configuration form. Fill this form as shown in the following screenshot, then click the Create button.
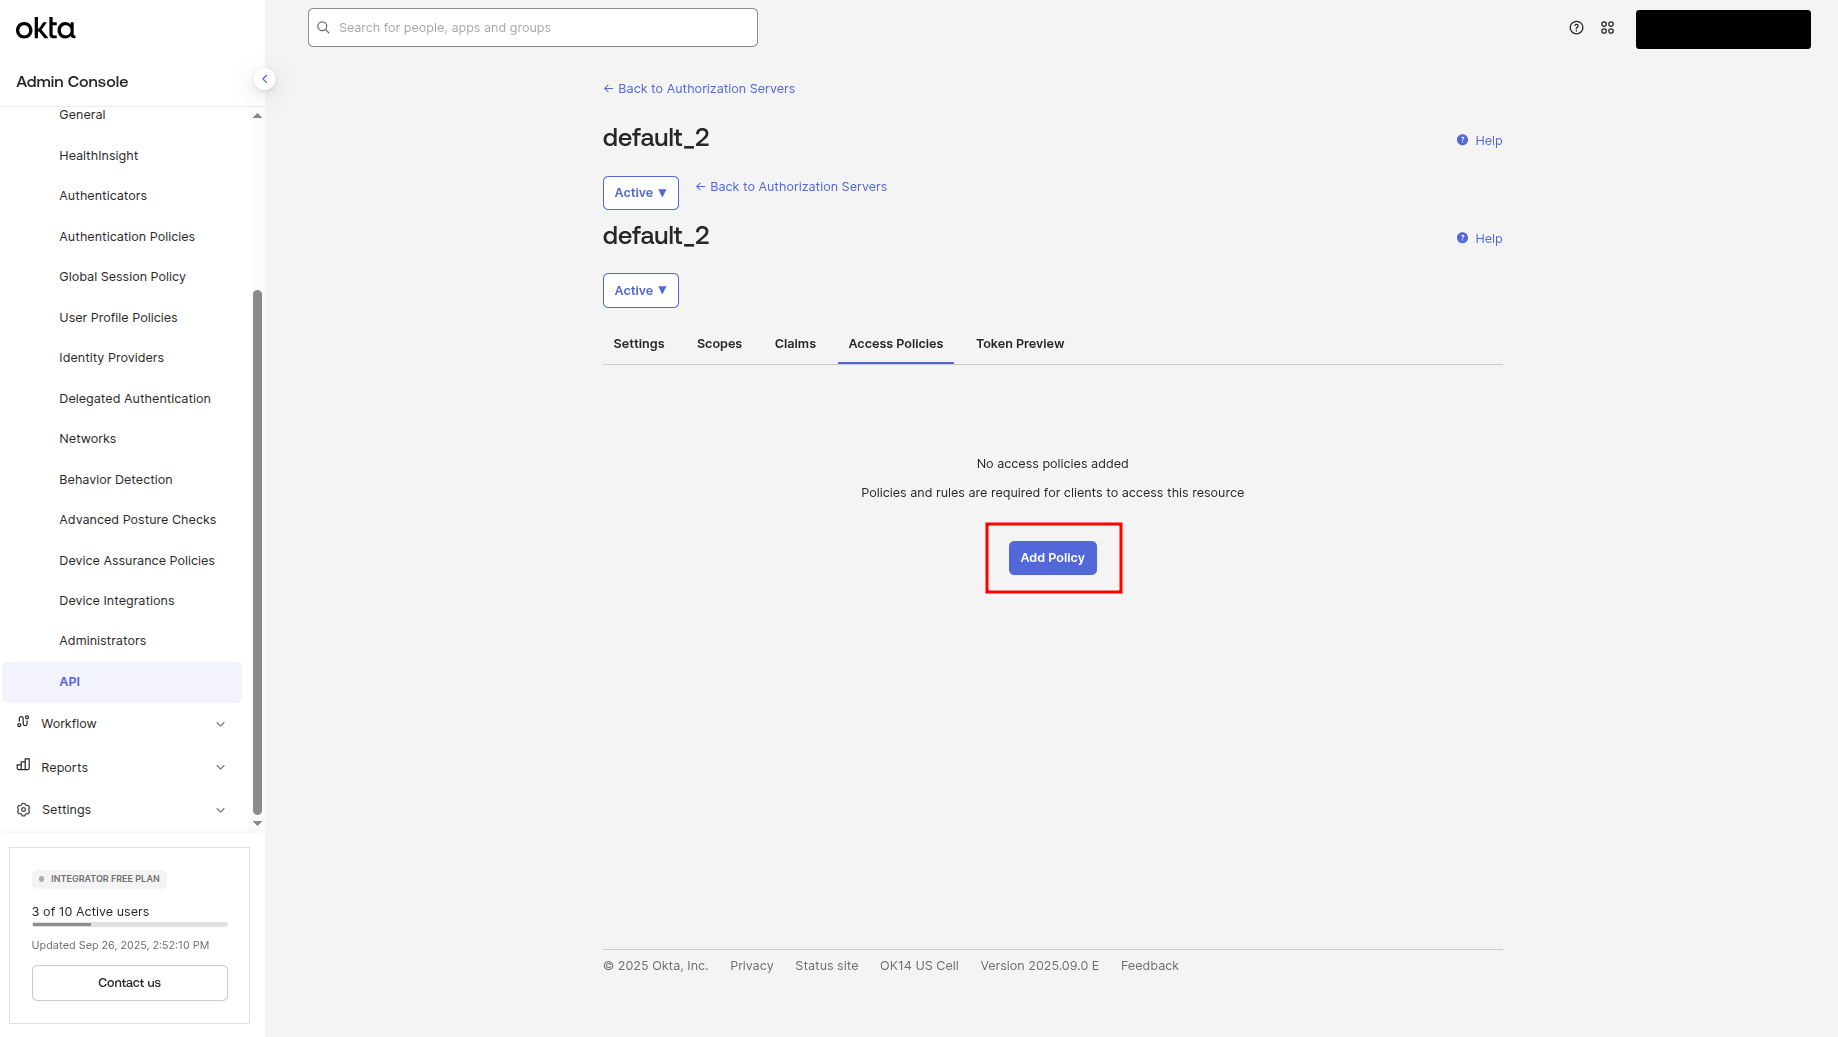
Configuring a new access policy
Access policies and rules in Okta SSO allow administrators to define and enforce conditions for user authentication, ensuring secure and granular control over who can access applications based on factors like location, device, and user group.
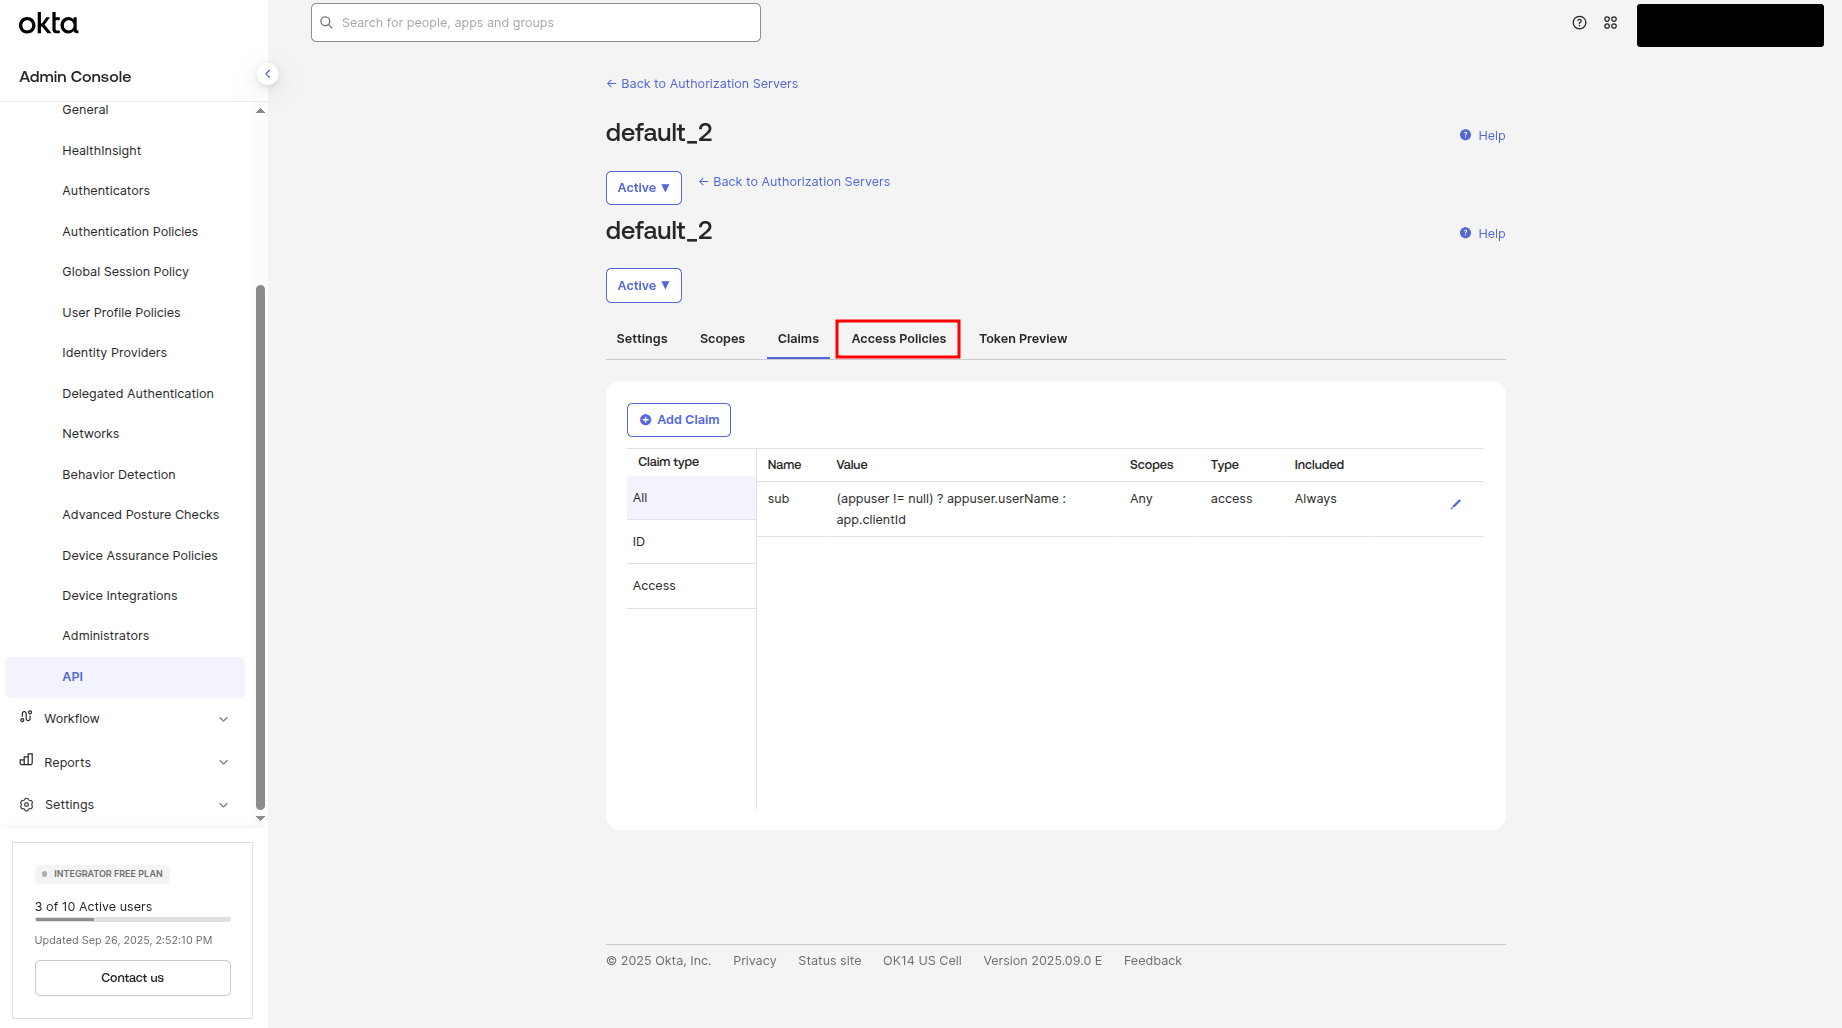
Click on the Access Policies subtitle to navigate to the access policies configuration page:
Click on the Add Policy button to add a new policy:
A modal window will appear with a configuration form. Fill this form as shown in the following screenshot, then click the Create Policy button.

Click on the Add rule button to add a new rule
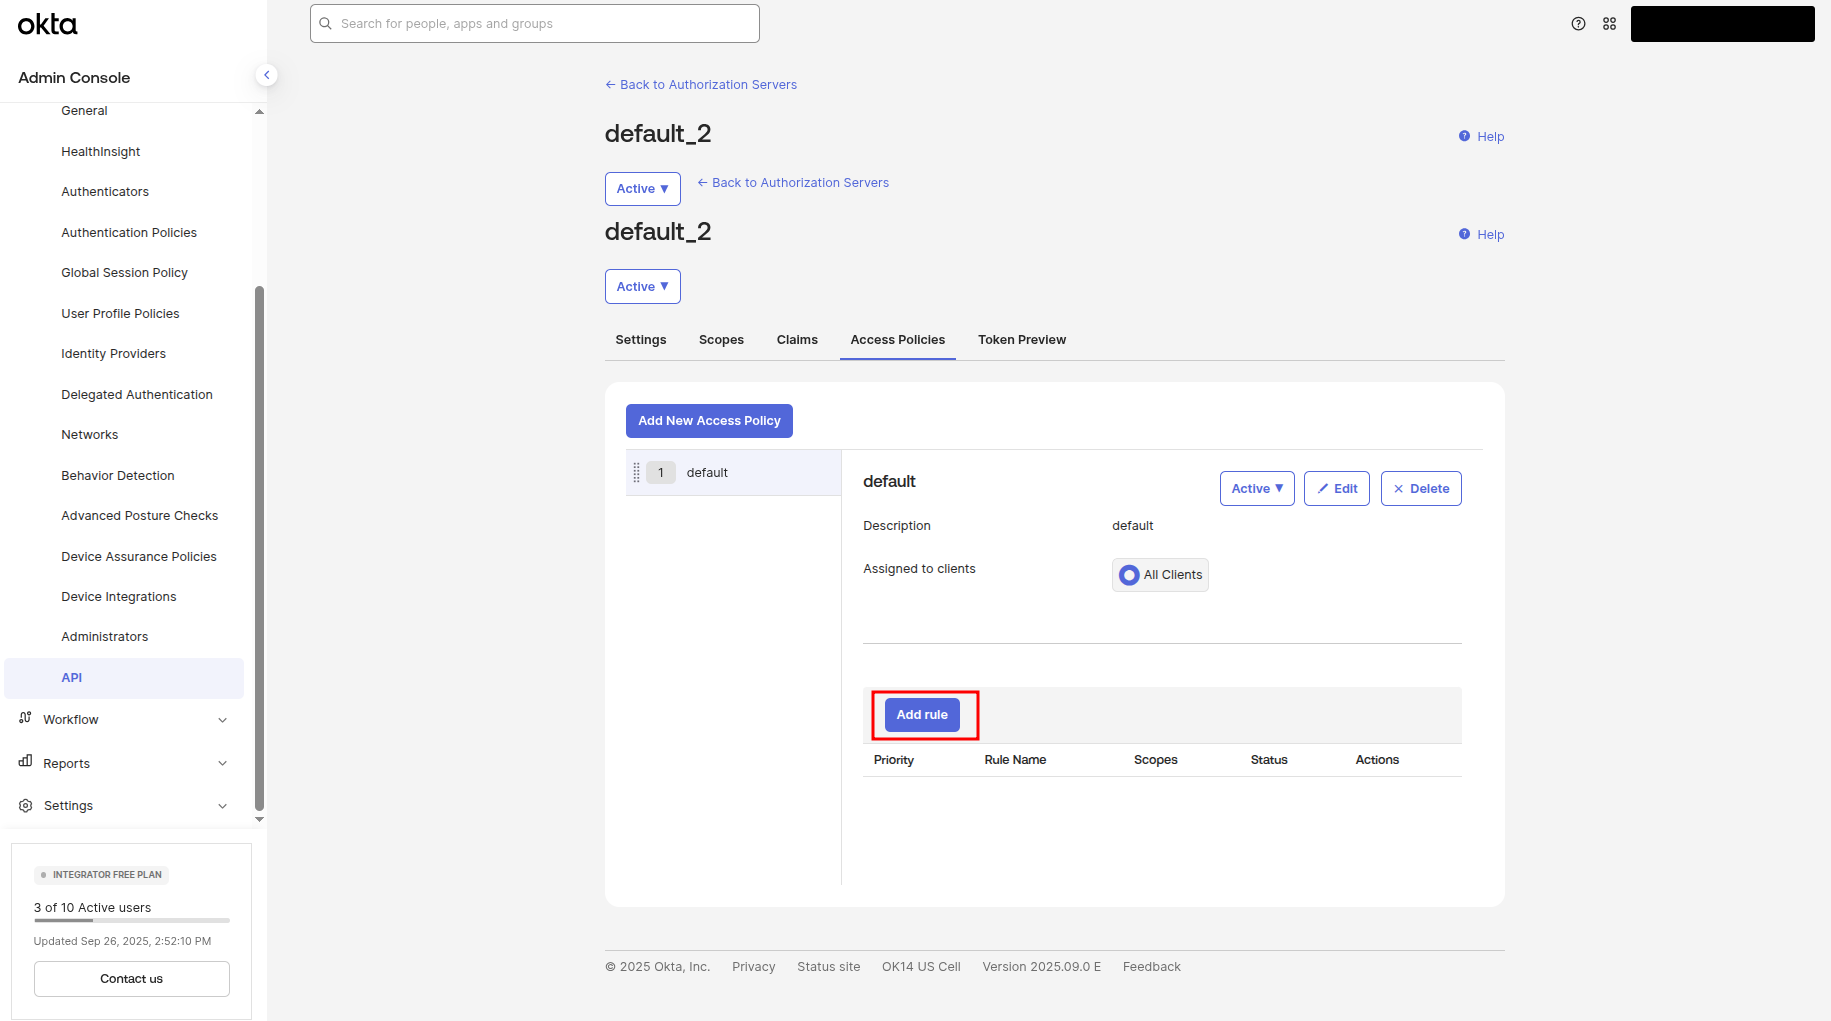
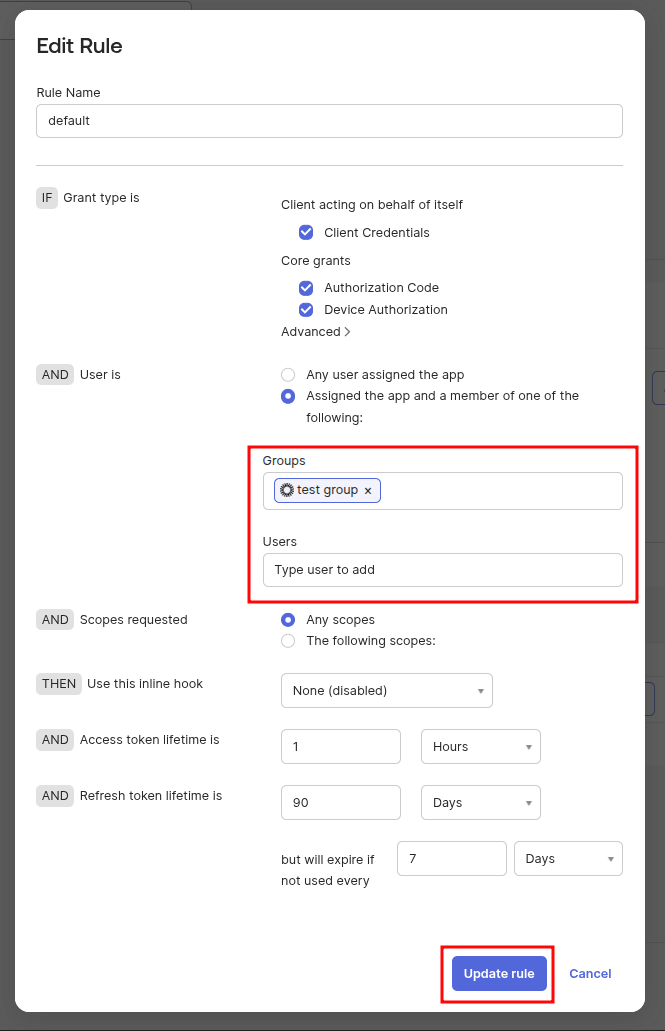
A modal window will appear with the configuration form. Fill in this form as shown in the screenshot.
In the "User is" section, select the group you want to allow access to your application. In my case, it is the users from "test_group".
You can also add individual users if needed.
Then, click the Create rule button.
Only users who are members of the selected group (and assigned the app) will be able to sign in.
Configuring a new Event Hooks
Event Hooks in Okta SSO allow your application to track IAM related events. We will create an event hook that listens for two specific events:
User removed from group
User deleted
These events will trigger a soft delete of the corresponding user in your application.
In the side menu, navigate to the Event hooks page:
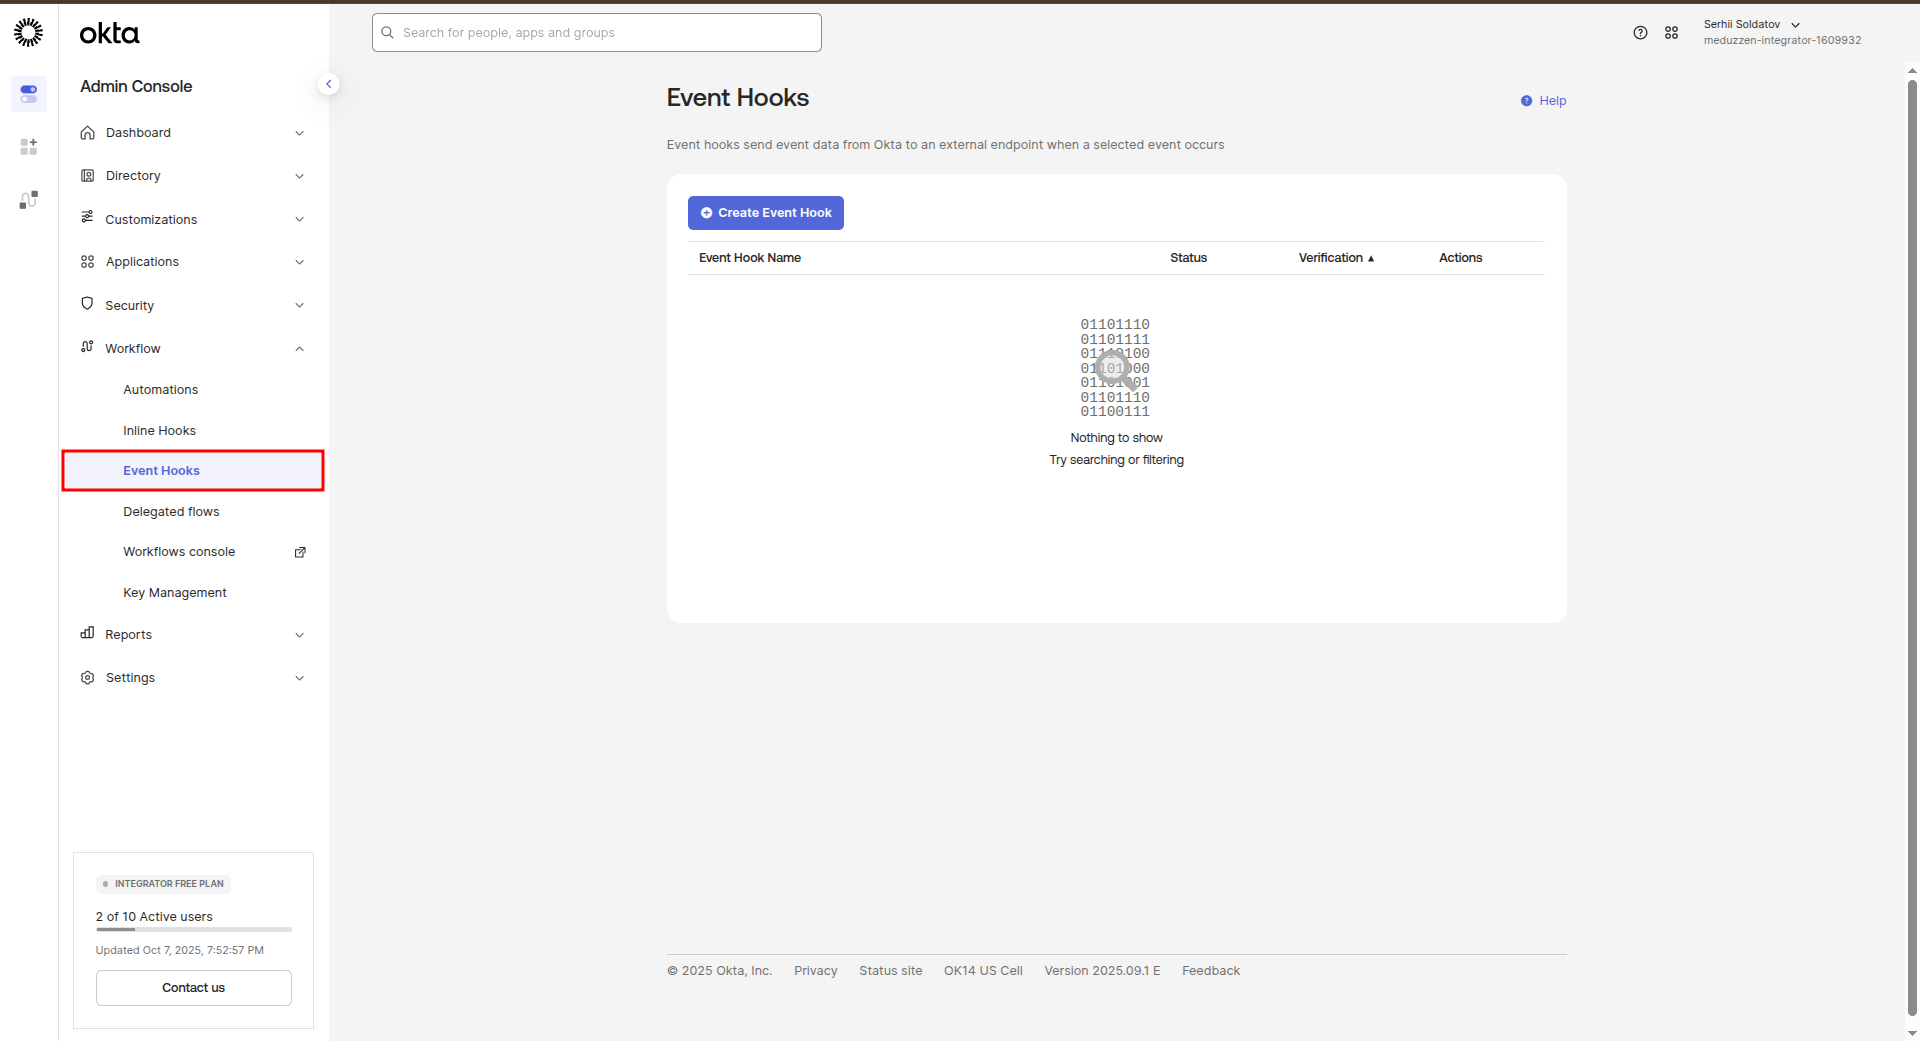
Click on the Create Event Hook button to add an event hook
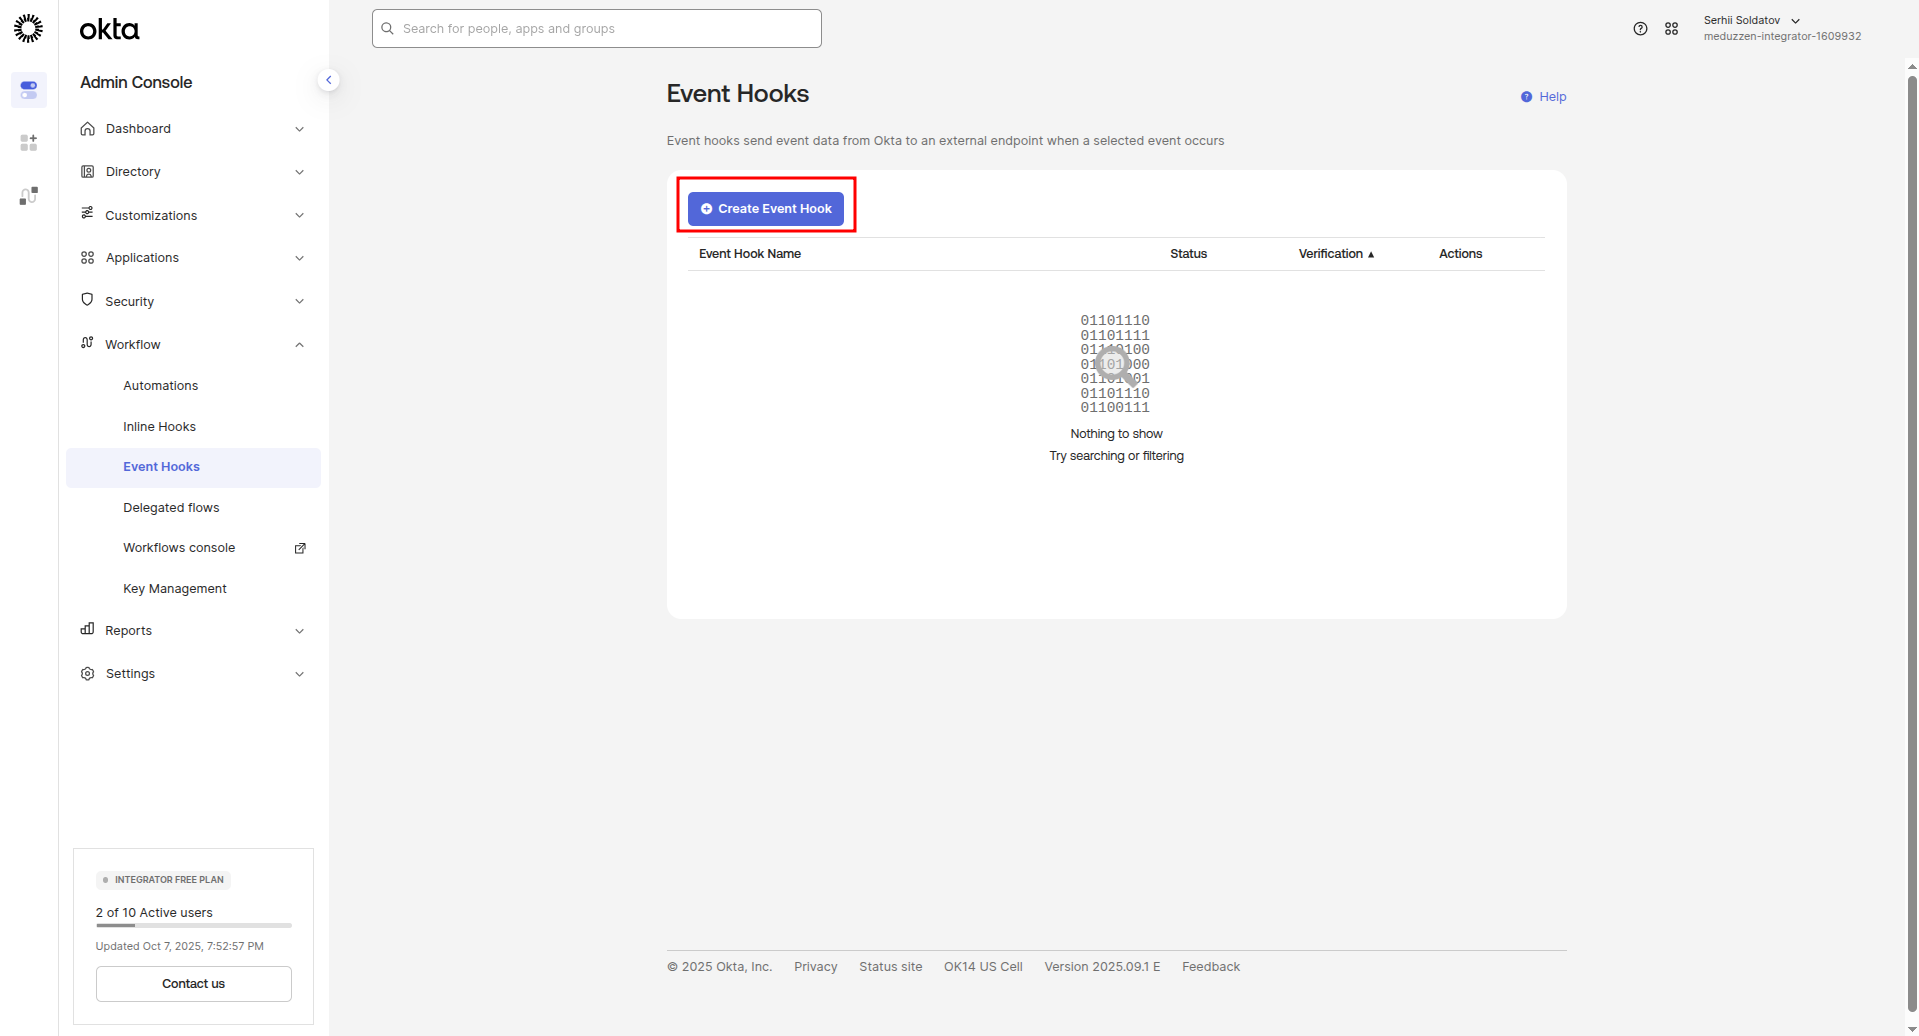
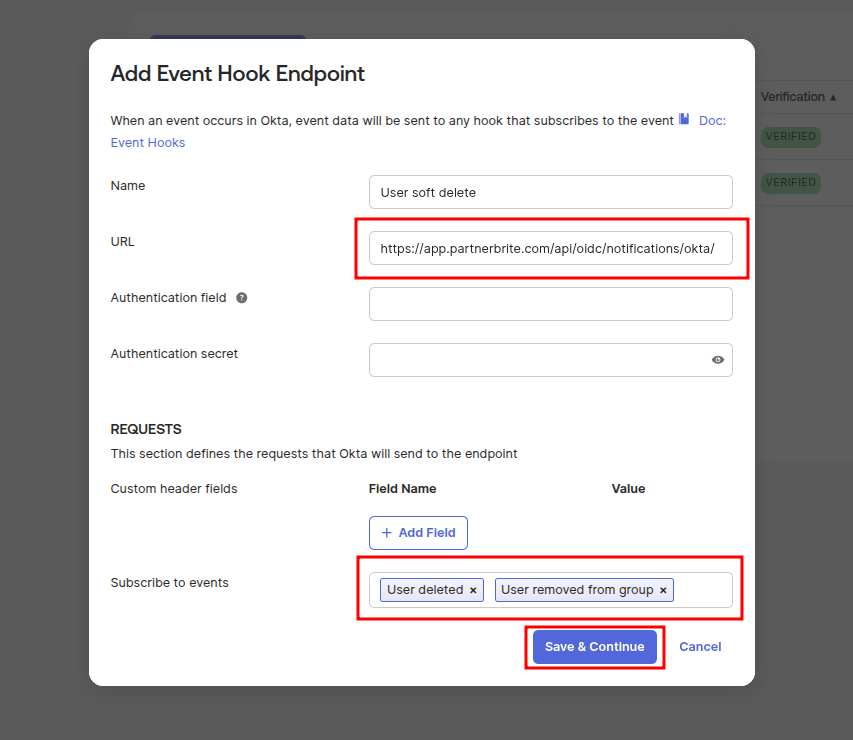
A modal window will appear with a configuration form.
Fill this form as shown in the following screenshot, then click the Save & Continue button.
Another more modal window will appear with a configuration form.
Click Verify to confirm that the webhook is active and reachable.
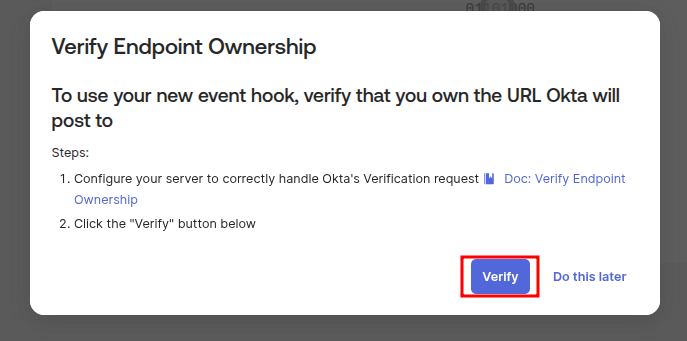
You will then be redirected to the newly created event hook page.

Assigning user roles
In the side menu, navigate to the People page, then choose a particular person in the list and click to navigate to the Person page
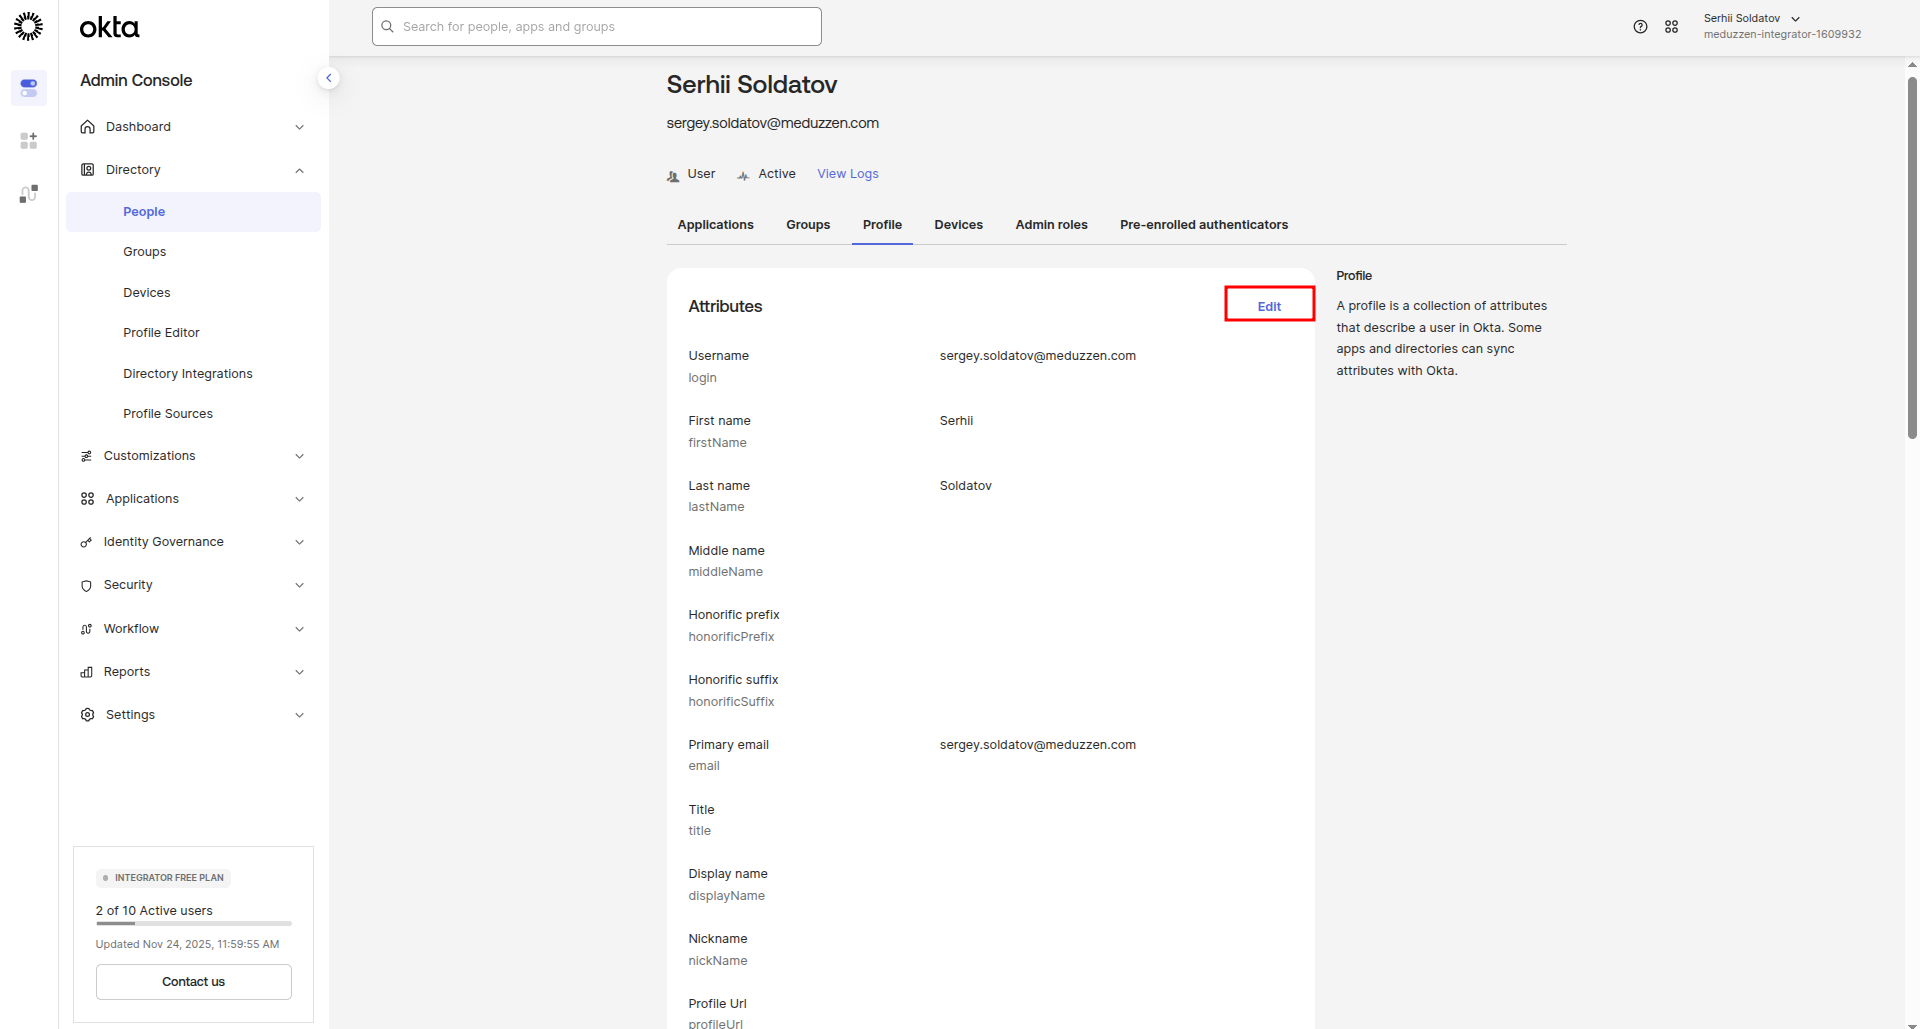
Click on the Profile subtitle to navigate to the profile page
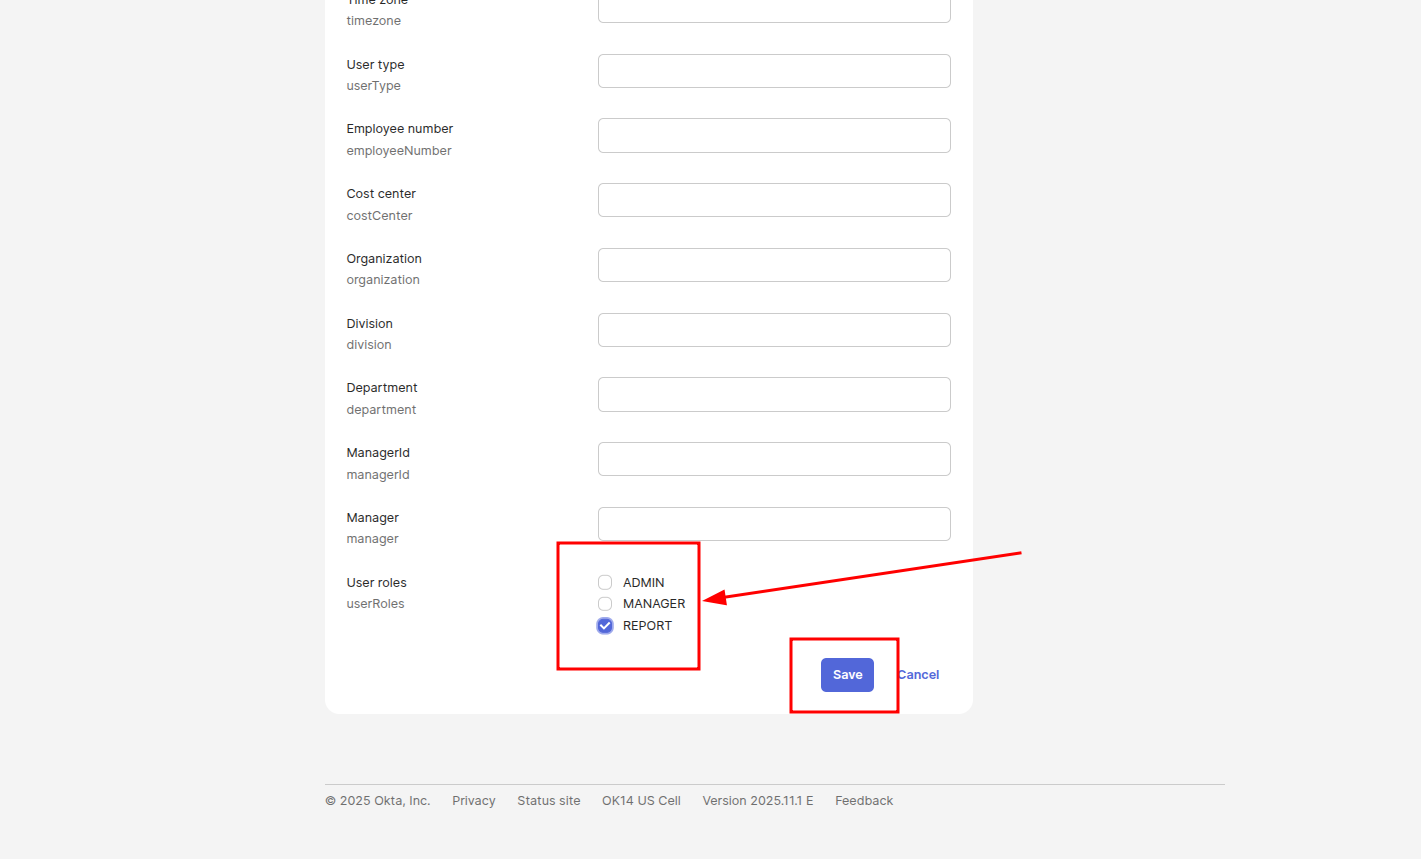
Click on the Edit button to enable editing attributes of the profile. Slide down to the bottom of the page.
Now, you can choose any number of roles from the list for the particular user. Click the Save button.
Deleting users
Delete user from group:
To trigger a soft-delete of a user in your application, you need to either remove the user from an Okta group or fully delete the user from Okta IAM.
To soft-delete a user from all rights holders where the user was, you need to remove the user from the corresponding Okta group (the group with the Group name defined in your SSO Client Provider).
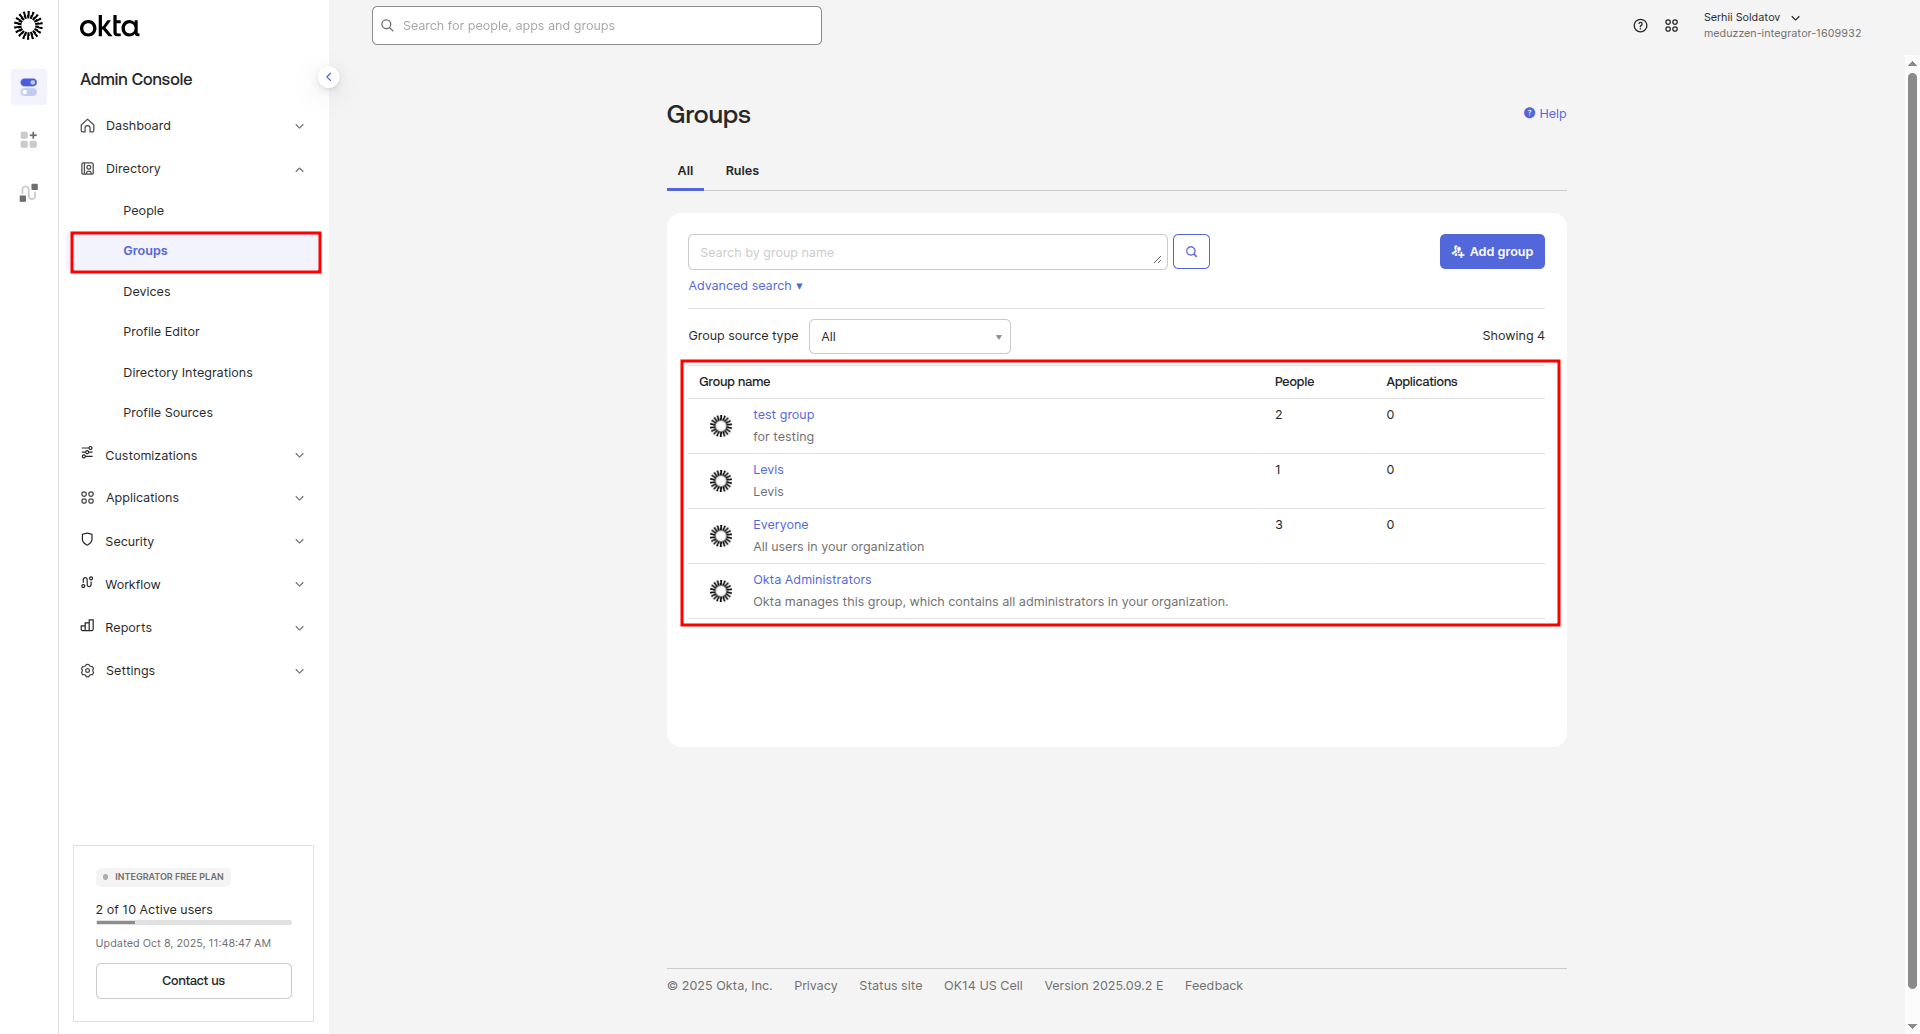
In the side menu, navigate to the Groups page and click on the group which you want to remove users:
Next to the user you want to remove, click on the cross (x) icon and the user will be removed.
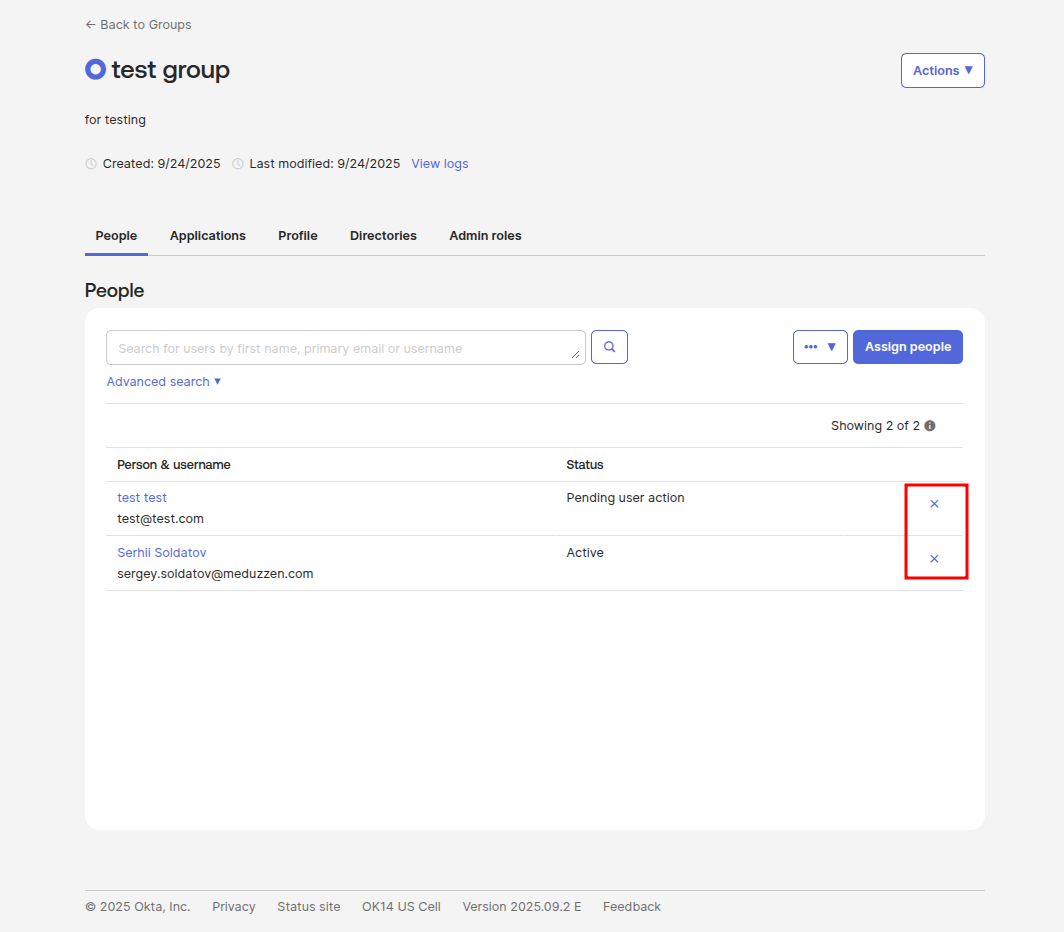
Once the user is removed from the group, they will be soft-deleted in your application.
Note: Users will be removed only when deleted from groups that are present in your app SSO Providers Group name, if not this event hook will be skipped.
Delete user from IAM:
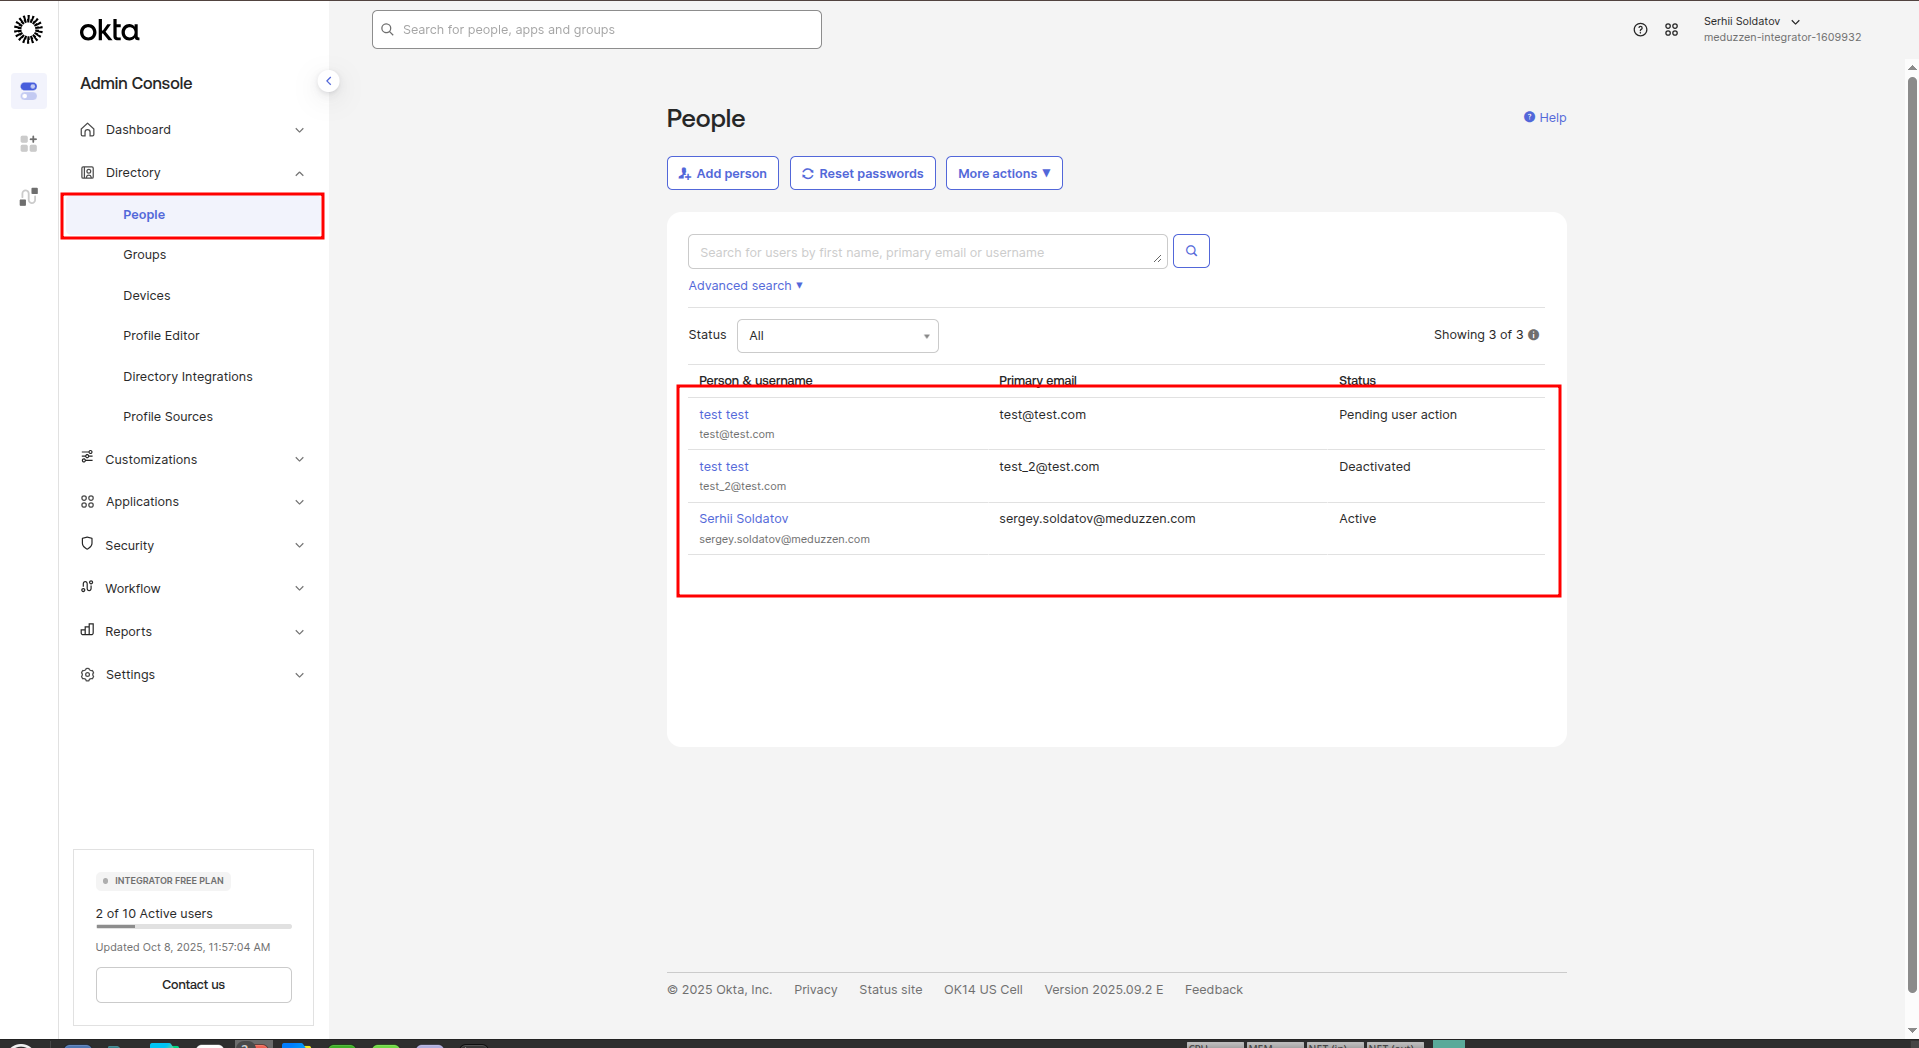
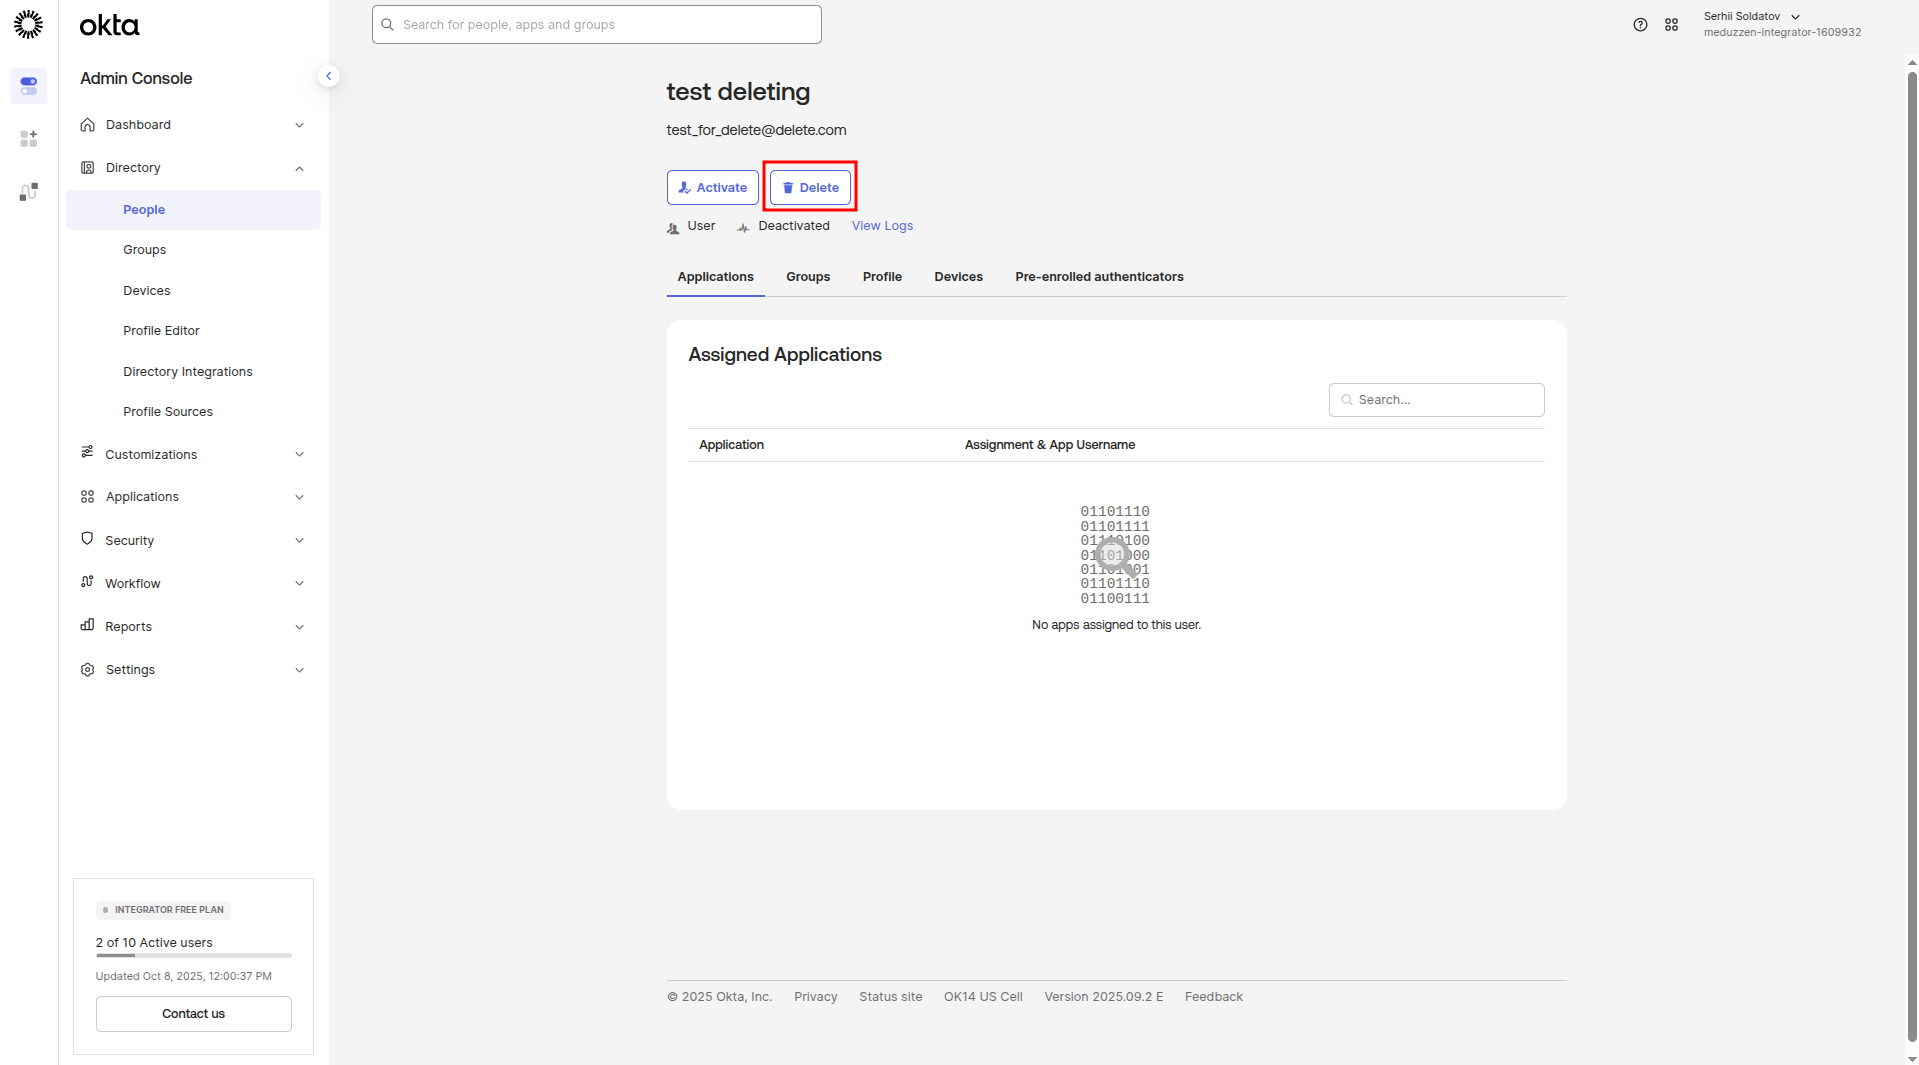
In the side menu, navigate to the People page and select the the user which you want to delete:
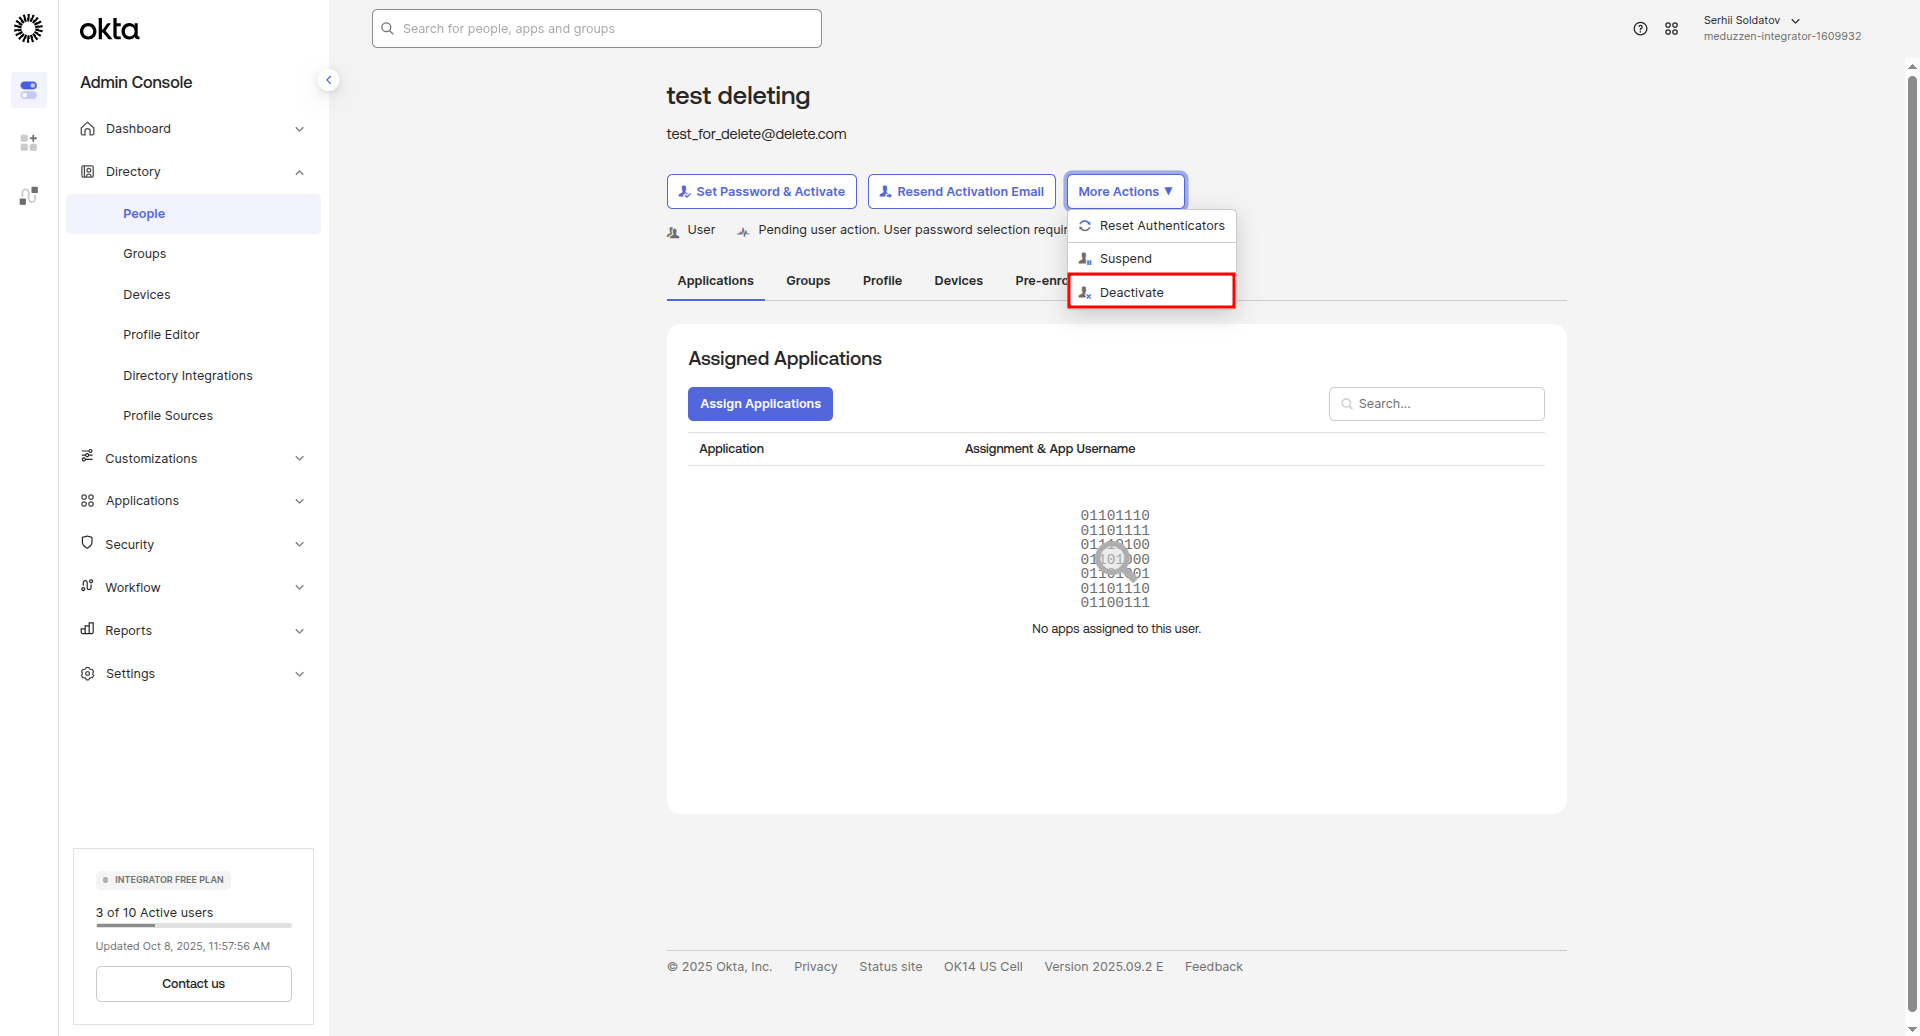
You will be redirected to the User Profile page. Click on the More Actions button, then click Deactivate to deactivate the user.
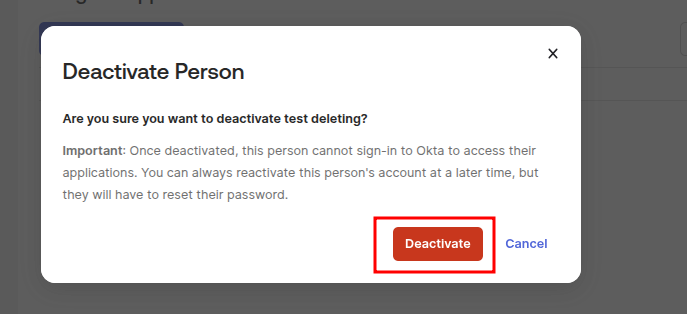
A modal window will appear with. Click Deactivate.
Then after the user deactivated, the Delete button will appear. Click Delete to completely delete the user from IAM.
A modal window will appear with. Click Delete.
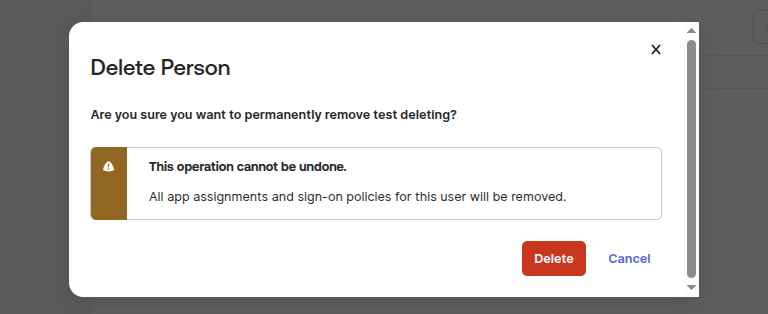
After this, the selected user will be completely deleted from Okta IAM.
If a user with the same email exists in your application, that user will also be soft-deleted in your application.
(Optional) Multi Factor Authentication
Configuring Global Session Policy
Multi-Factor Authentication (MFA) adds an additional layer of security to user login. When enabled, users must verify their identity using a second factor, such as the Okta Verify app, in addition to their password.
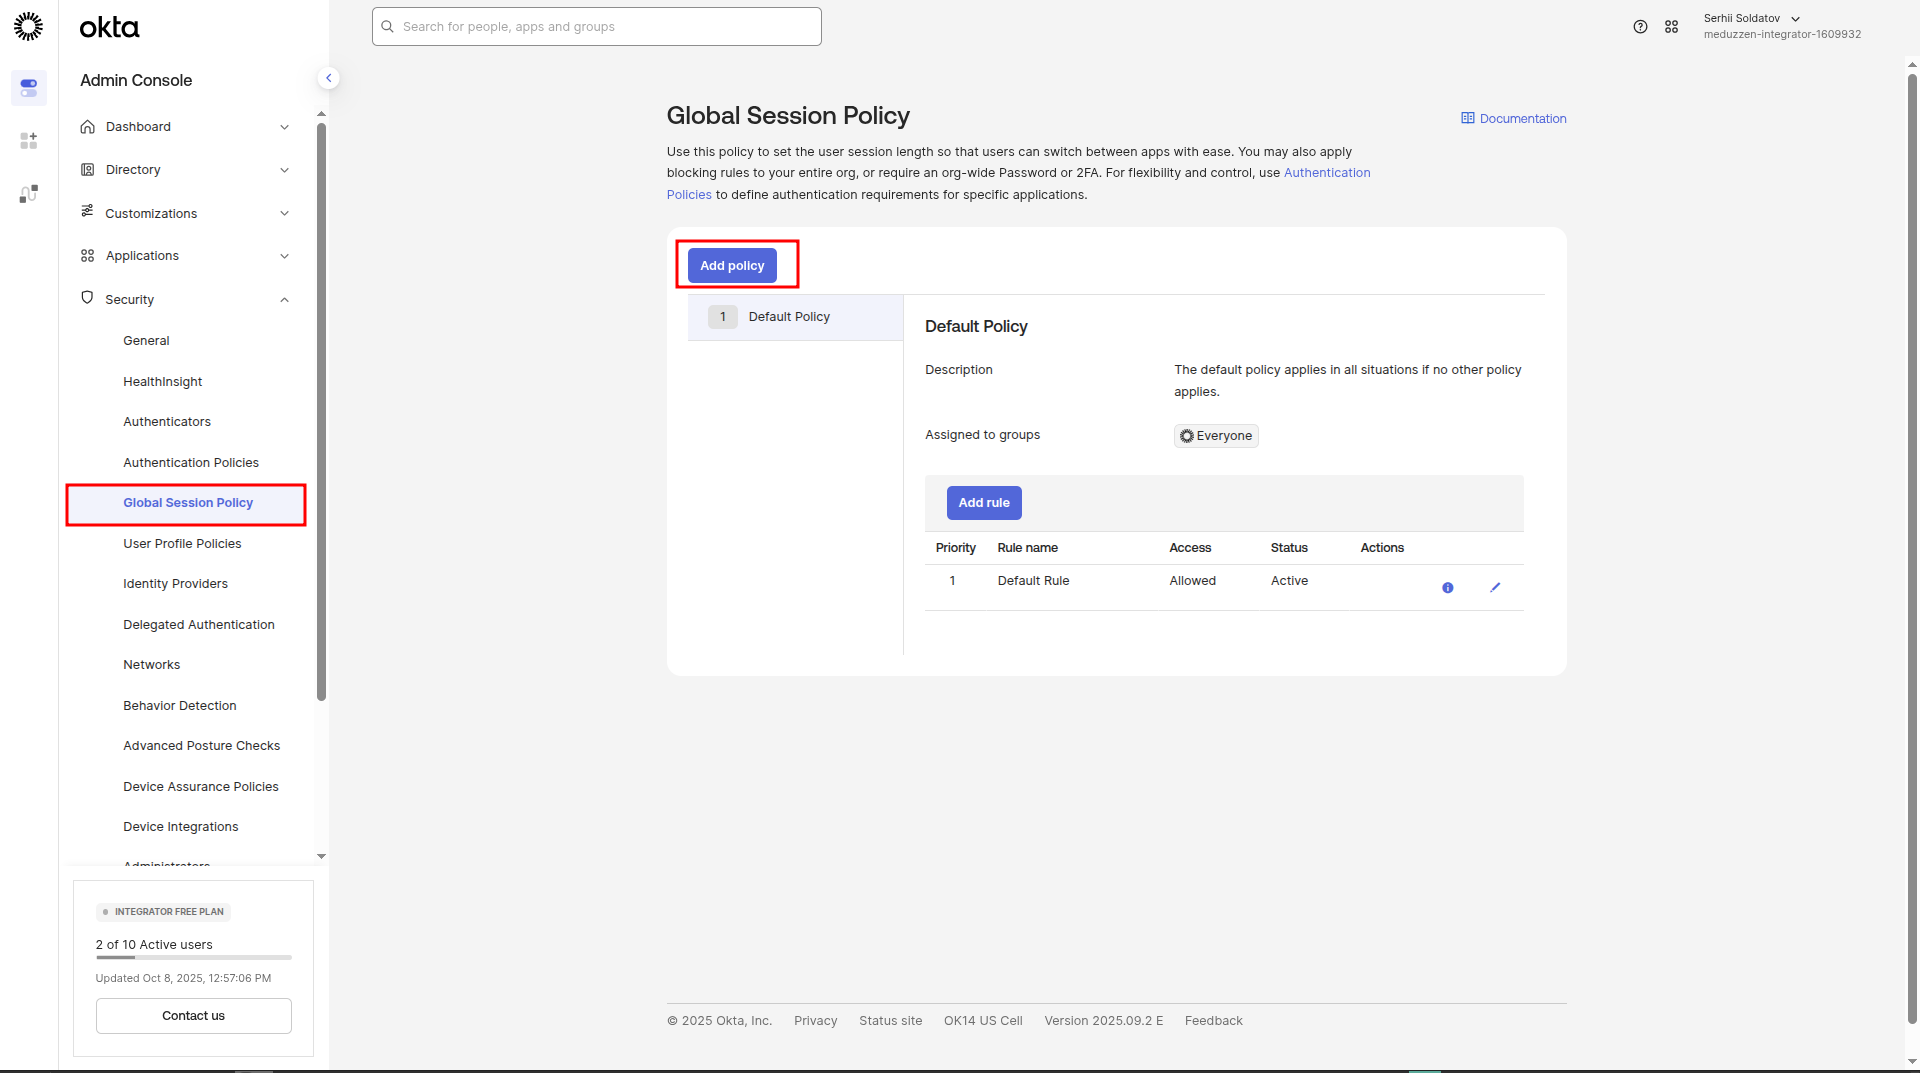
In the side menu, navigate to the Global Session Policy page. Сlick Add policy button
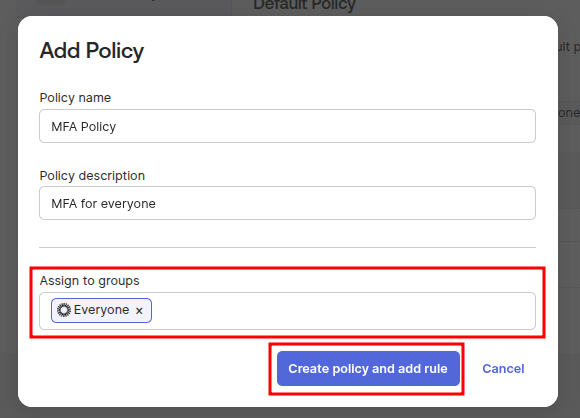
A modal window will appear. Enter Policy name, Policy Description and assign it to the group you want to enforce MFA for. In my case this will be a group of Everyone. Click Create policy and add rule.
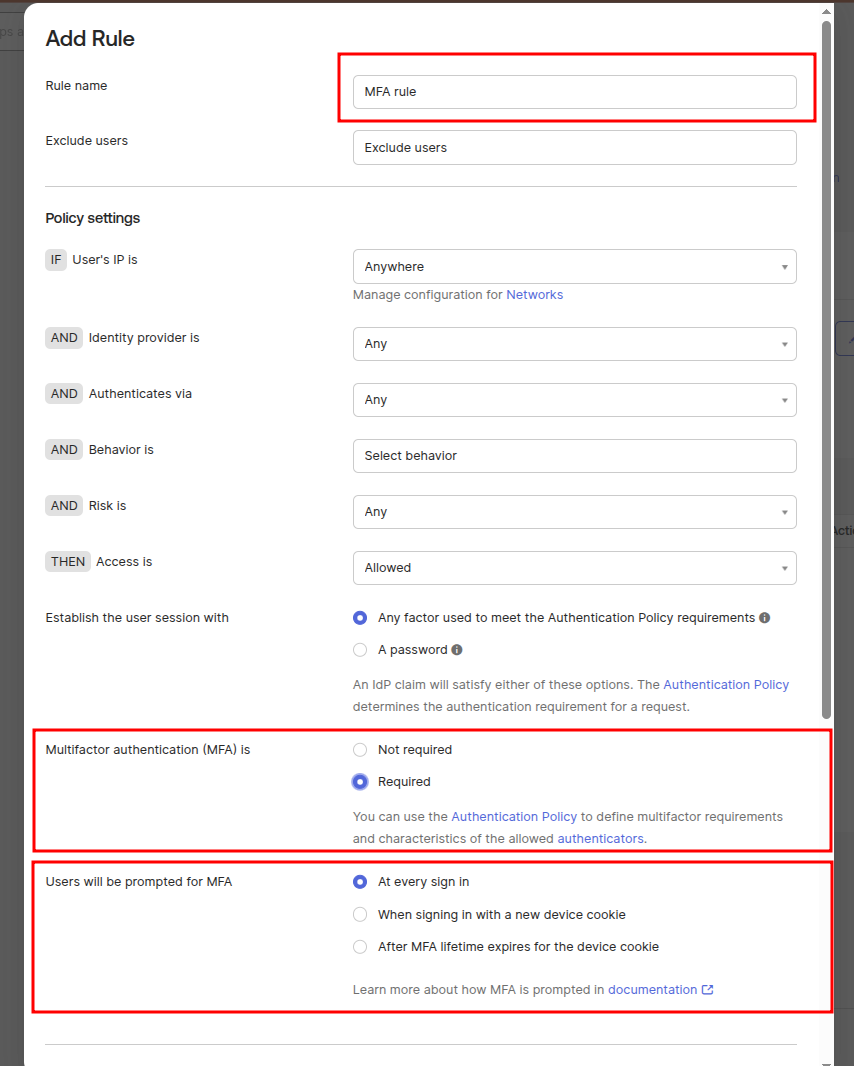
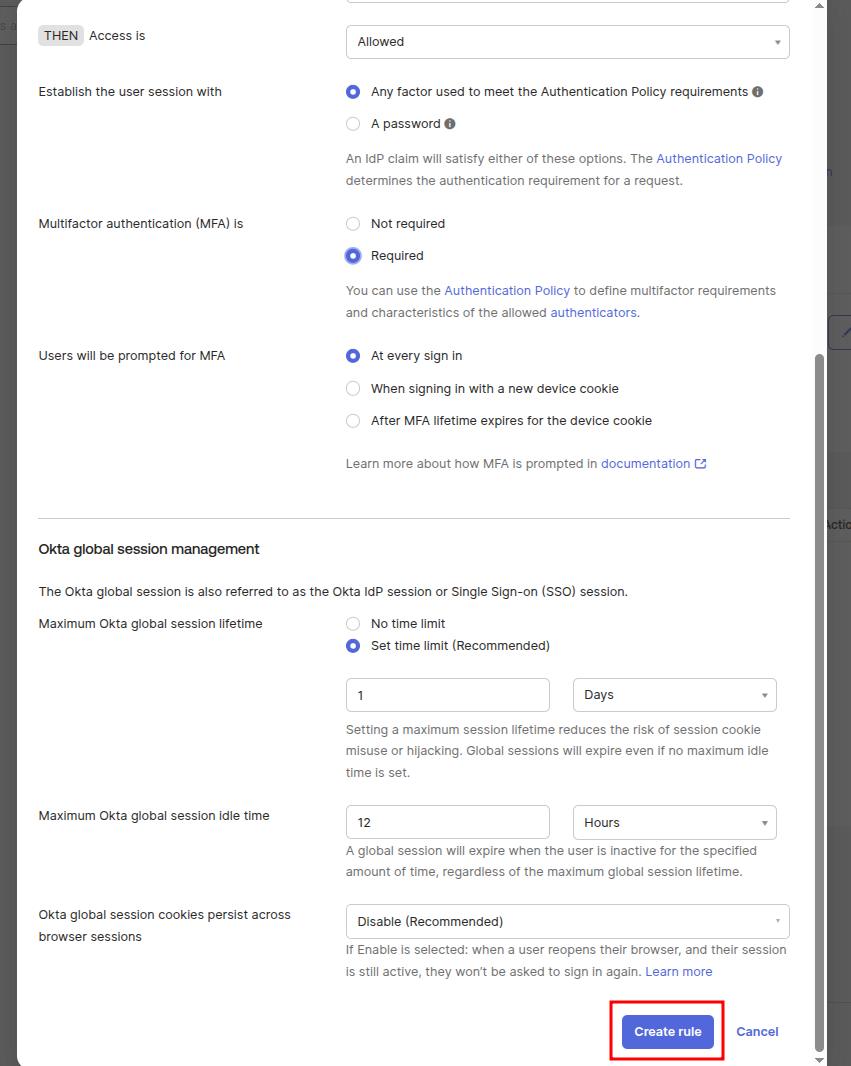
Another modal window will appear with adding policy rule. Enter Rule name, Set MFA to Required, In User will be prompted for MFA, select the desired option. Then click Create rule.
Configuring authentication policies
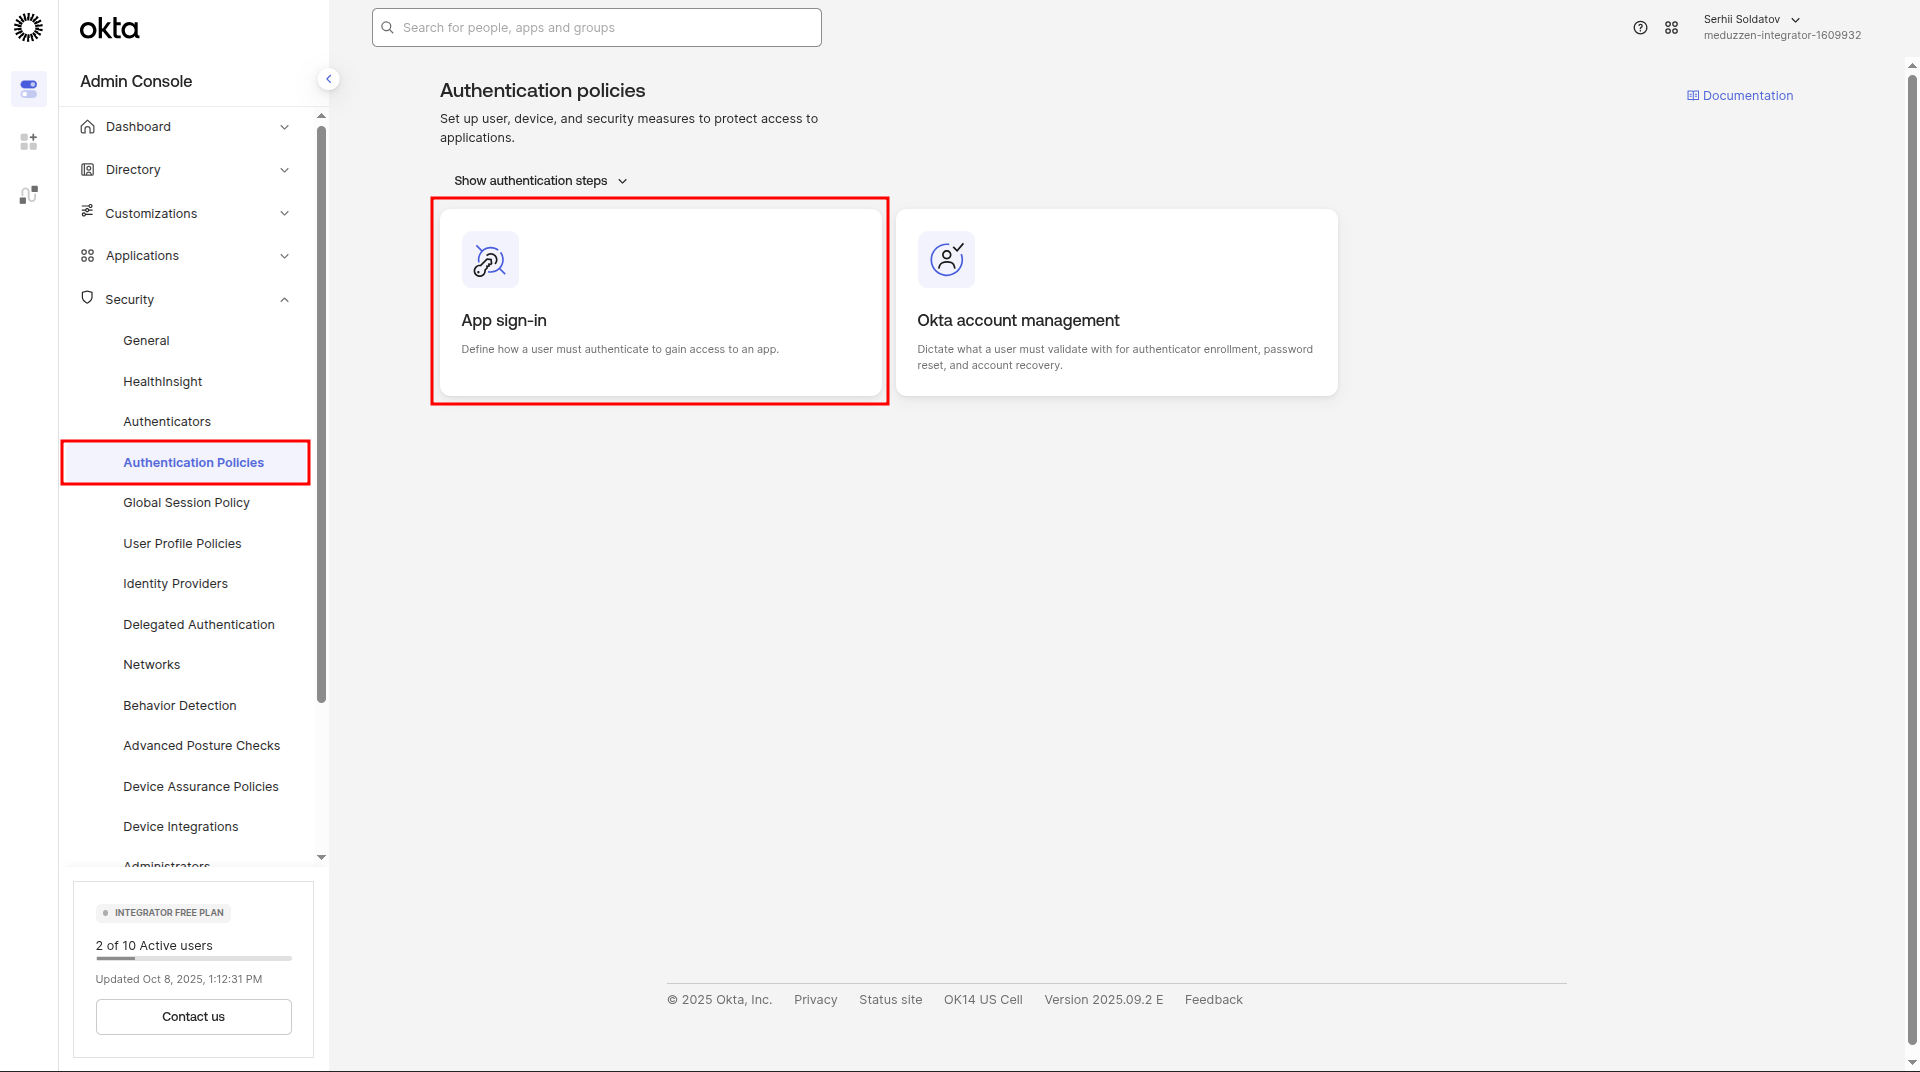
In the side menu, navigate to the Authentication Policies page and click on App sign-in button:
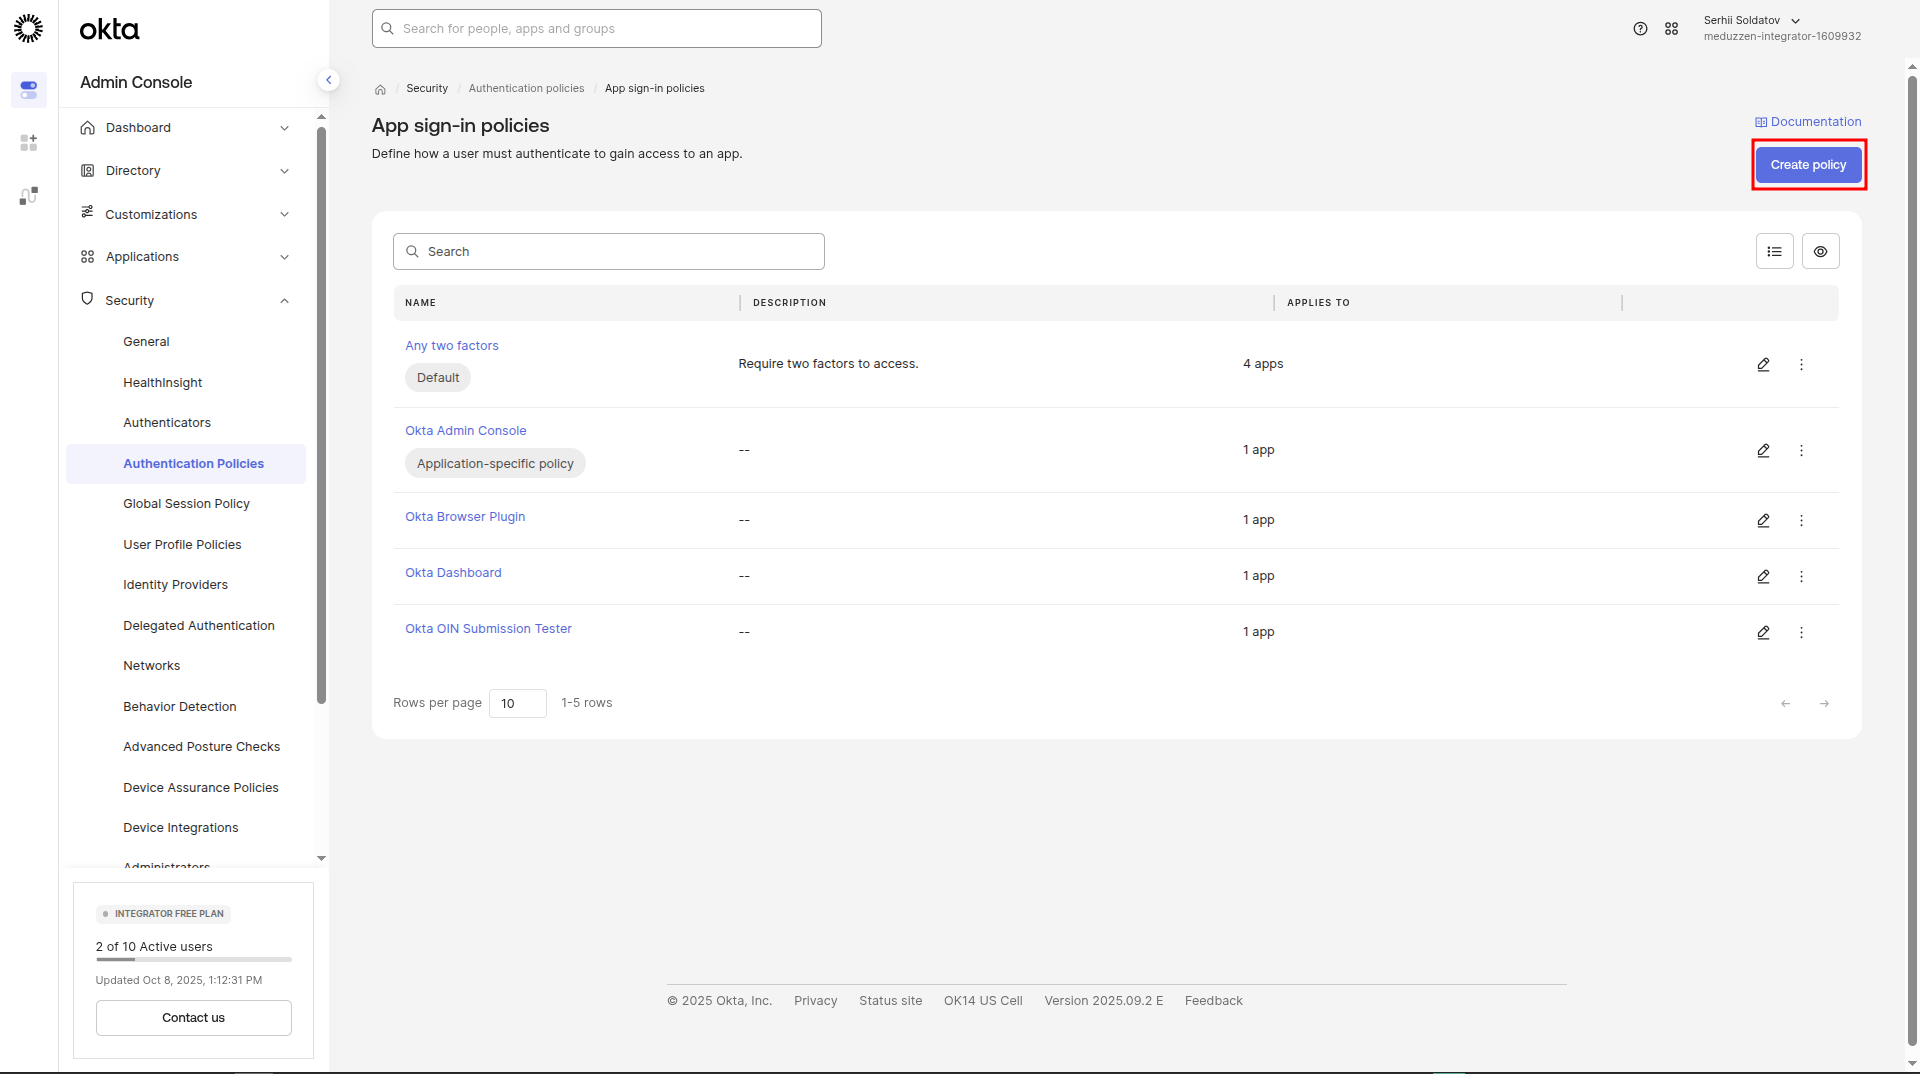
You will be redirected to the App sign-in policies page. Click Create policy to add a new policy.
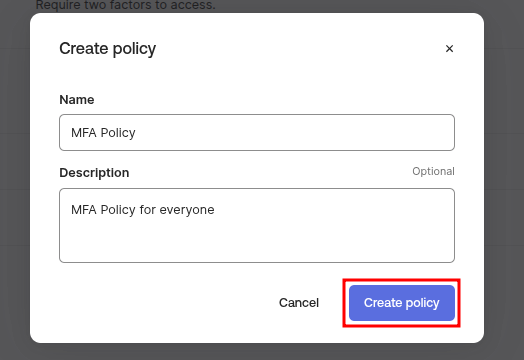
In the modal window, provide a Policy name and Description, then click Create Policy.
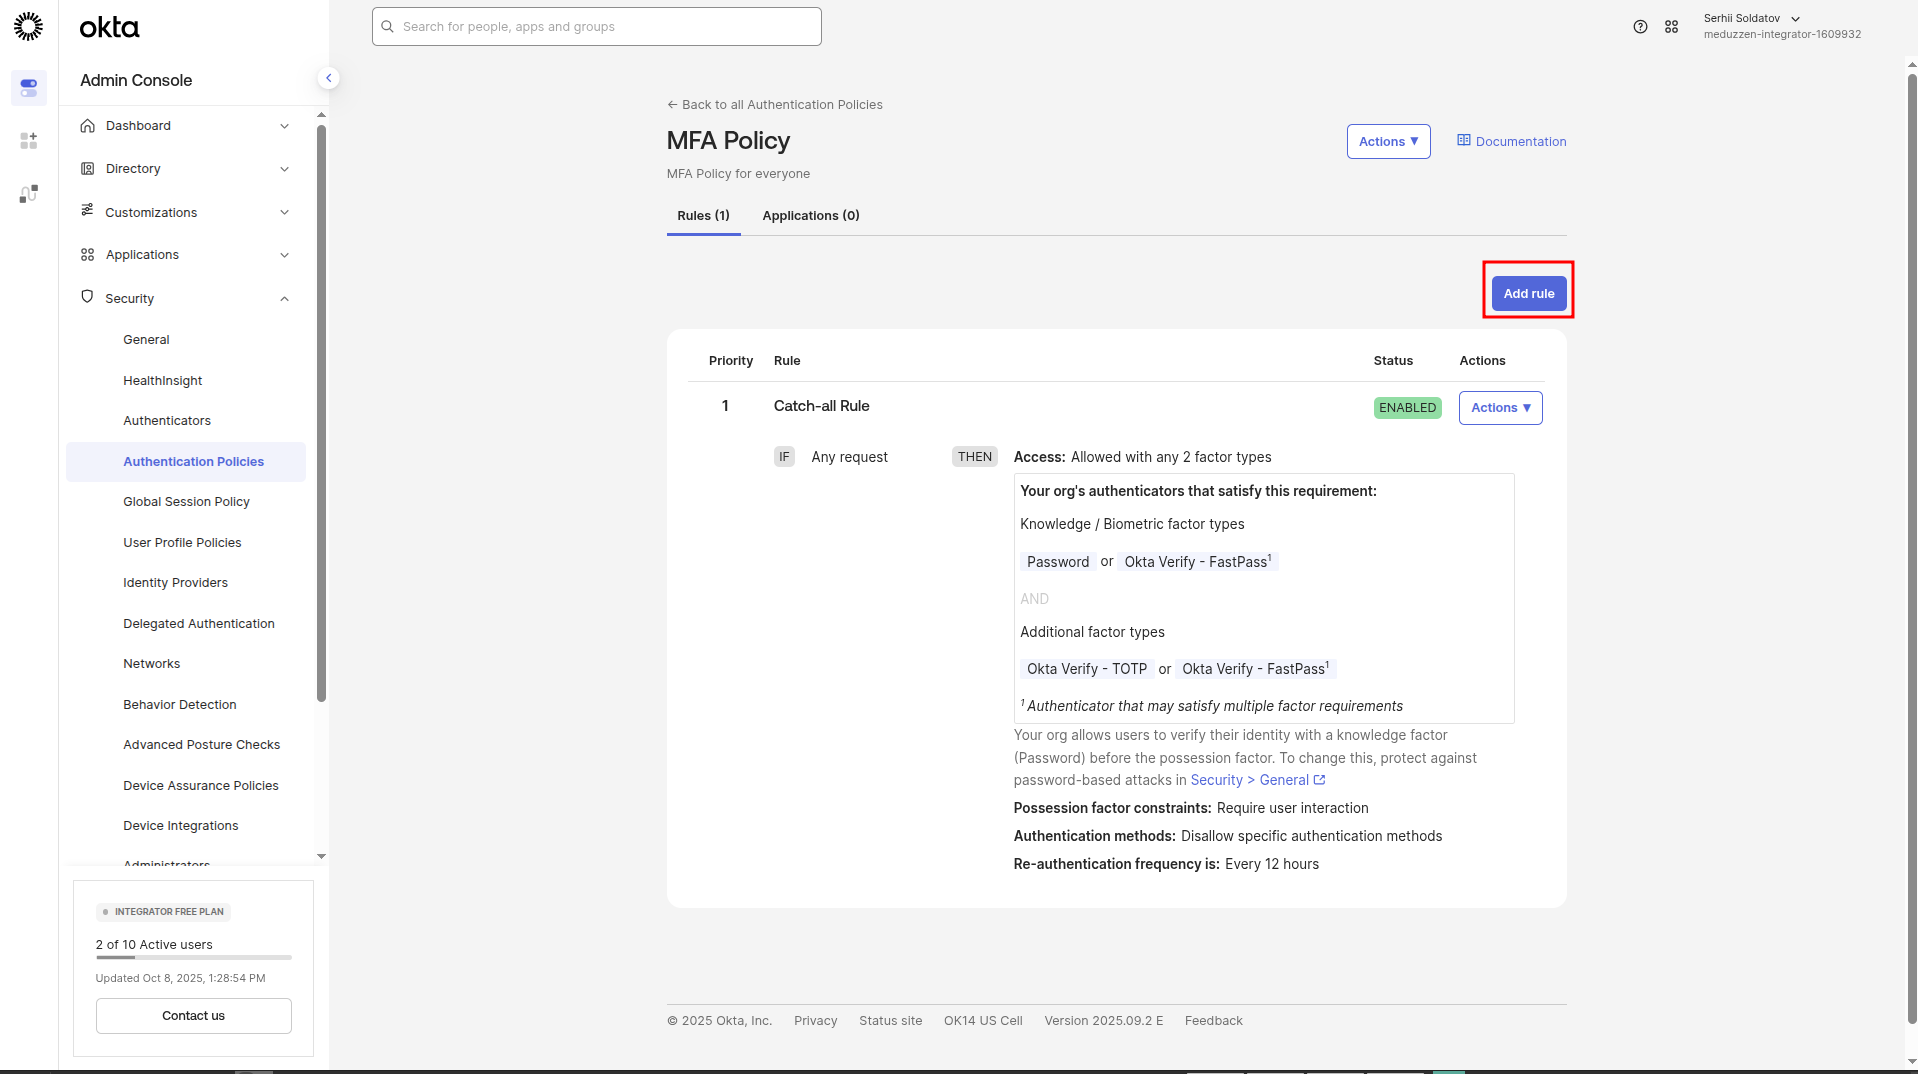
You will be redirected to your policy page. Click Add rule.
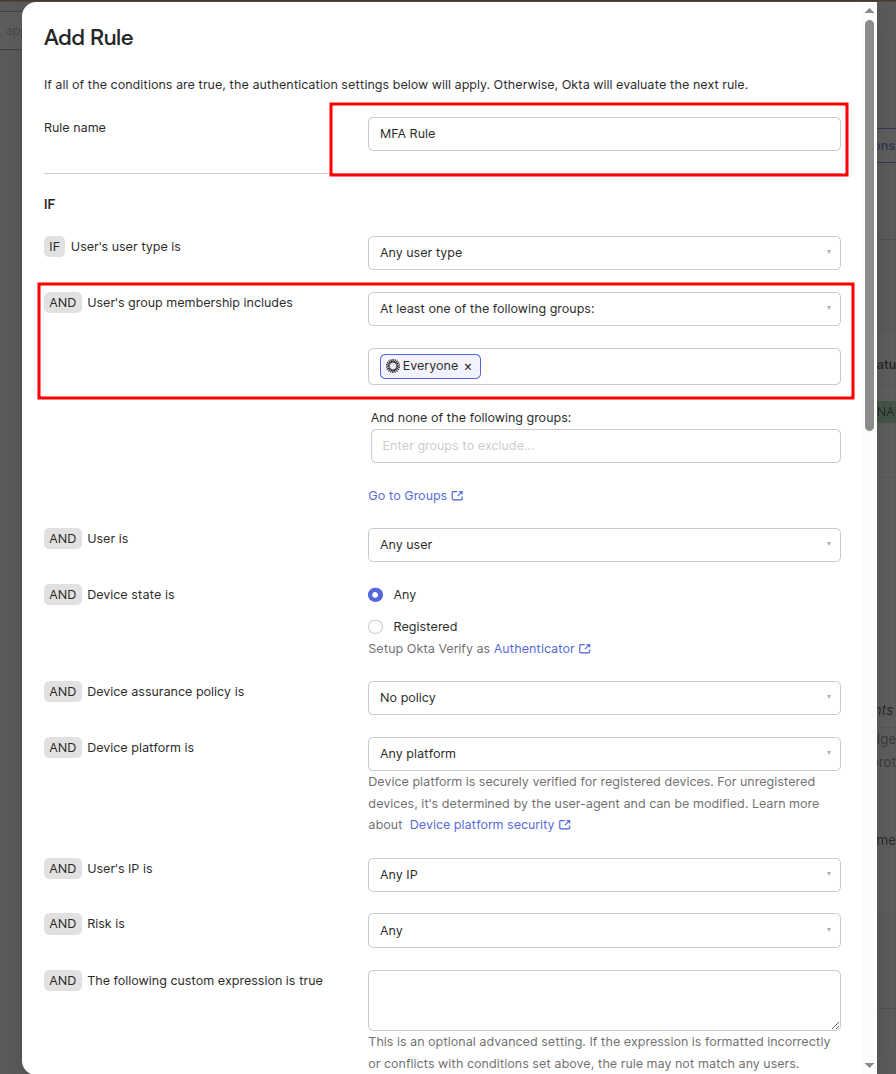
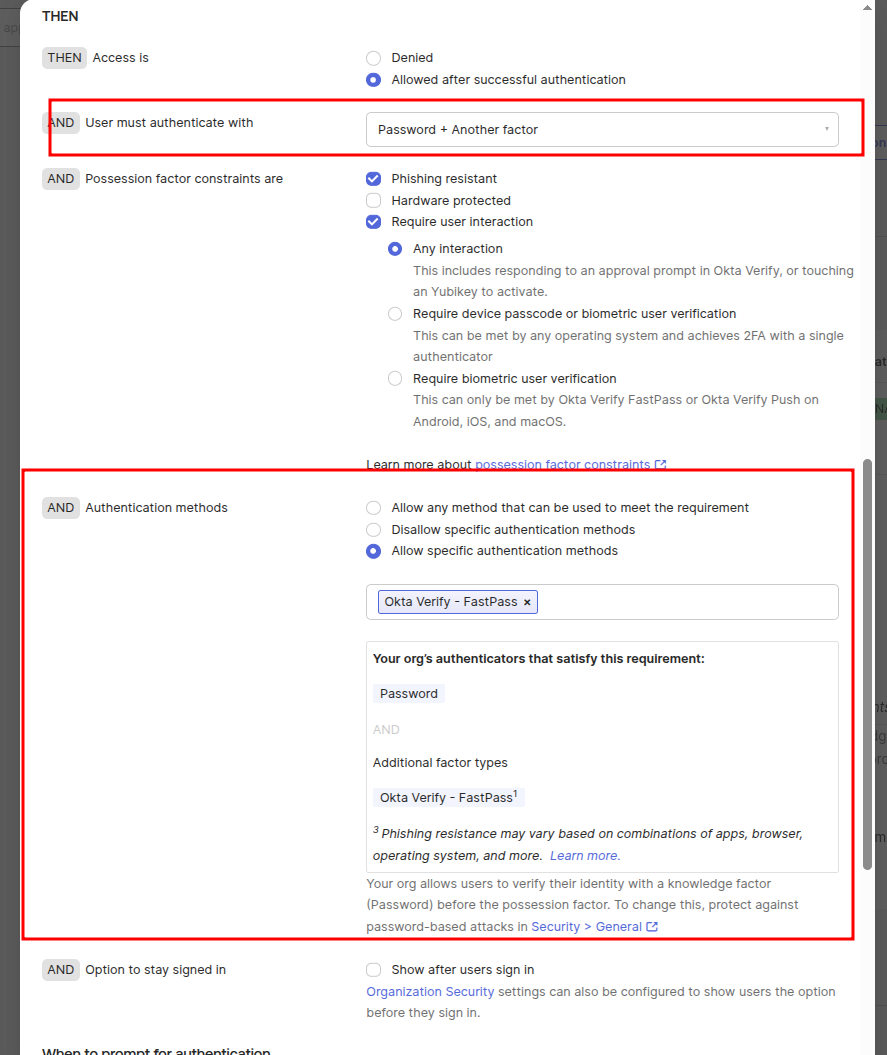
A modal window will appear. Enter rule name, select the Groups you want to enforce MFA for.Configure other fields as shown in the screenshots below. Then click Save.
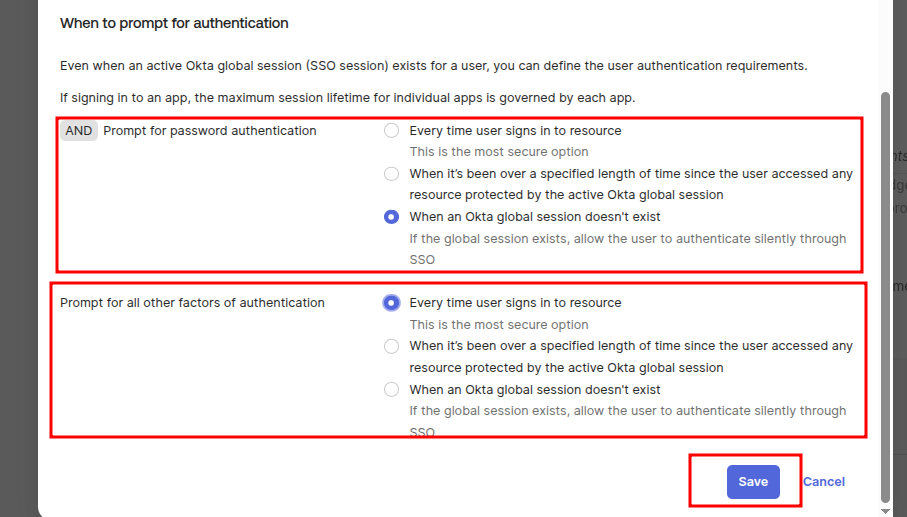
Your new authentication policy rule will be added.
Configuring Authenticators
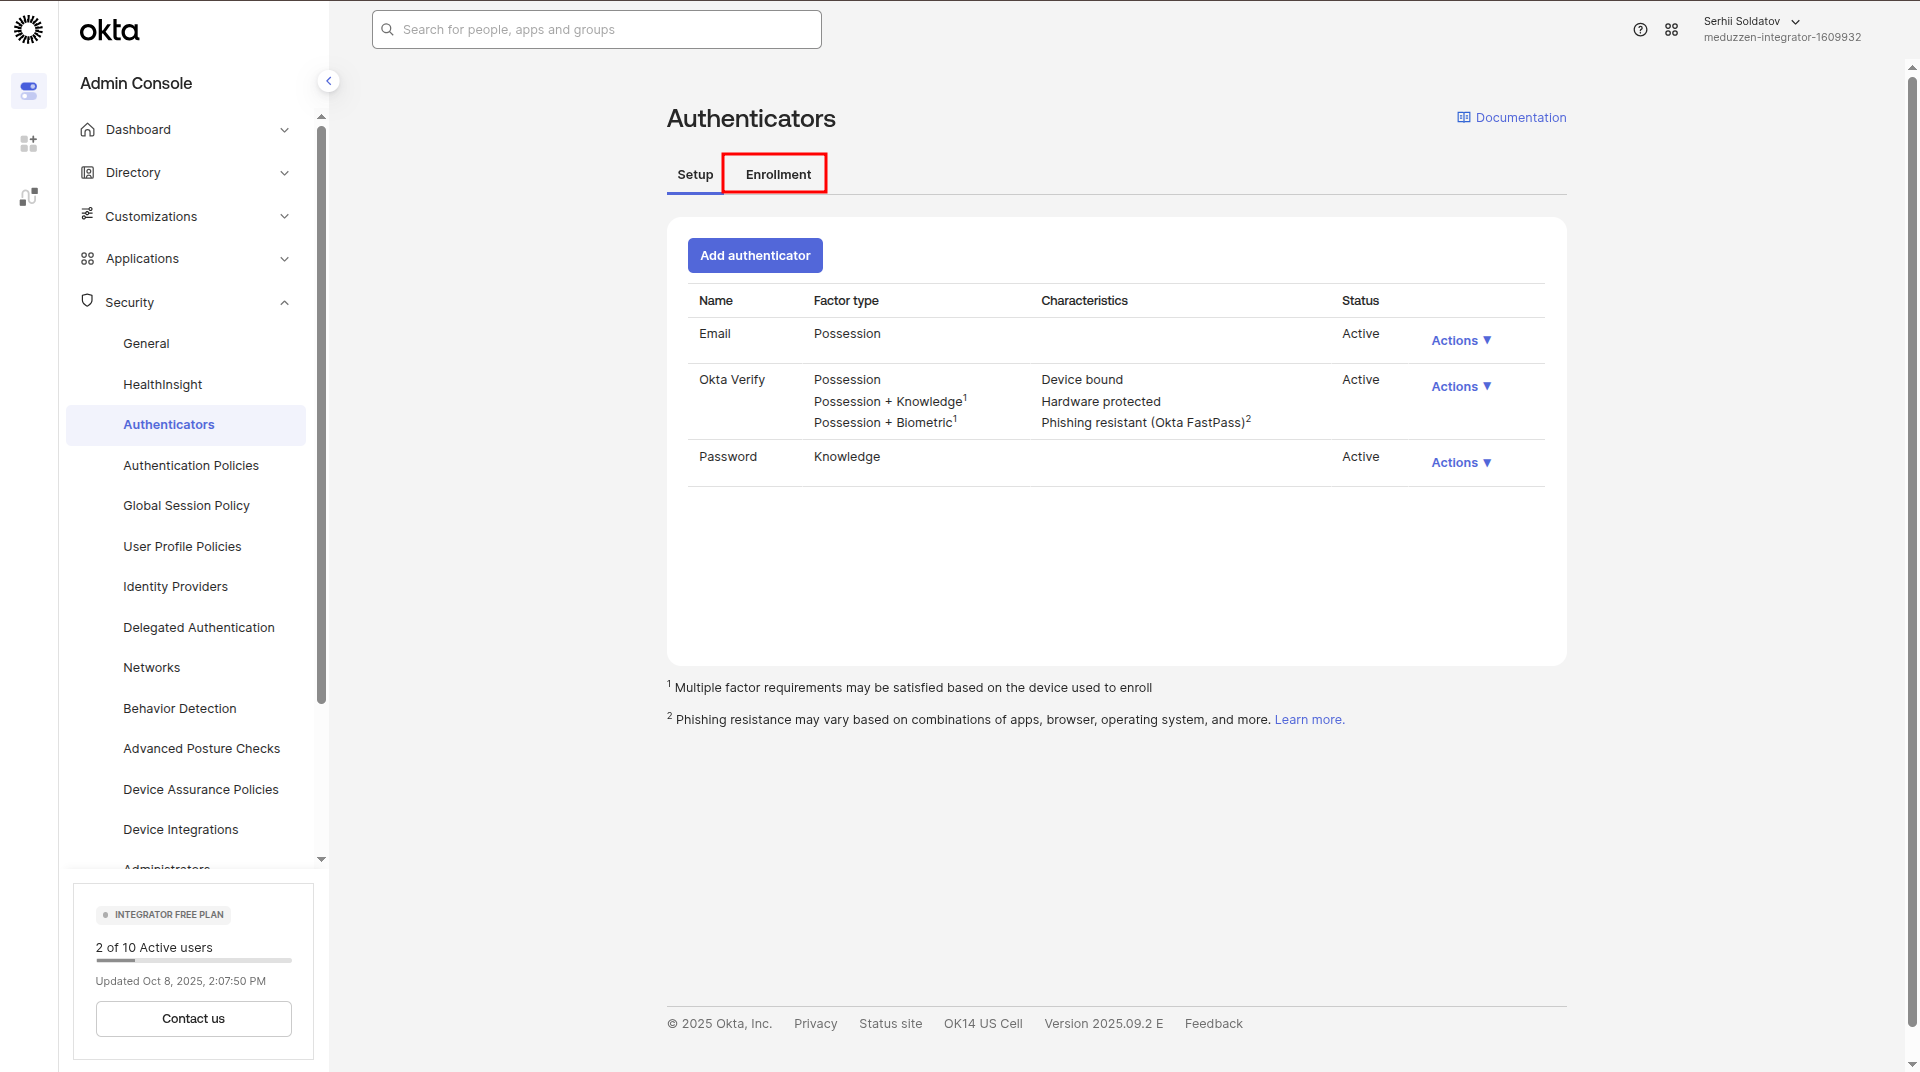
In the side menu, navigate to the Authenticators page and click on Enrollment tab:
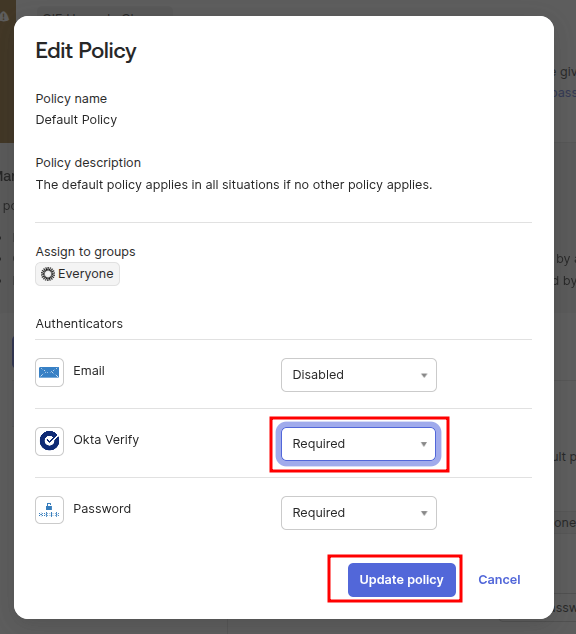
Then click Actions next to the default policy and select Edit.

In the modal window that appears, ensure that Okta Verify is set to Required, then click Save.
✅ That's it!
Okta Multi-Factor Authentication (MFA) is now successfully configured.
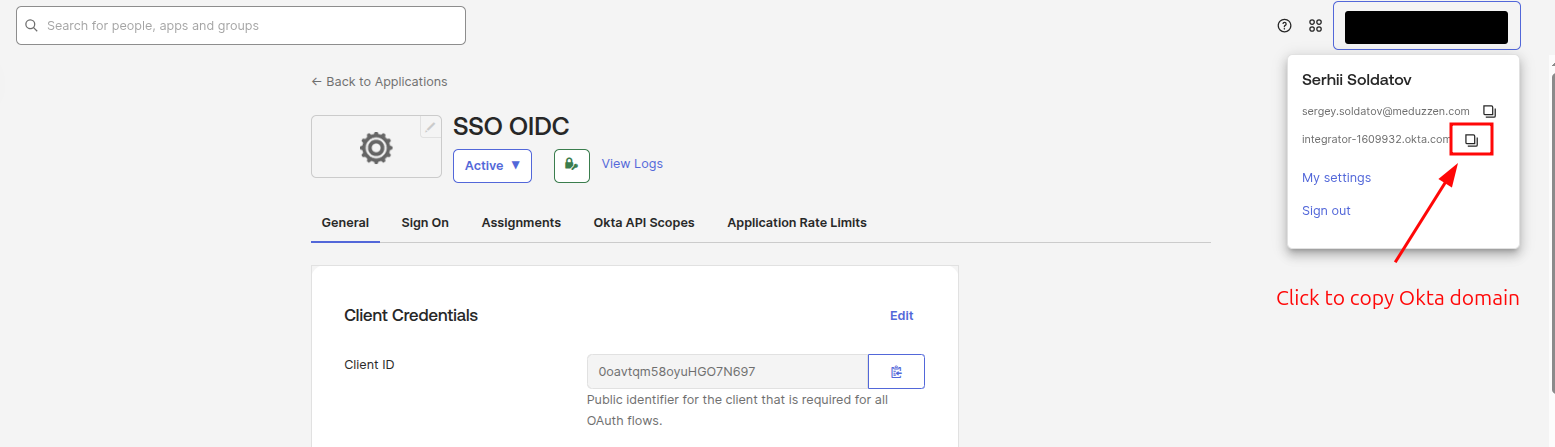
How to connect to your application
To enable Okta login for your users in your application, you need to retrieve the following three parameters:
Client ID
Client Secret
Okta domain
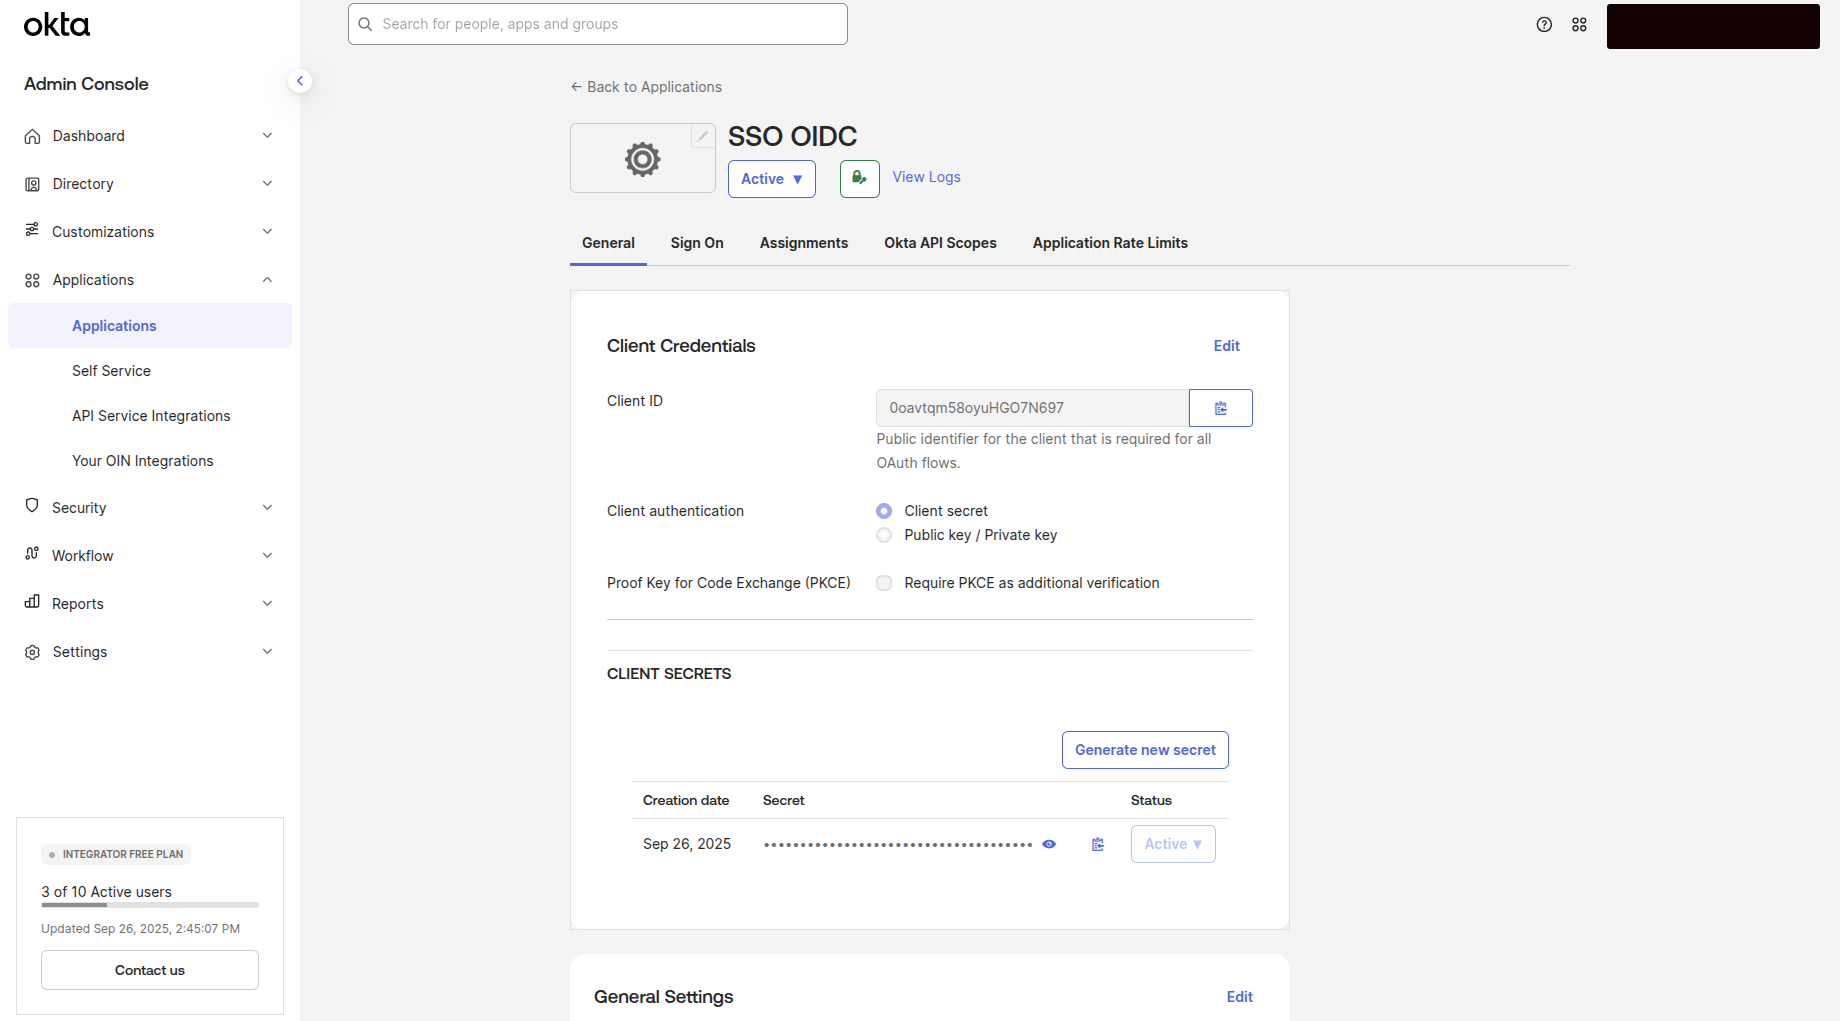
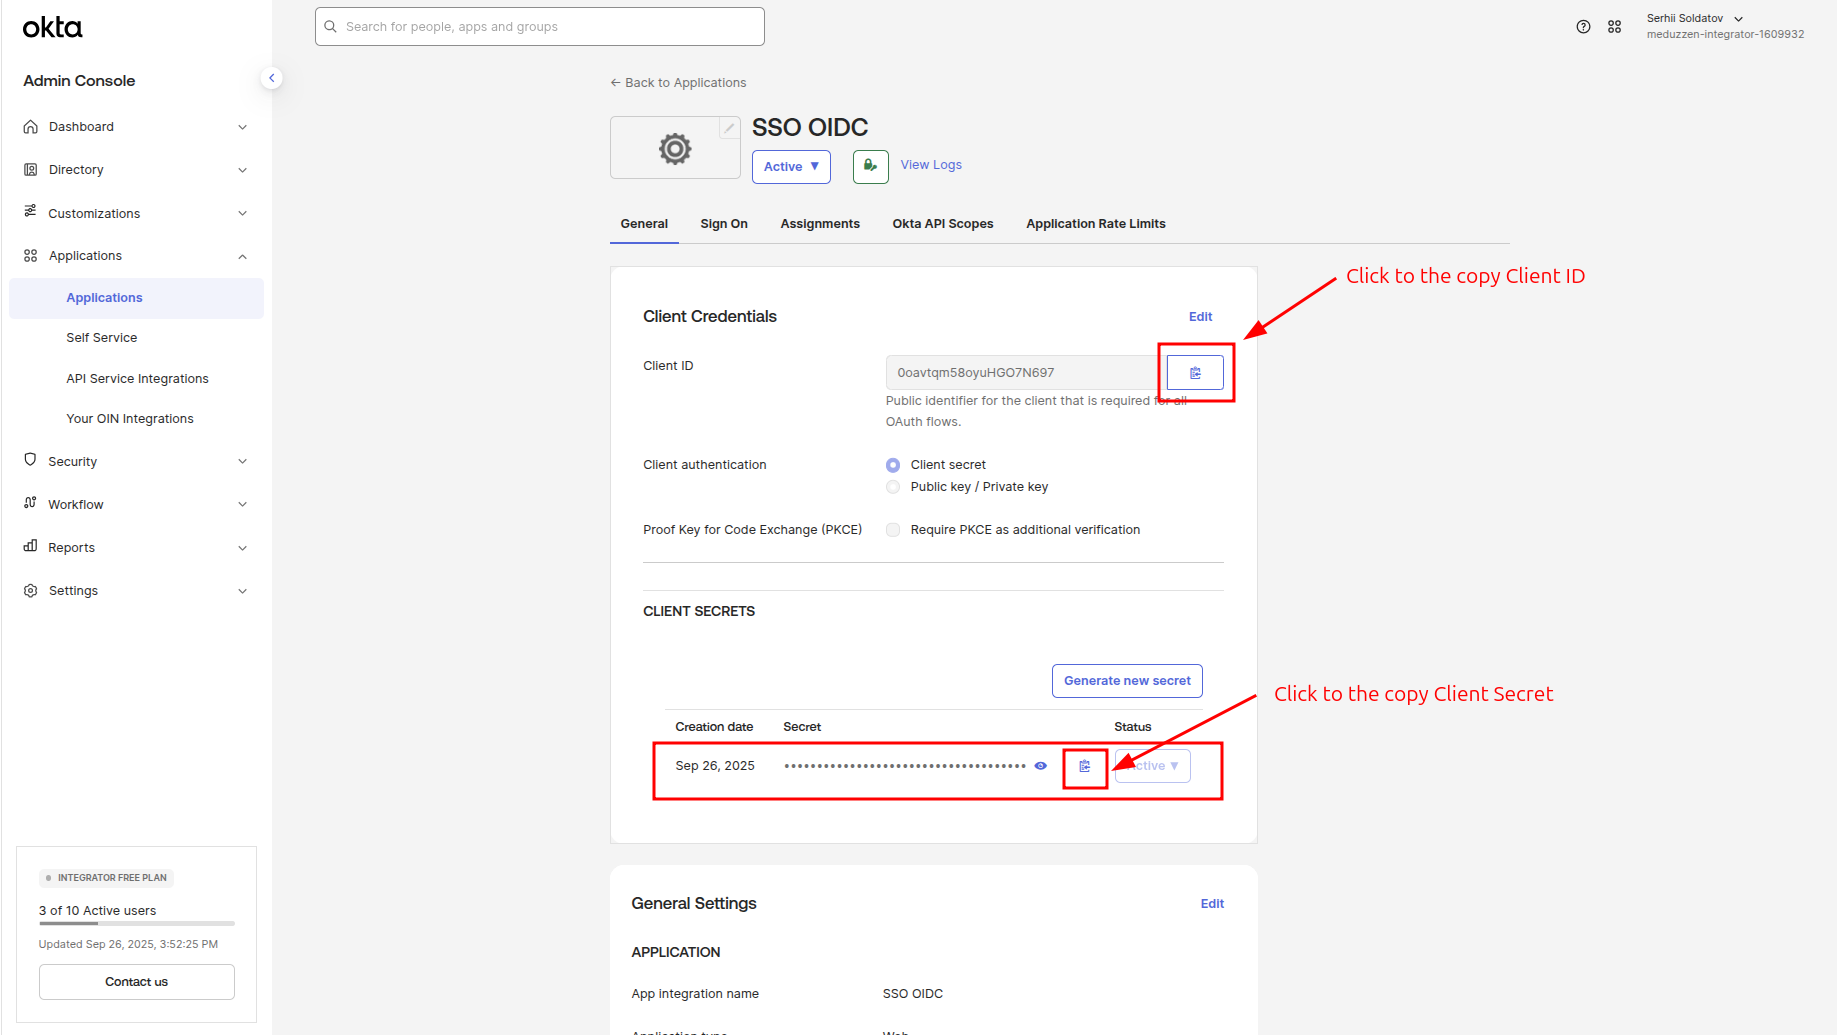
You can find this data on our Application details page. In the side menu (Okta panel), navigate to the Applications
Choose an application which you created previously. In my case, it is an SSO OIDC (marked below)

Instructions for copying the whole information that we should fill in your application can see below
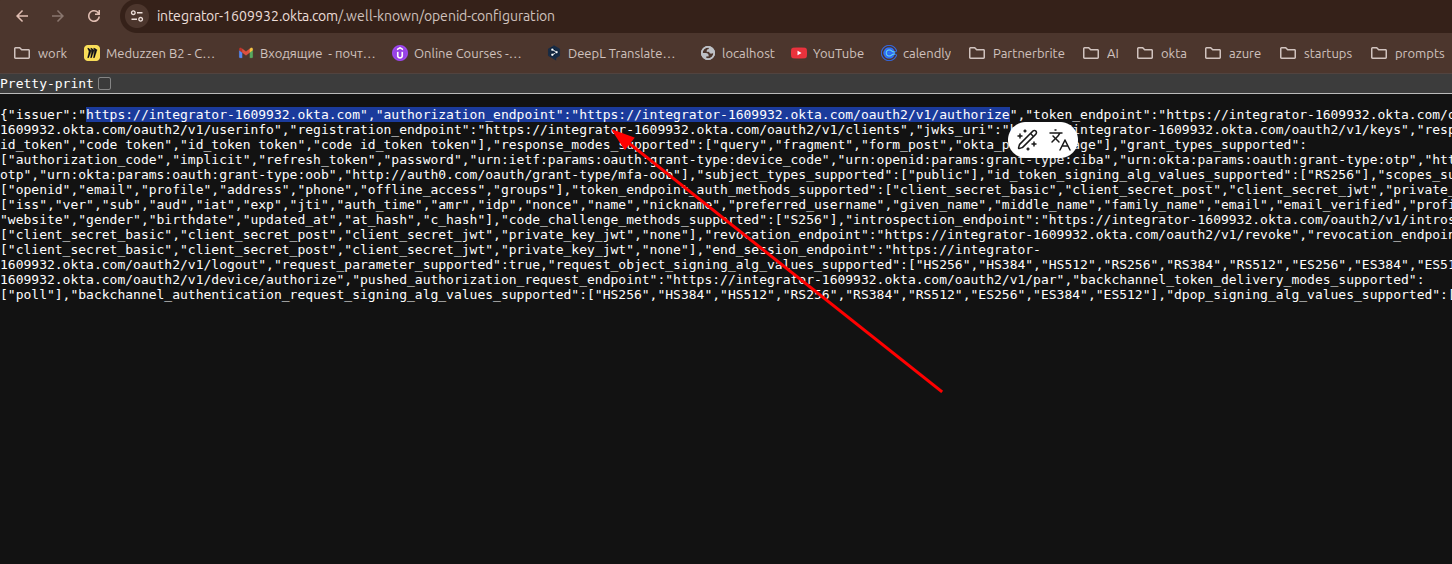
Copy a issuer URL
To obtain the Issuer URL for your application, open: https://{yourOktaDomain}/.well-known/openid-configuration (In my case it is: https://integrator-1609932.okta.com/.well-known/openid-configuration)
Then copy the value of the issuer field from the returned JSON:
✅ Now, you have all the required credentials to connect to your application!
