

How to Configure AWS Cognito for SSO: A Step-by-Step Guide
Creating App Client for Each Customer
According to the multi-tenant application model, we need to create a separate Cognito App Client for each customer and attach their corresponding external OIDC providers.
Step 1: Creating Application Client
To create App Client navigate to Application - App client, click to Create App Client
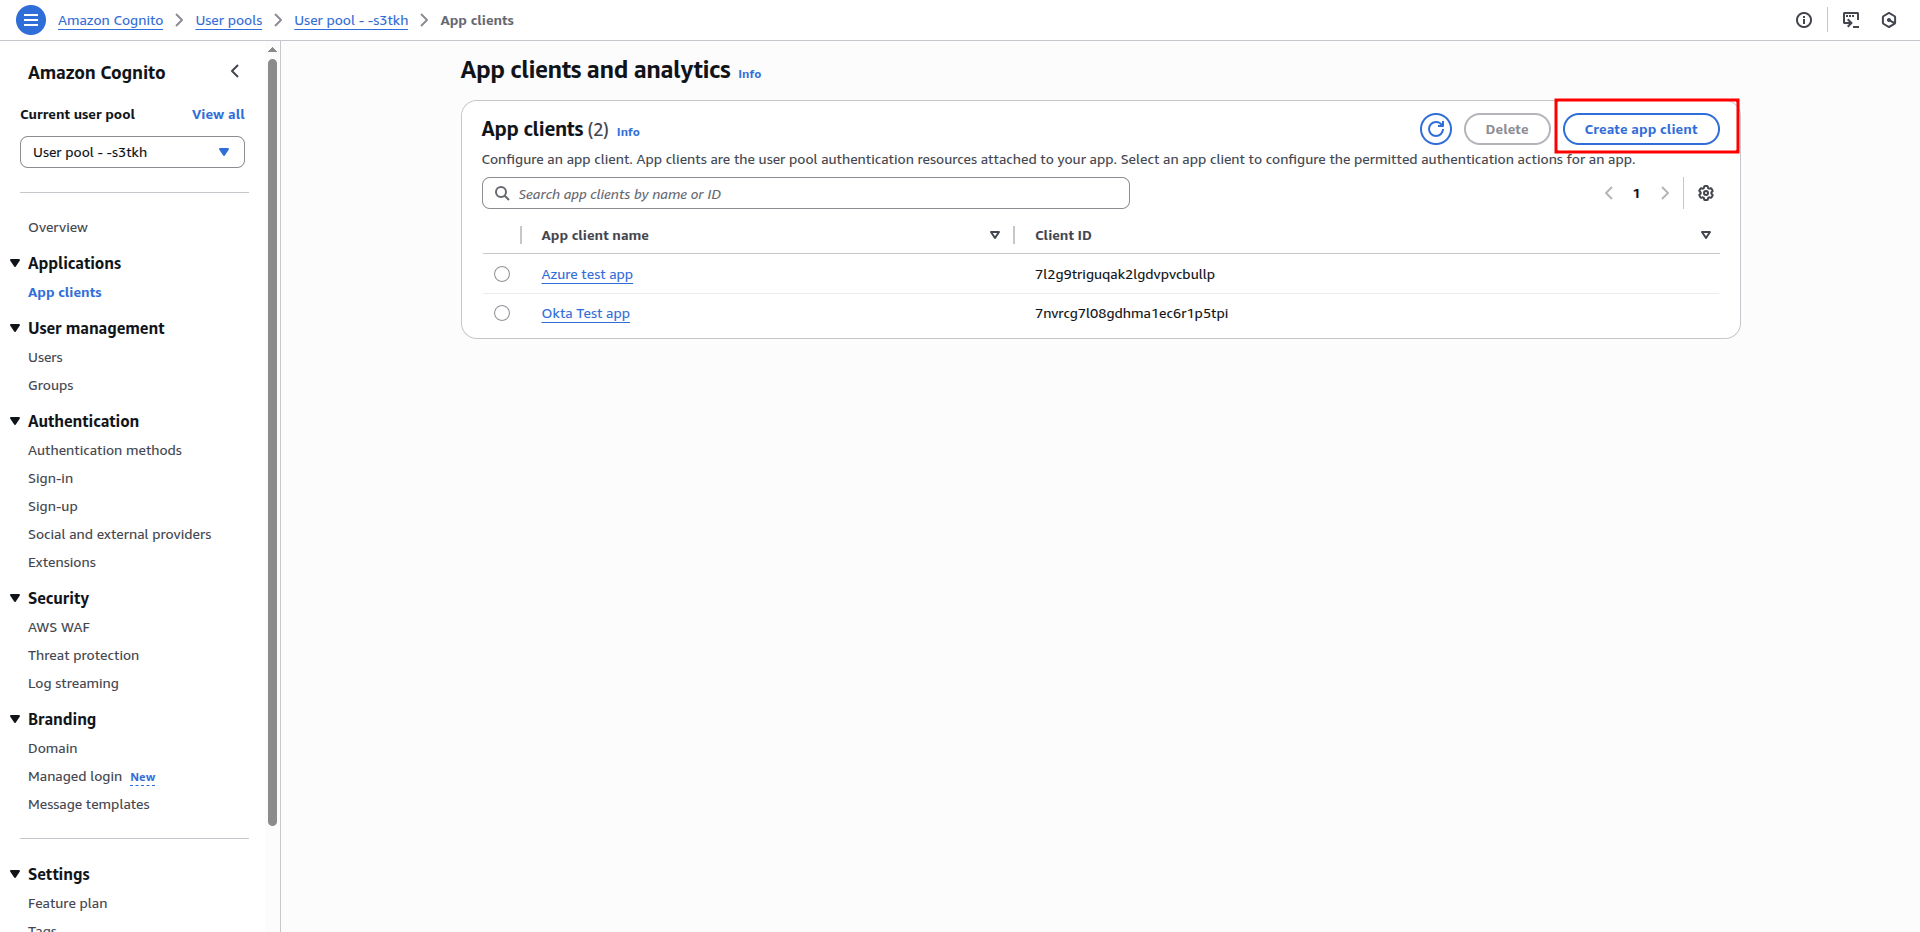
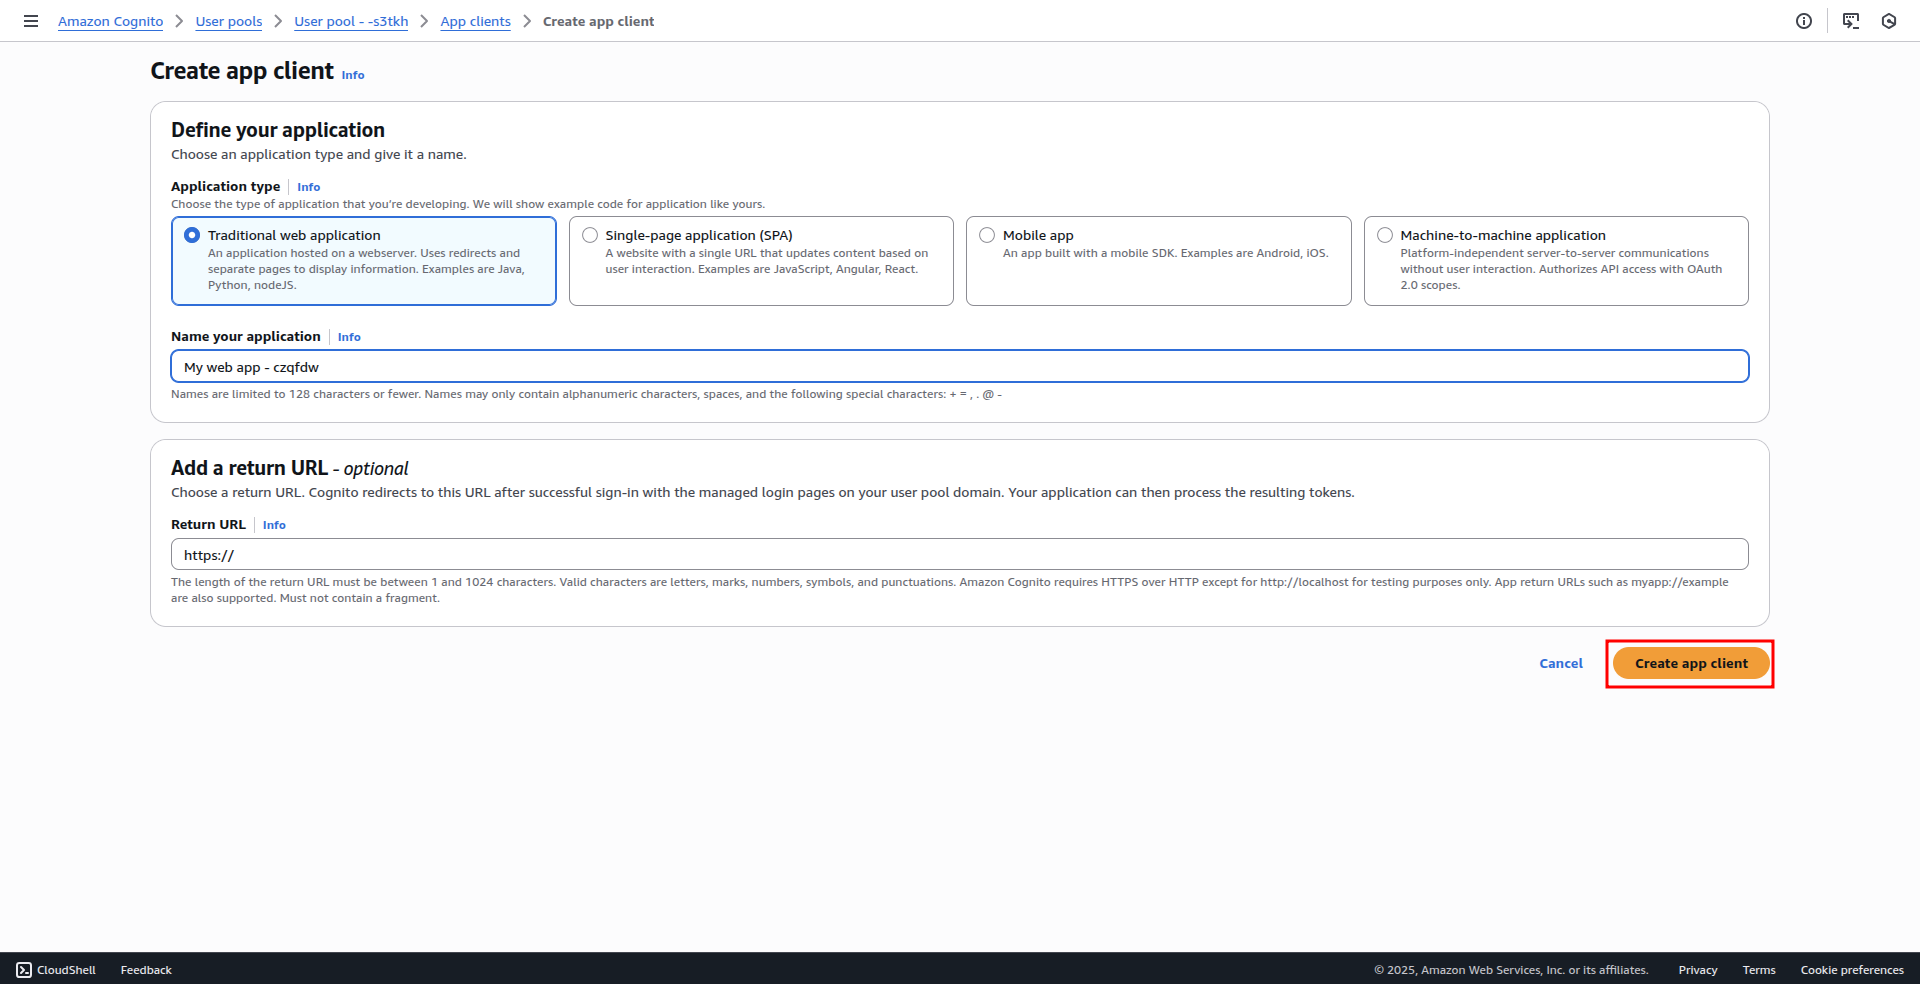
In the setup form, choose Traditional web application as the application type.
Step 2: Adding custom attribute
To include user groups in the ID token, we need to add a custom attribute to the Cognito User Pool.
- Navigate to Authentication - Sign Up, then click Add custom attribute:
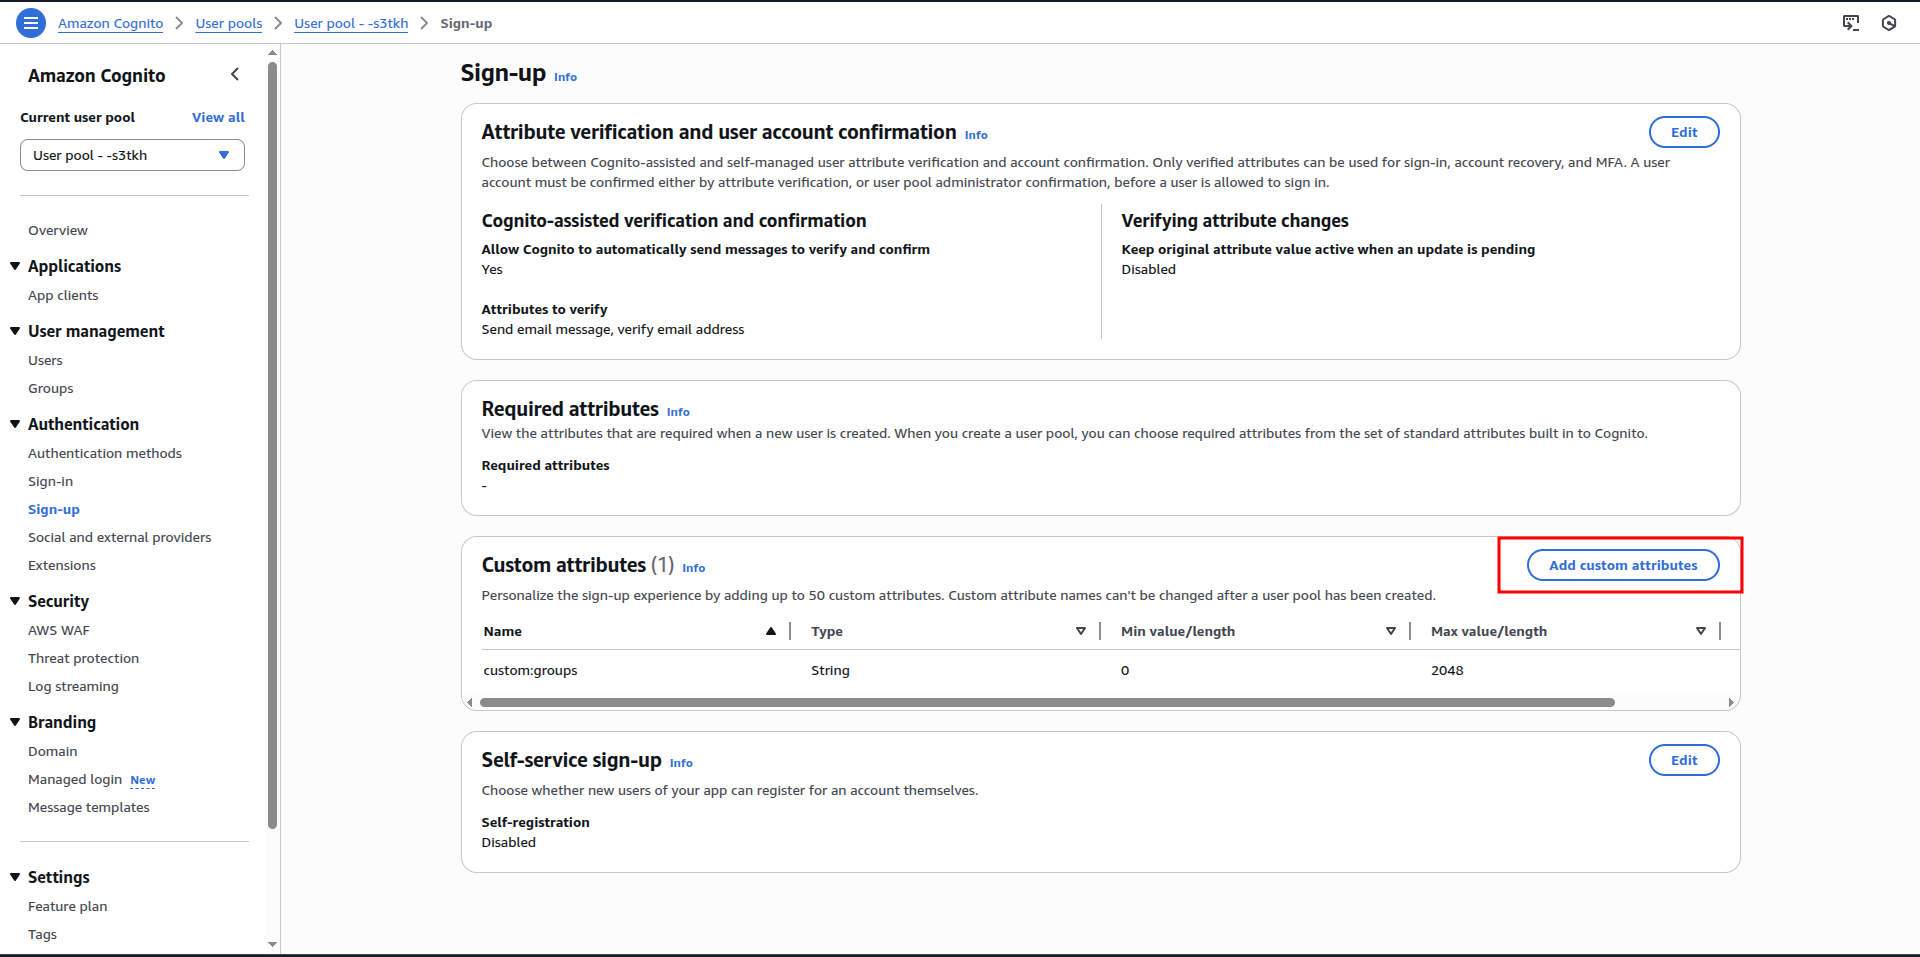
In the form, enter the attribute name as shown below, and then click Save changes.
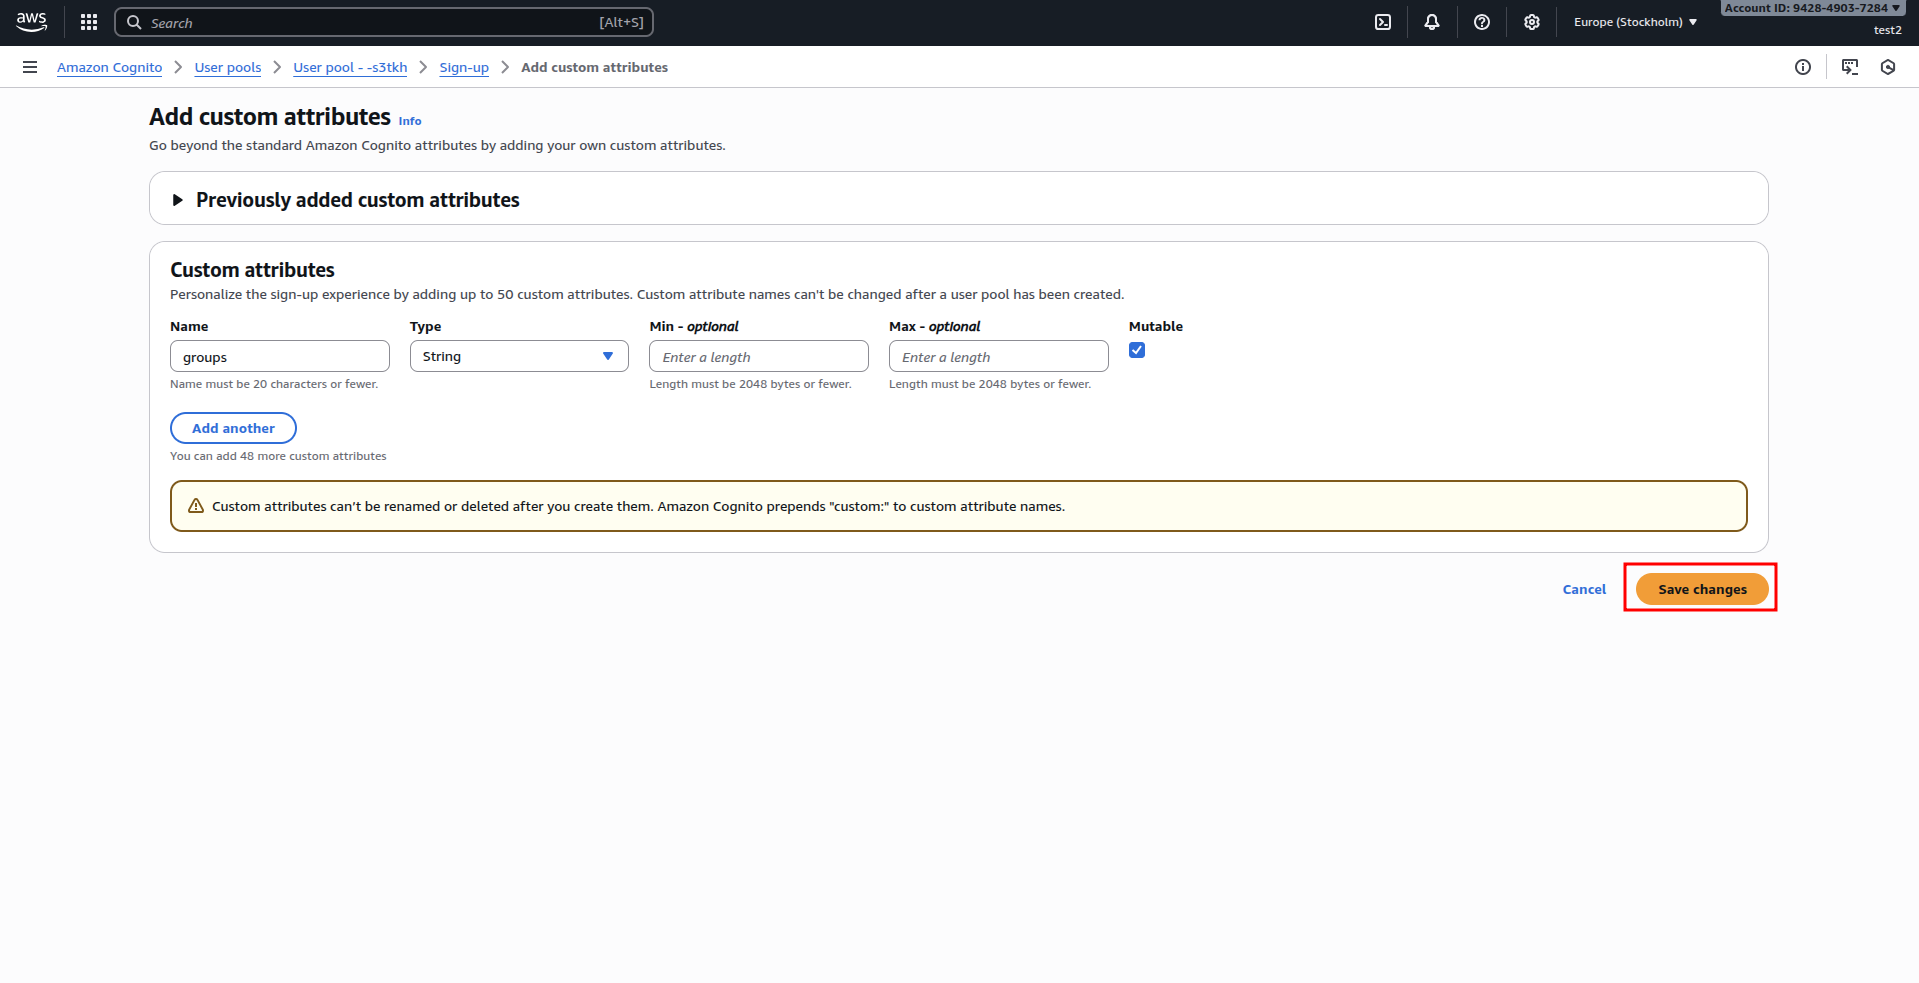
Adding roles custom attribute
If “roles” scope is configured in Customer OIDC provider, you can add a custom “roles” attribute as well and include this attribute in External Cognito Provider.

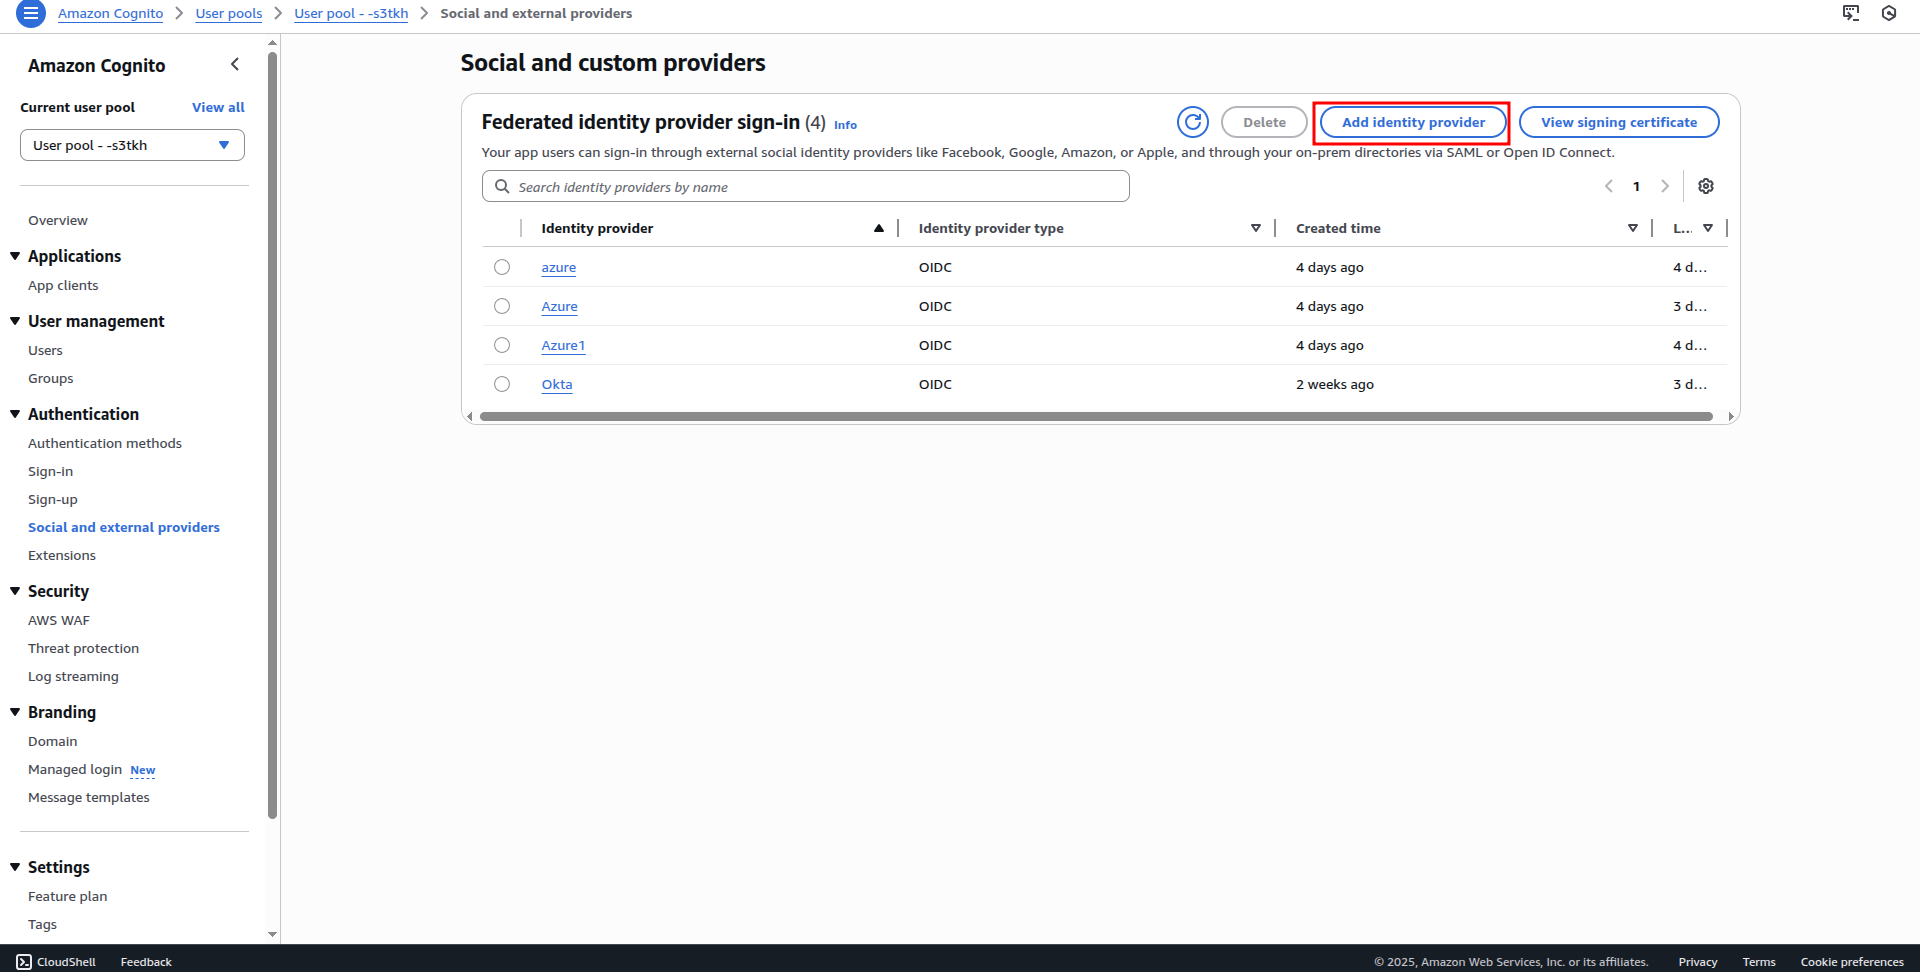
Step 3: Creating External Provider
- Navigate to Authentication - Social and external providers
In from enter your OIDC Provider credentials, Client ID, Client Secret and Issuer URI.
Add custom “groups” attributes that you created in the previous step and include email attributes. (username will be added automatically after you created the provider).
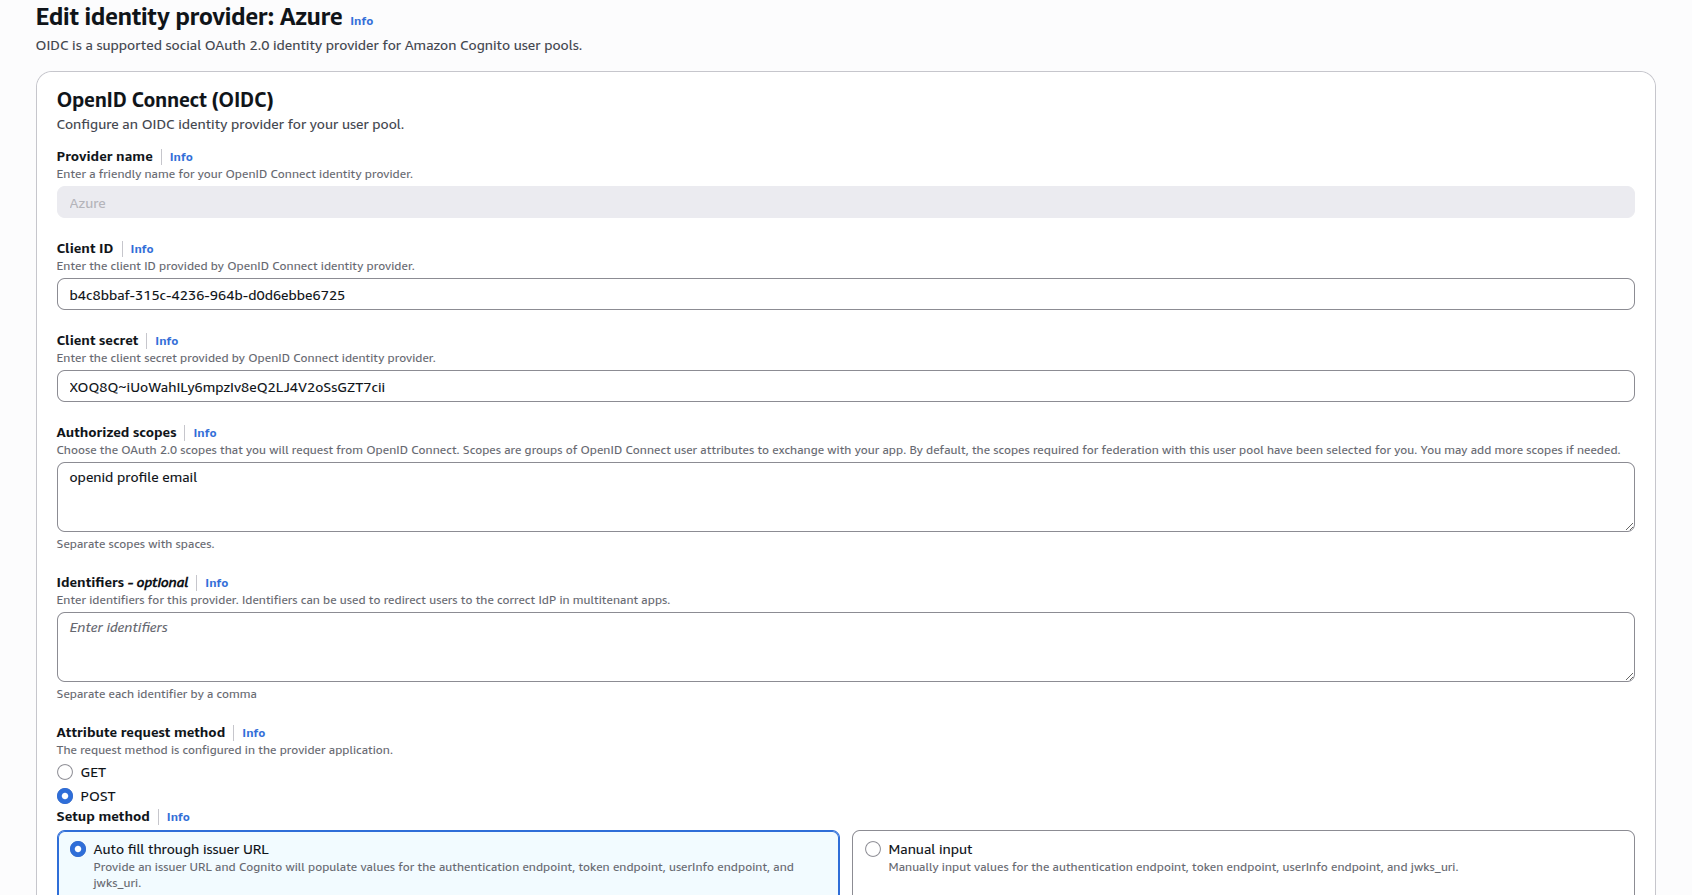

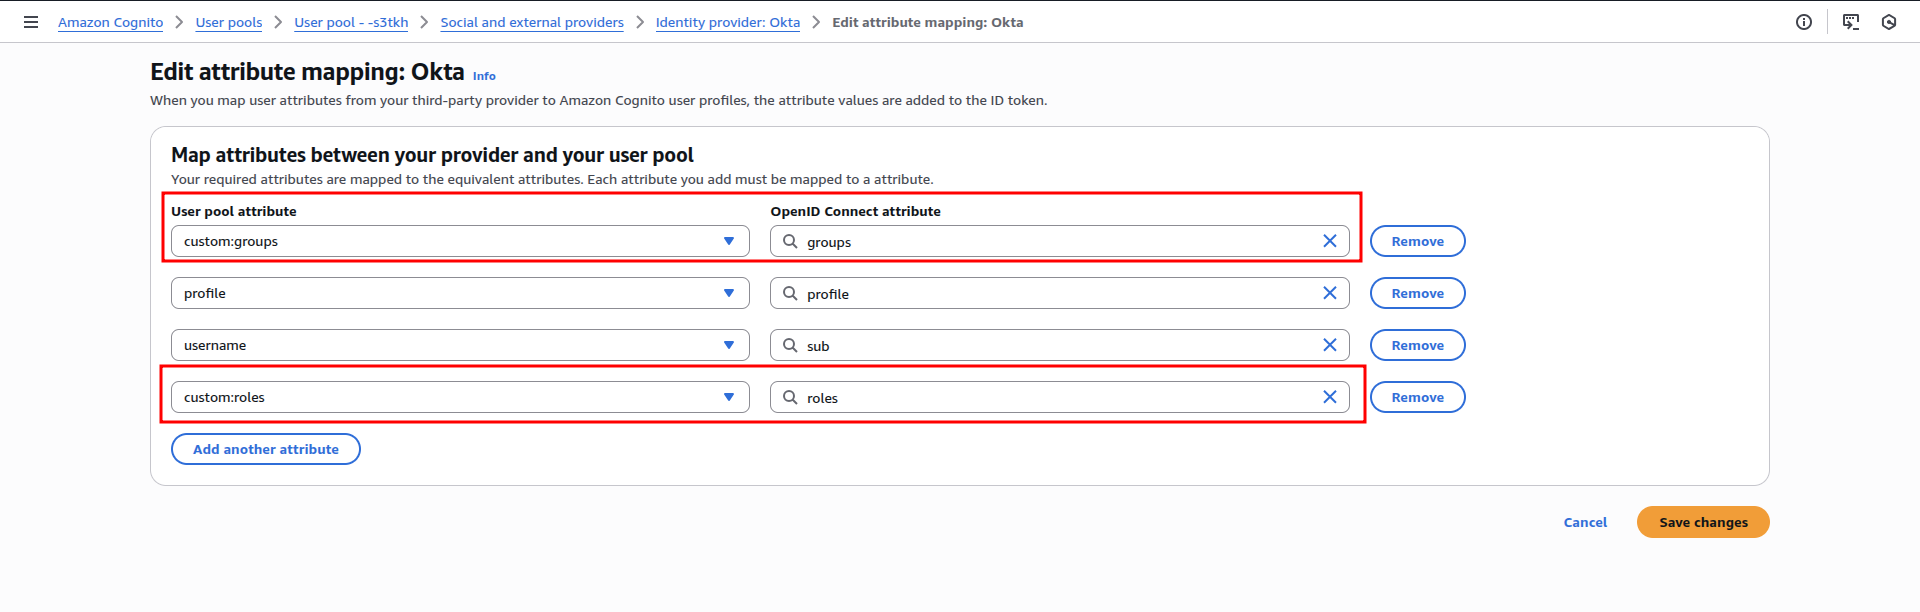
!Important: In the form, enter the OpenID Connect attribute to groups exactly as shown below, and then click Save changes.
Clarification: We configure these attributes so that the group and role information (optional) is included in the ID Token returned by the Identity Provider. If your application uses different scope names, make sure to update the values in the Cognito accordingly (for example, if Provider sends roles under app_groups scope, you should set OpenID Connect attribute to app_groups).
Info: If you added a “custom:roles” attribute in the previous step, you can include the “roles” attribute here as well.
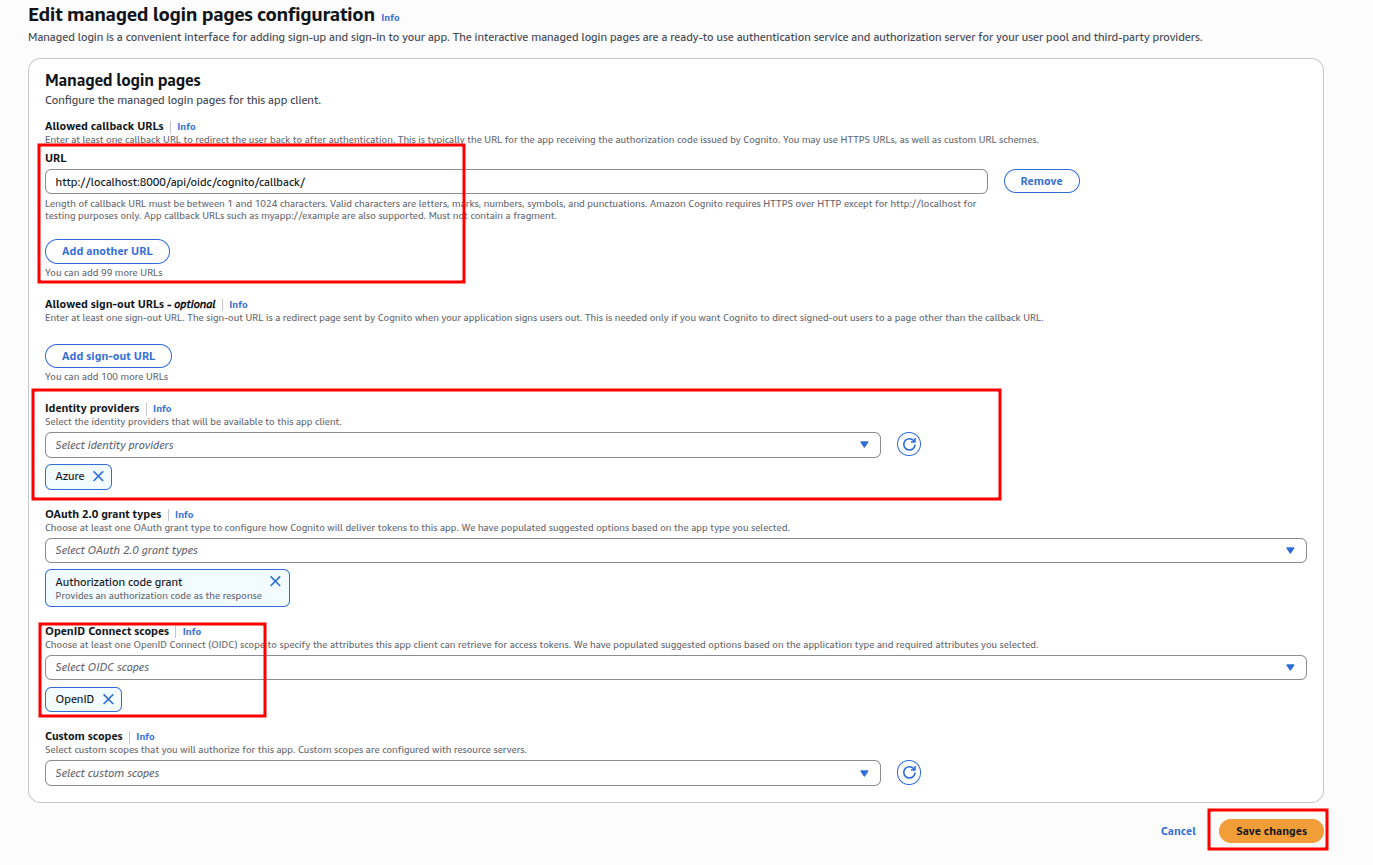
Step 4: Attach External Provider to App client
Navigate to App Clients - Your App - Login Pages
Click Edit button.
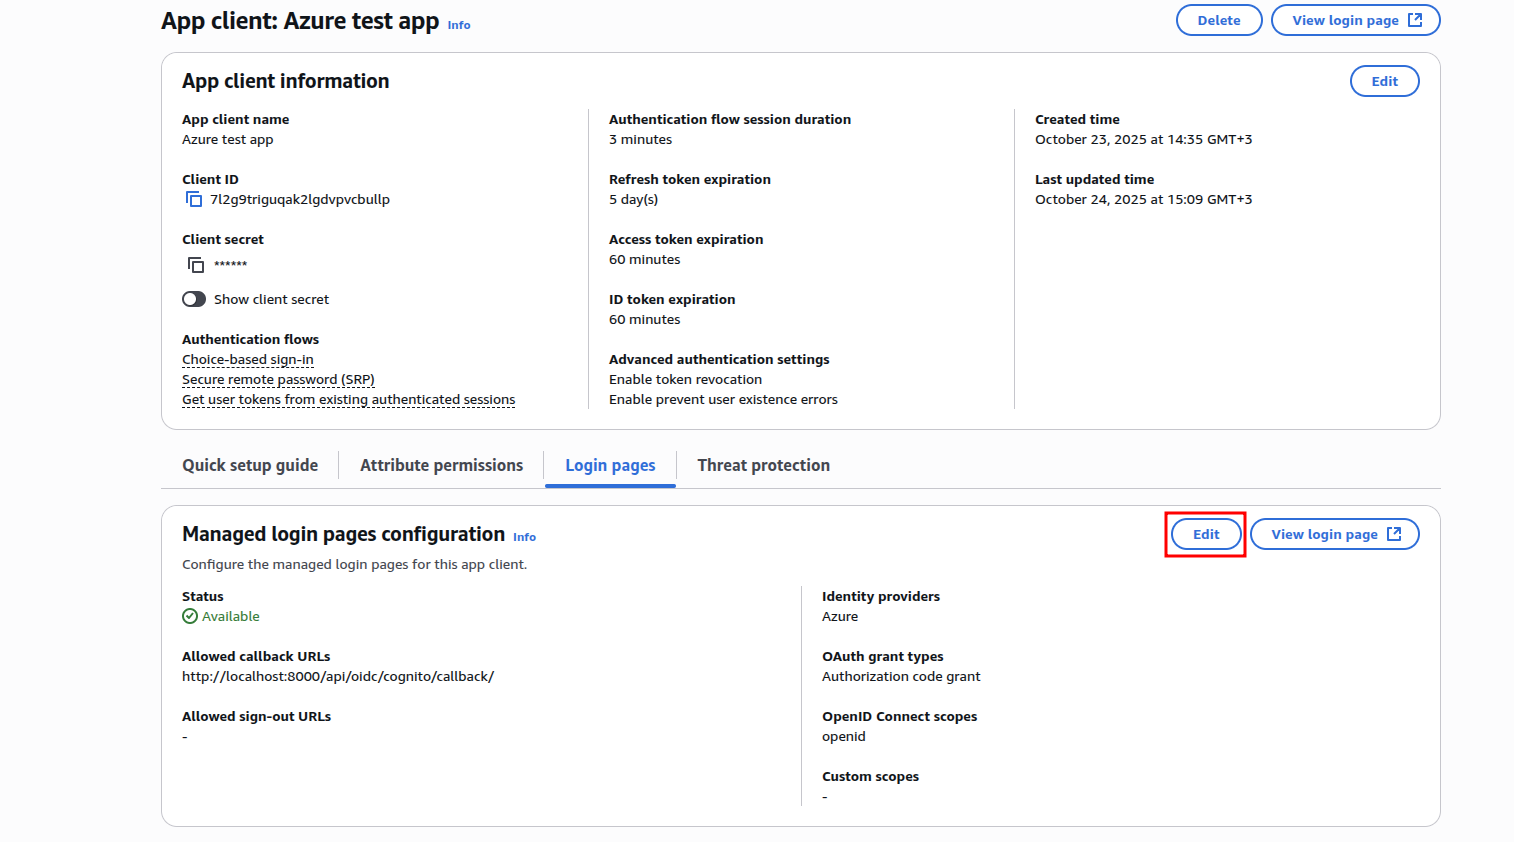
In the configuration form:
- Add allowed callback URLs (e.g.
https://yourapp.com/api/oidc/cognito/callback/
or http://localhost:8000/api/oidc/cognito/callback/ for local testing).
Attach the identity providers you created in the previous steps.
!Important: Under OpenID Connect scopes, select only the OpenId scope.
Click Save changes.
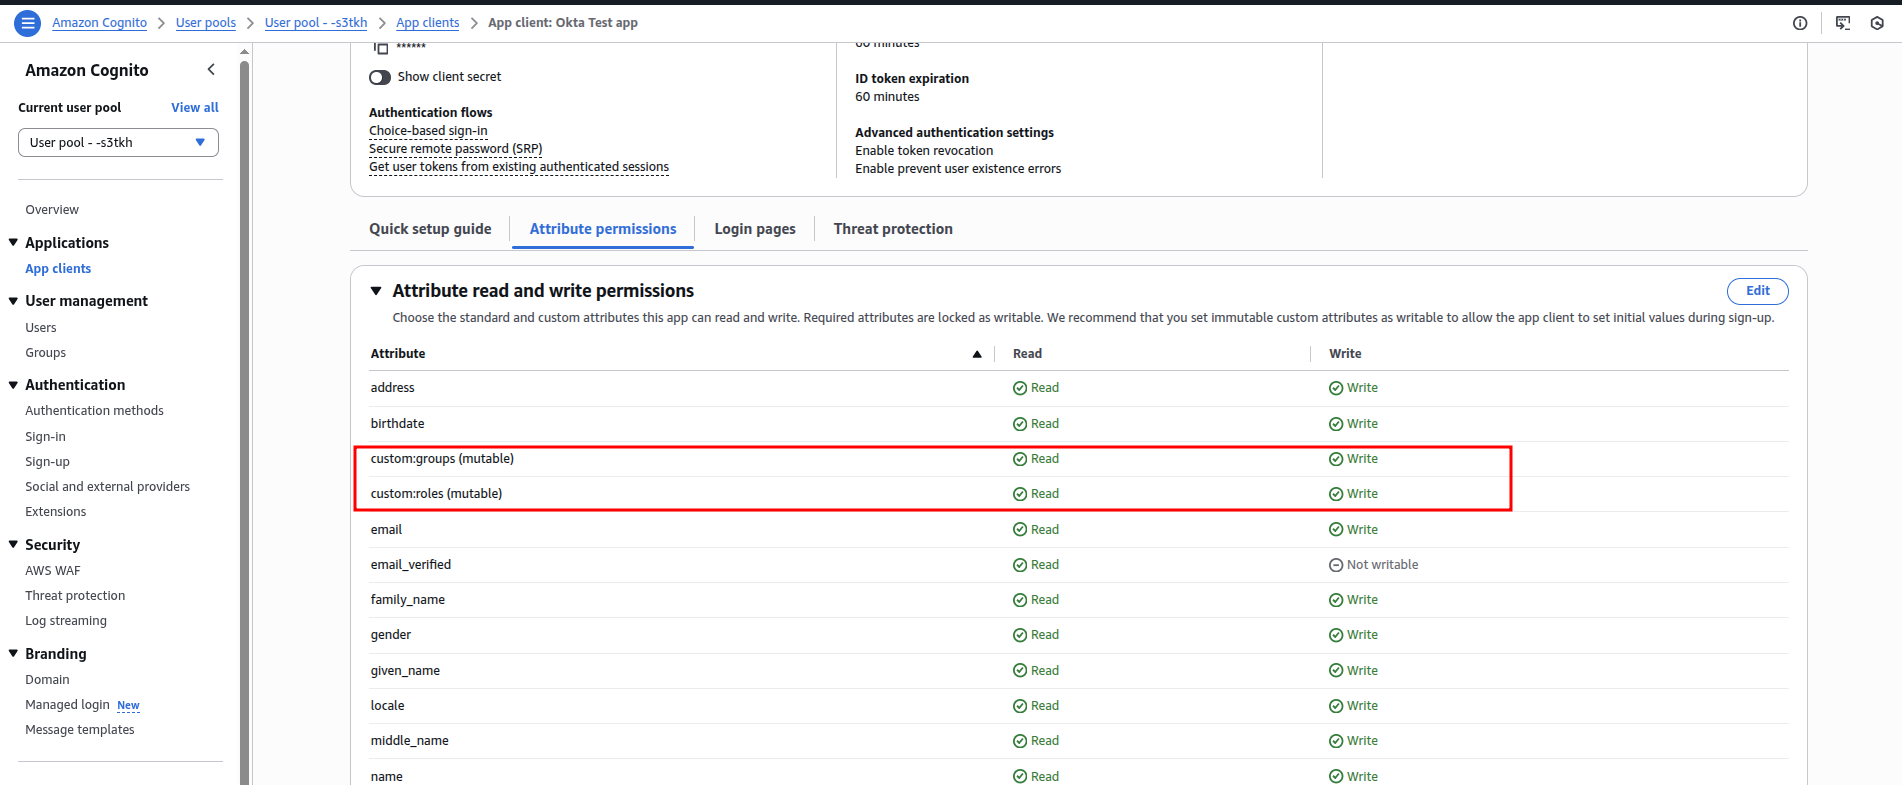
After custom attributes setup check in Attribute Permission that Read and Write permissions are checked:
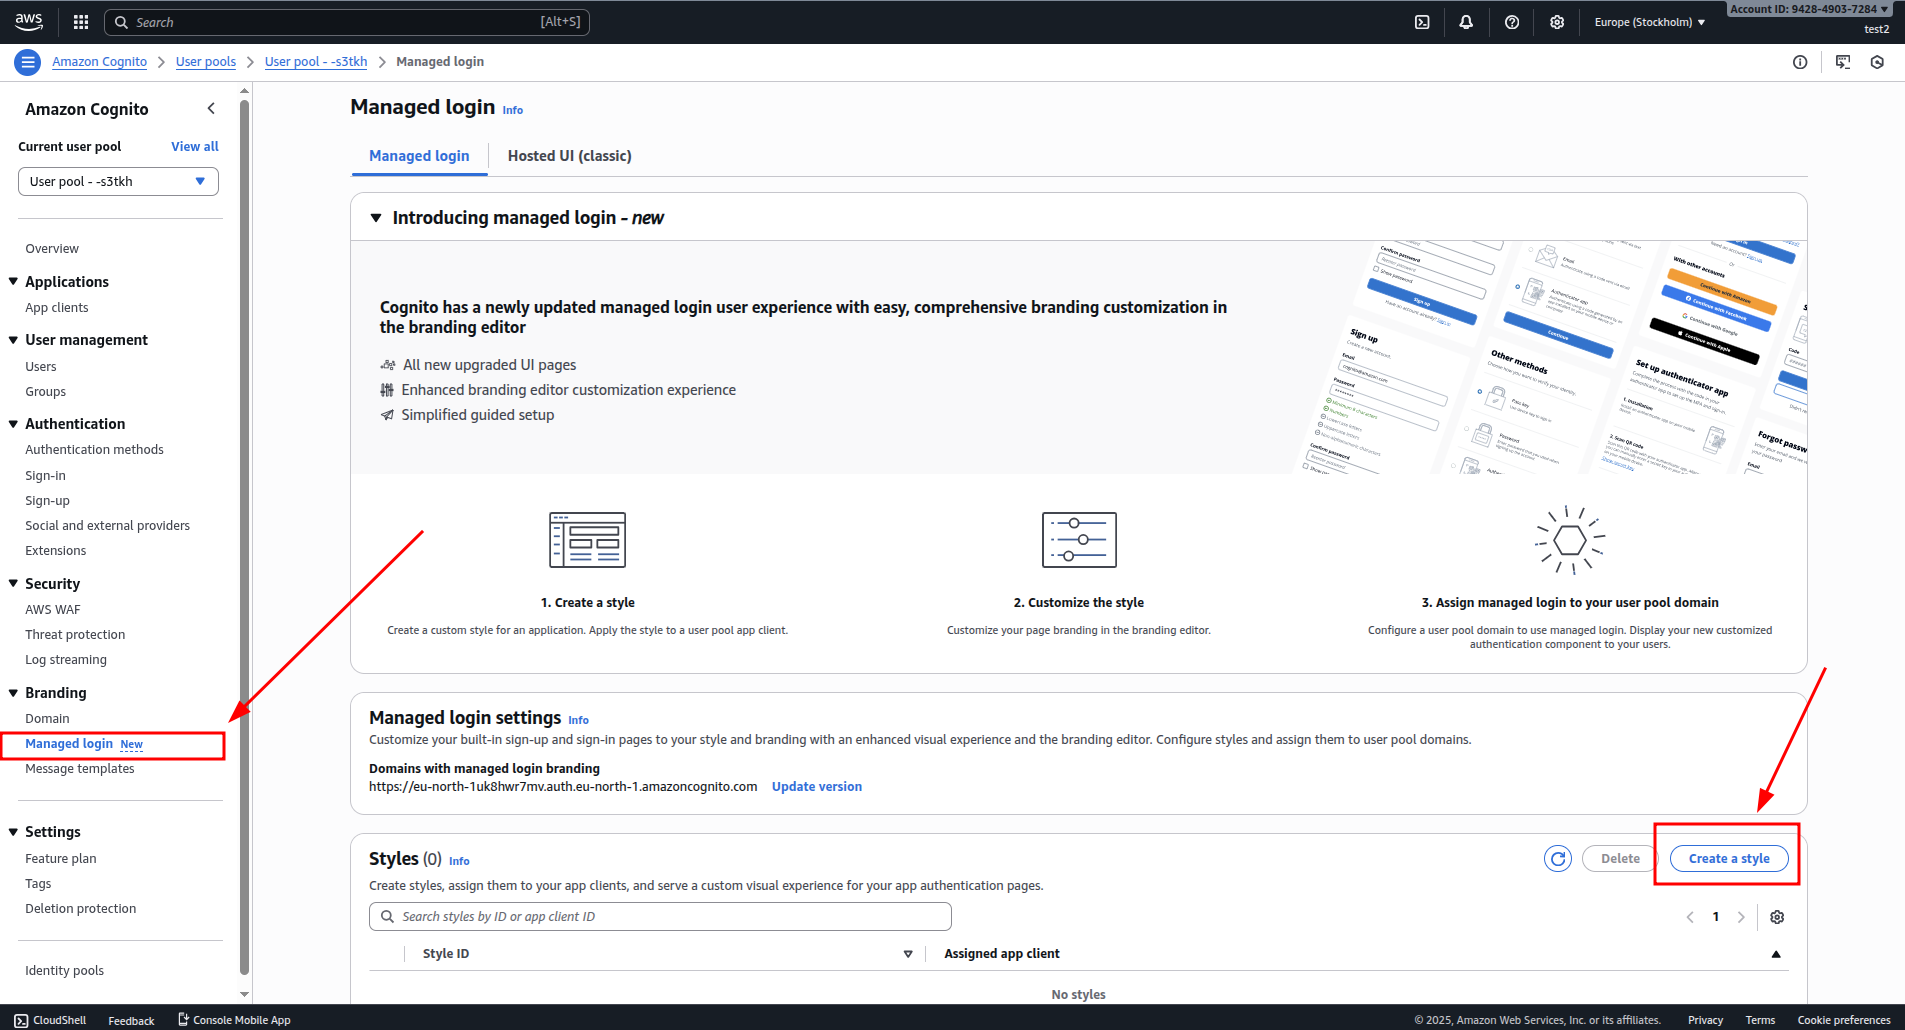
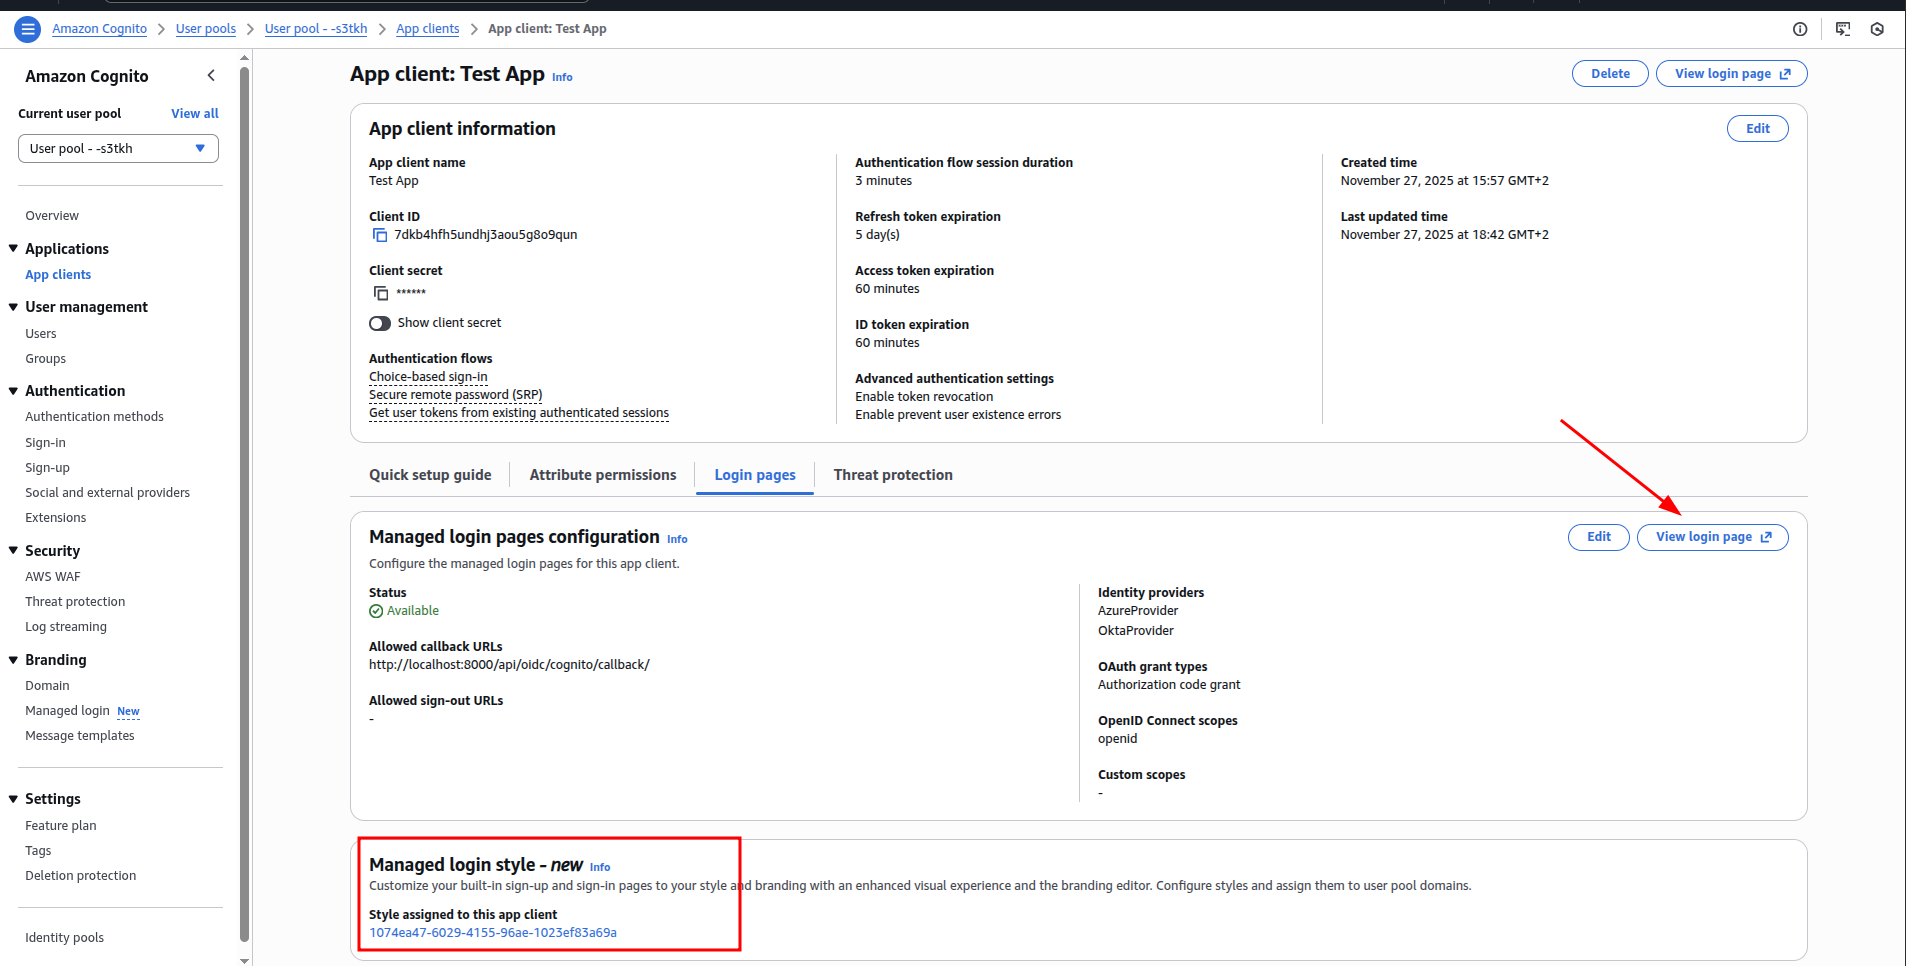
Step 5: Attach Login Page to the App client
Navigate to Your User Pool - Managed login.
Click Create a style button.
Select the App client you want to attach a login page to.
Click Create.
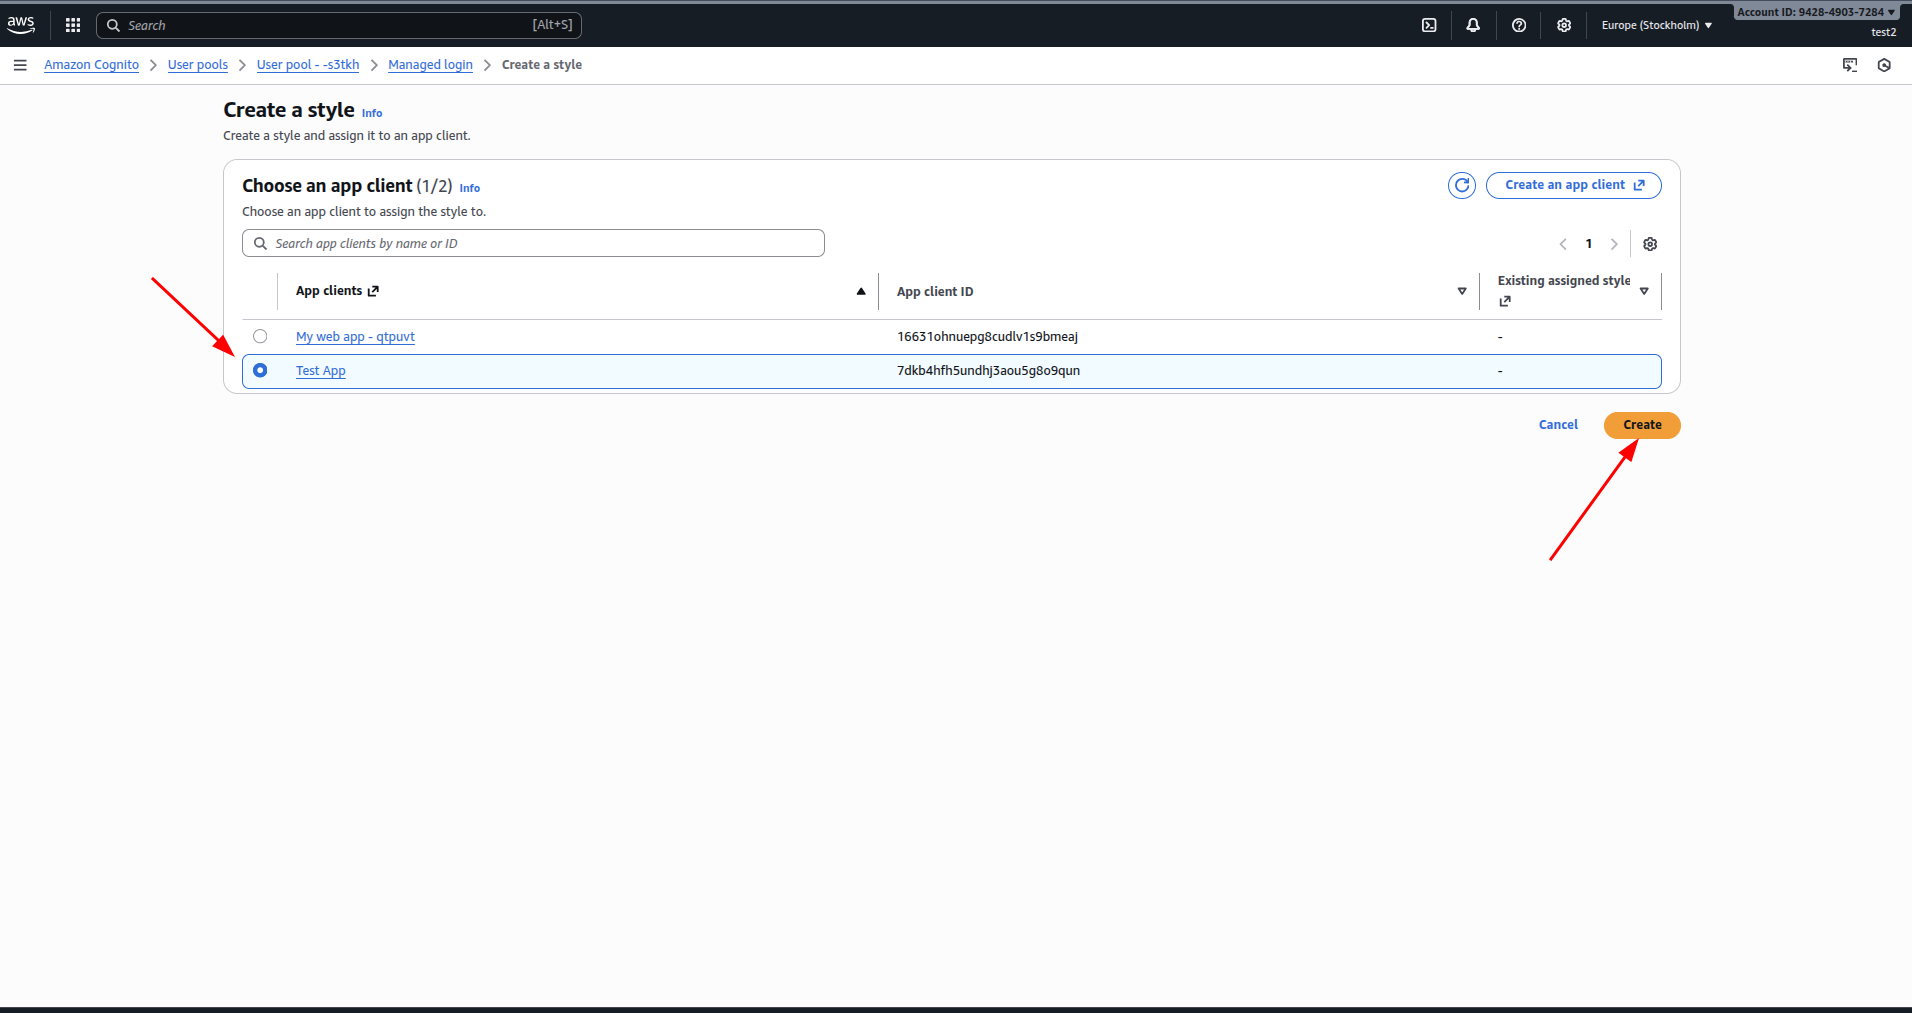
After creation, the login page for your App Client will become available and can be accessed directly via its generated URL.
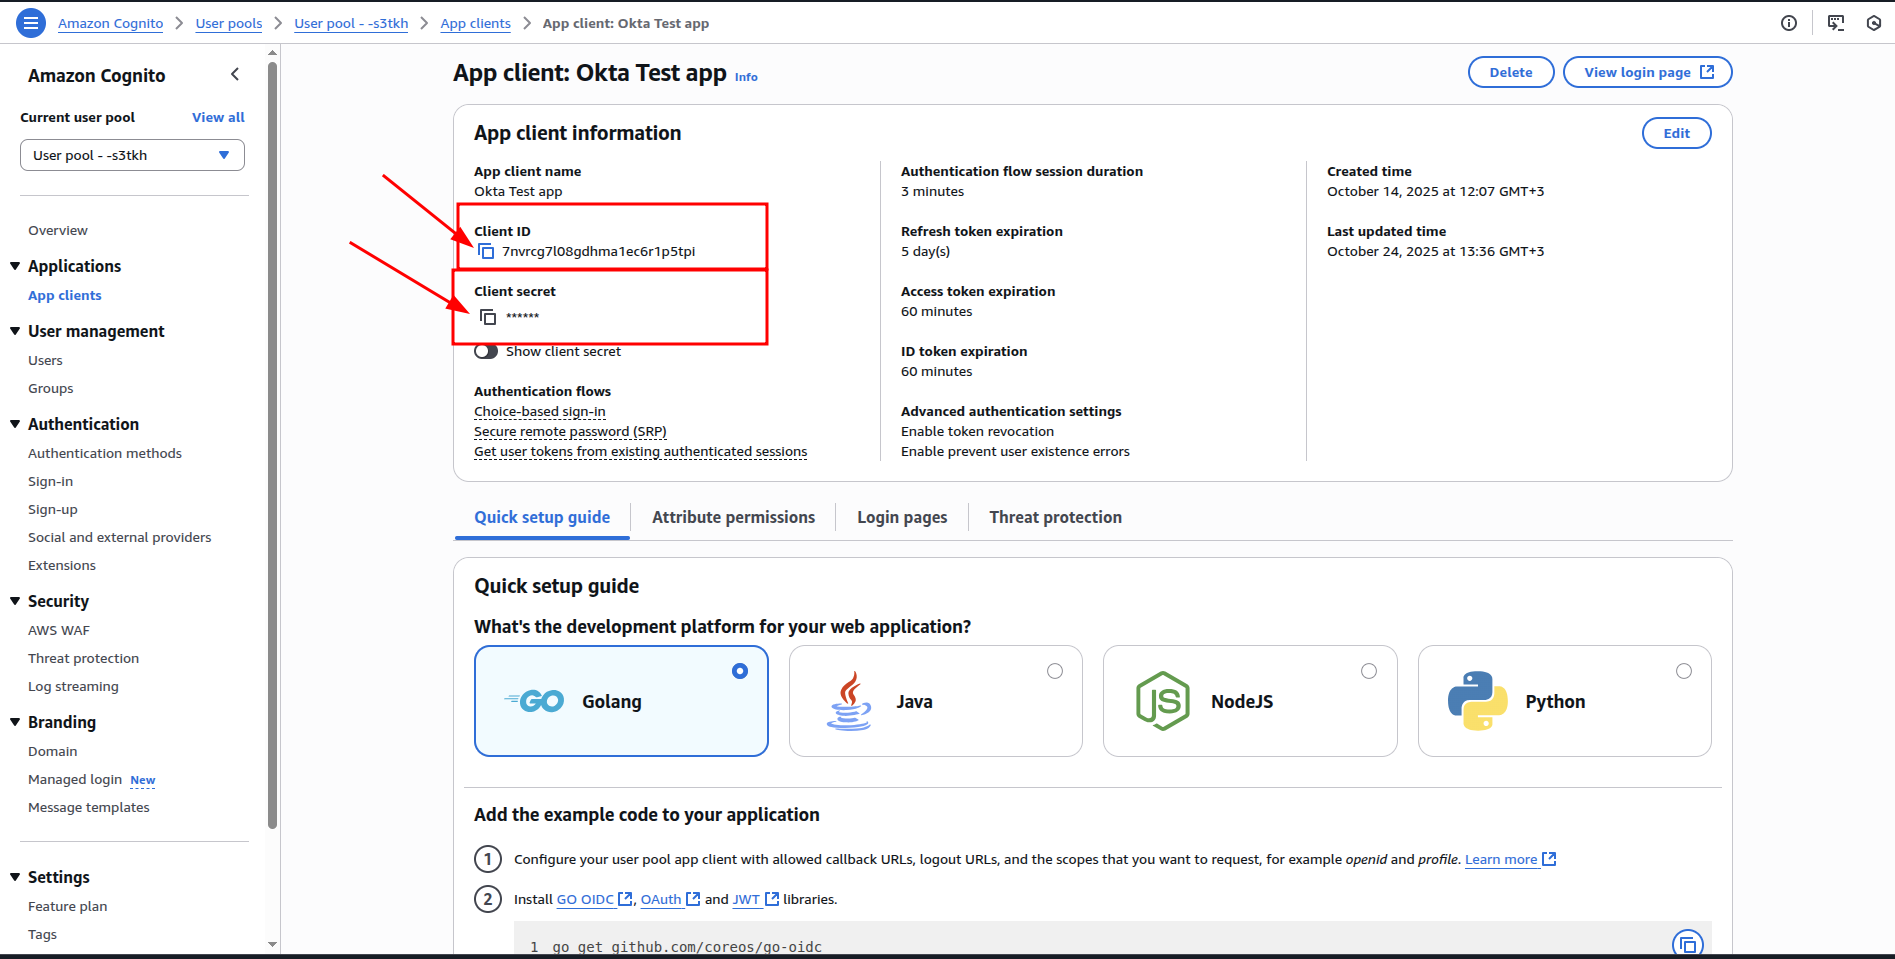
How to connect to your application
To enable Cognito login for your users in your application, you need to retrieve the following three parameters:
Client ID
Client Secret
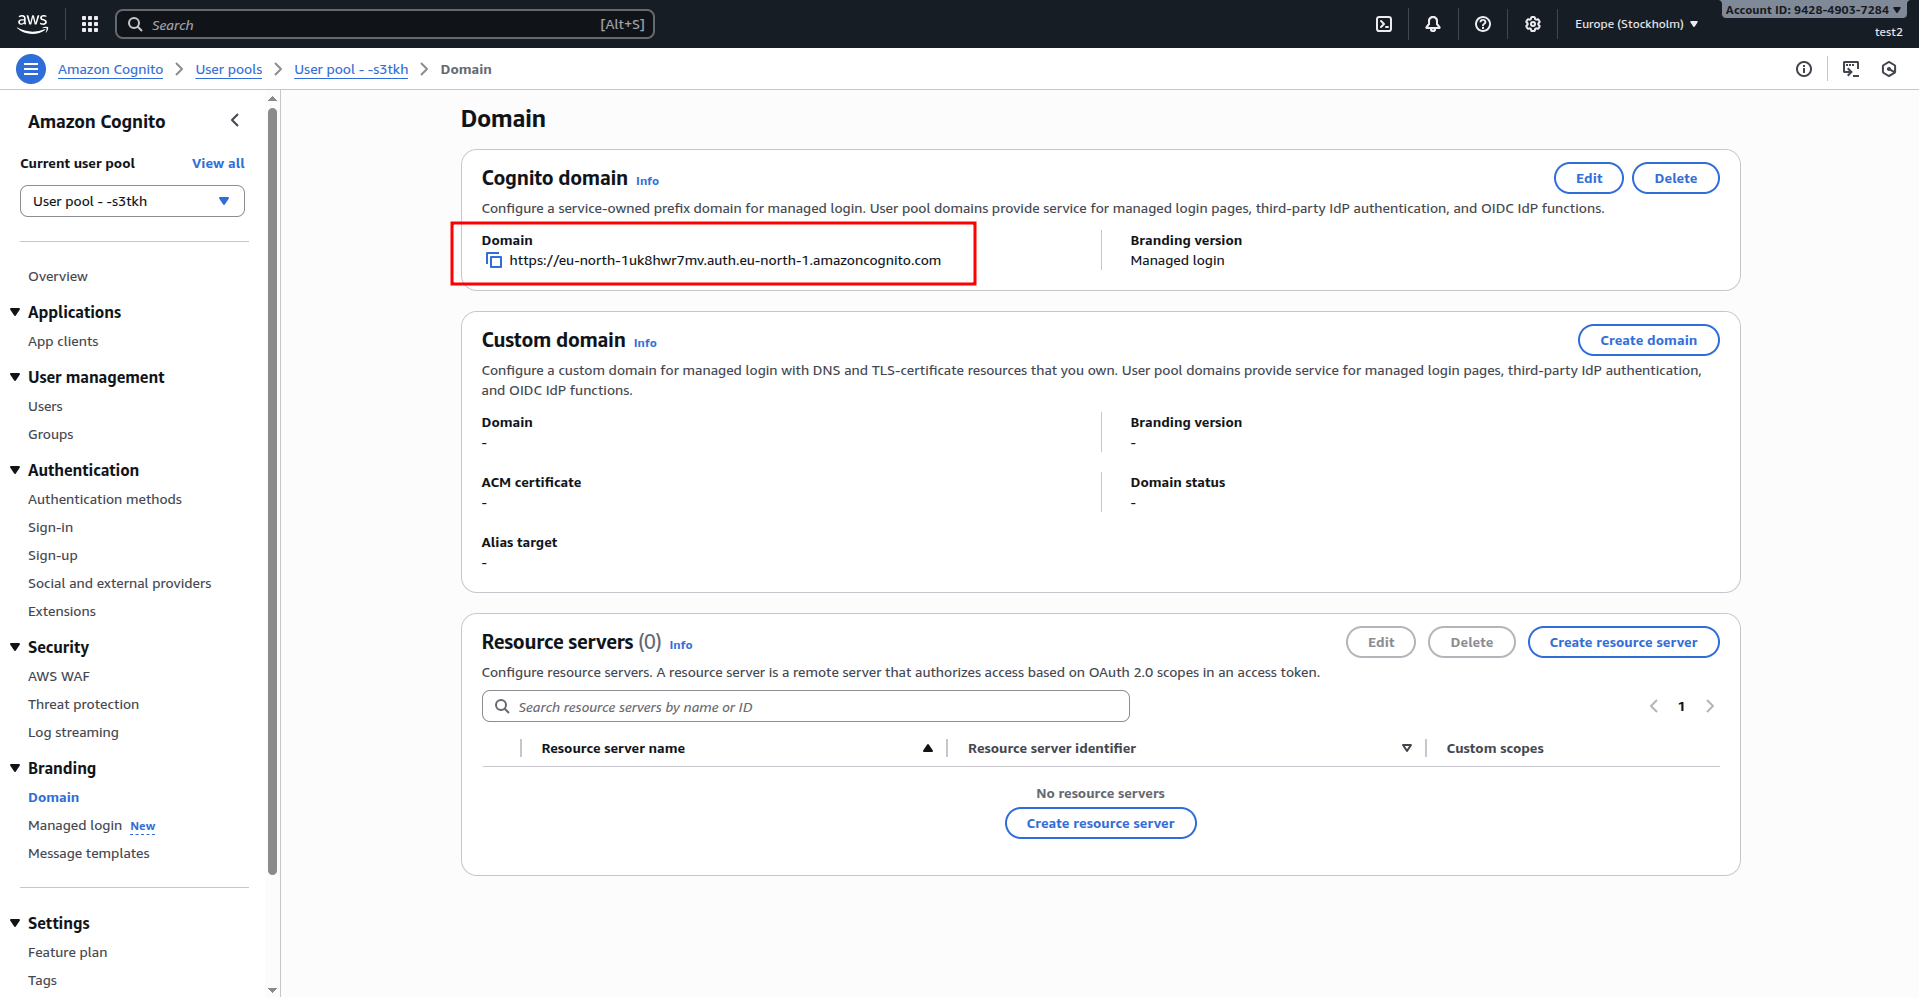
User Pool Cognito domain
You can find this data on our Cognito User Pool and App client pages.
To copy Client ID and Client Secret Navigate to corresponding App client:
To get User Pool Cognito domain, navigate to Domain page:
✅ Cognito Setup Complete. Your Cognito configuration is now complete and ready for SSO testing.
